User Guide
1. Introduction
Hello there! If you are reading this, you must be curious about CANdidates.
CANdidates is a powerful and optimized contact management app for job recruiters to manage job candidates and job listings. A key strength of CANdidates is its convenience and ease of managing all job-related contacts in a single application. Additionally, it is an offline application that does not require an internet connection to function. No need to worry about disconnecting from the internet anymore!
If you find yourself having difficulty in managing job candidates and positions, then CANdidates is the perfect tool for you! Use this user guide to discover the amazing functions and features of CANdidates! Although CANdidates is simple and intuitive enough to use without having to read this user guide, we still recommend that you read through in order to fully utilise CANdidates.
Before you get thrown off by some of the more technical terms used in this user guide, you may be happy to know that a glossary is provided at the end of this document and may be of help to you!
1.1 Authors
CANdidates is developed as part of a NUS CS2103T Project by:
2. Preface
For a smoother start to your usage of CANdidates, read this section to find out how this document is structured, how to navigate the document and what all the symbols, special fonts and command formats mean.
2.1 Understanding this Document
This User Guide is structured into 9 sections so that it is easy to read and navigate!
These are the 9 sections and a short explanation of what they are for:
| Section Title | What is it for |
|---|---|
| 1. Introduction | An introduction to CANdidates and the amazing team behind it! |
| 2. Preface | A warm-up to get you familiar with this document. This is the section you are reading now. |
| 3. Quick Start | A quick guide to start using CANdidates for those of you who are very eager to begin using our application! |
| 4. Features for Candidates | An exhaustive list of commands to manage your list of candidates. Learn about the command formats, view examples and step-by-step instructions here. |
| 5. Features for Jobs | An exhaustive list of commands to manage your job listings. Learn about the command formats, view examples and step-by-step instructions here. |
| 6. Other Features | A list of general features not specific to candidates or job listings. |
| 7. FAQ | Frequently Asked Questions that we receive. Take a look here if you have any lingering questions to see if they have been answered. |
| 8. Command Summary | A table that summarises the commands and their respective formats. This is convenient as a quick reference for commands. |
| 9. Glossary | An explanation of certain specialised terms used in this document. |
2.2 Understanding Symbols
This section explains all the symbols and fonts used in this document.
| Symbols/Font | Explanation |
|---|---|
command |
Words that are highlighted in grey indicate that the words are describing a typed command. It could be a command format, a full command or part of a command. |
| {Description} | Curly braces indicates a variable field that is described by Description. This is used to display results of commands that vary depending on a user’s specific data. For example, the number of jobs in the list is variable and would depend on the user’s data, hence this is represented as {Number of jobs} in this User Guide. |
| An example of how to use the feature. | |
| Additional comments on the section or sub-section being explained. | |
| Useful tips that you can keep in mind when exploring the application or this document. | |
| Precautions you should take note of when using the application. |
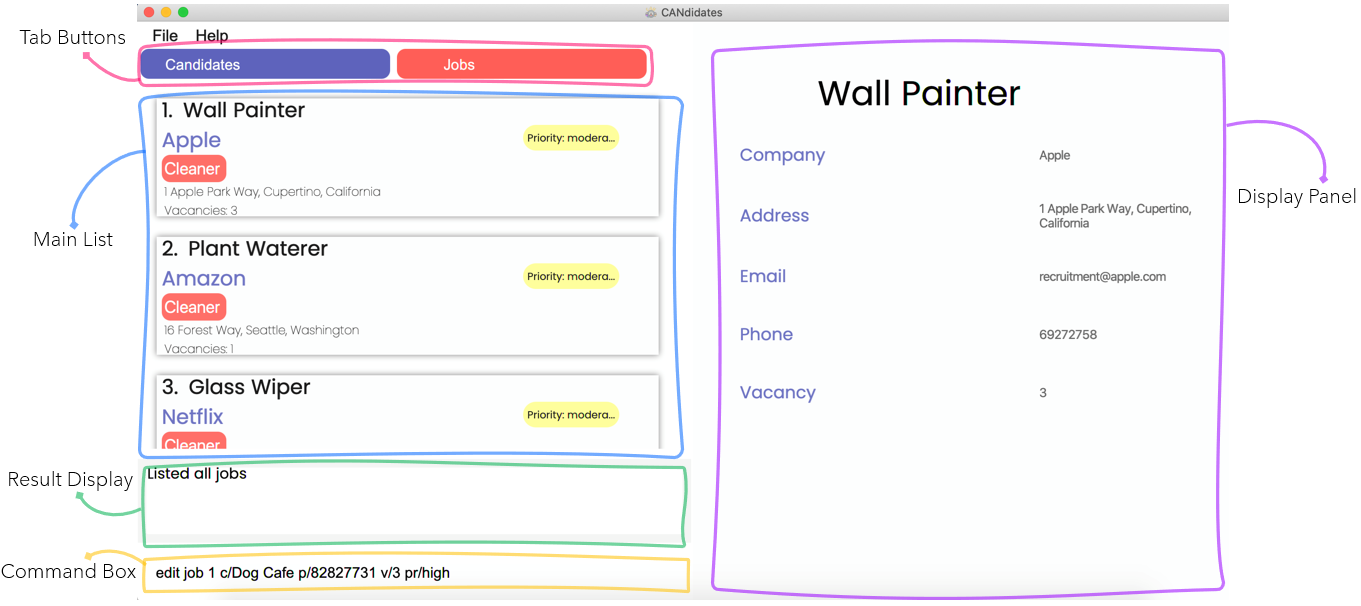
2.3 Understanding the CANdidates GUI
The figure below shows an annotated version of the GUI, to help you in understanding some of the technical terms used regarding our GUI.
You may refer back to this section whenever you need help understanding the GUI terms.
2.4 Understanding Input Fields
Input fields are fields that you specify in your commands to tell CANdidates exactly what you wish to do, such as the information to store. Most input fields have specific requirements that have to be fulfilled or CANdidates will not be able to understand you! The table below provides a summary of the requirements, but do not worry if you cannot remember them because CANdidates will notify you with an error message if any of these requirements are not met, and you can then make the relevant changes!
If you feel unsure while exploring this section due to the lack of prior context, fret not! You will certainly understand better when you read about the commands in the later sections. Try taking a quick glance at the command formats in Section 4. Features for Candidates or Section 5. Features for Jobs!
You may refer to this table whenever you need help understanding the input fields.
| Name of input field | How to use them |
|---|---|
NAME |
Name of candidate being added or edited. |
PHONE_NUMBER |
Contact number of candidate or job listing being added or edited. |
EMAIL |
Contact email address of candidate or job listing being added or edited. |
ADDRESS |
Residential address of a candidate or work address of a job listing. |
YEARS_OF_EXPERIENCE |
Years of experience of the candidate in the relevant job he/she applied for. |
DATE_OF_APPLICATION |
Date of application submitted by candidate.doa/31-9-21
|
EXPECTED_SALARY |
Expected salary of a candidate in dollars. |
IS_BLACKLISTED |
Blacklist status of a candidate. You may use this to blacklist candidates that are unresponsive, have poor attitude, etc. |
PROFILE_LINK |
URL link to candidate profile or portfolio (e.g. LinkedIn or GitHub, etc.) to provide convenience for you to refer to their profile later on. |
JOB_TYPE |
Job type tags for candidates so that it will be easier to find candidates applying for similar jobs. For example, you can tag them according to the job industry. |
JOB_TITLE |
Title of a job position. |
COMPANY_NAME |
Name of the company for the job listing you are adding or editing. |
VACANCY |
Vacancy of a job listing i.e. Number of available slots open for hiring. |
PRIORITY |
Priority of a job listing. Job listings may be of different urgency levels and this field is used to indicate the urgency. |
JOB_DESCRIPTION |
Job description tags for job listings to specify additional descriptions. For example, you can specify requirements of the job such as age or skill level. |
FIELD_TO_SORT |
Input field that is exclusive for sort can and sort job commands, to specify the field that the candidate or job list is sorted by. |
ORDER |
Input field that is exclusive for sort can and sort job commands, to specify the sort order. |
INDEX |
Index number of the candidate or job displayed in the list. |
2.5 Understanding Command Format
This section explains how to interpret all the command formats which you will encounter in Section 4. Features for Candidates, Section 5. Features for Jobs and Section 6. Other Features. This will help you to understand CANdidates’ features better.
-
Command formats are highlighted in grey as mentioned in Section 2.2. Understanding Symbols
-
Words in
UPPER_CASEare the input fields which are supposed to be specified by you.
e.g. inadd n/NAME,NAMEis a input field which can be used asadd n/John Doe. -
Items in square brackets are optional.
e.gc/COMPANY_NAME [t/JOB_DESCRIPTION]can be used asc/Samsung t/ContractWorkeror justc/Samsung. -
Items with
…after them can be used multiple times including zero times. You can put as much information as you want to!
e.g.[t/JOB_TYPE]…can be used ast/accountant(i.e. 1 time),t/programmer t/technician(i.e. 2 times) etc. -
Input fields can be in any order you want them to be.
e.g. if the command specifiesn/NAME p/PHONE_NUMBER,p/PHONE_NUMBER n/NAMEis also acceptable. -
If there are multiple inputs for the same input field, only the last one will be accepted. The only exception is the tag field for
addandeditcommands as there can be multiple tags.
![]() If you need help with the various input fields, refer to Section 2.4. Understanding Input Fields.
If you need help with the various input fields, refer to Section 2.4. Understanding Input Fields.
3. Quick Start
Can’t wait to start using CANdidates? This section guides you through the starting up process, so that you can proceed on to use the application for your own needs!
-
Download the latest Candidates.jar file from here.
-
Copy the file to the folder you want to use as the home folder for your CANdidates.
-
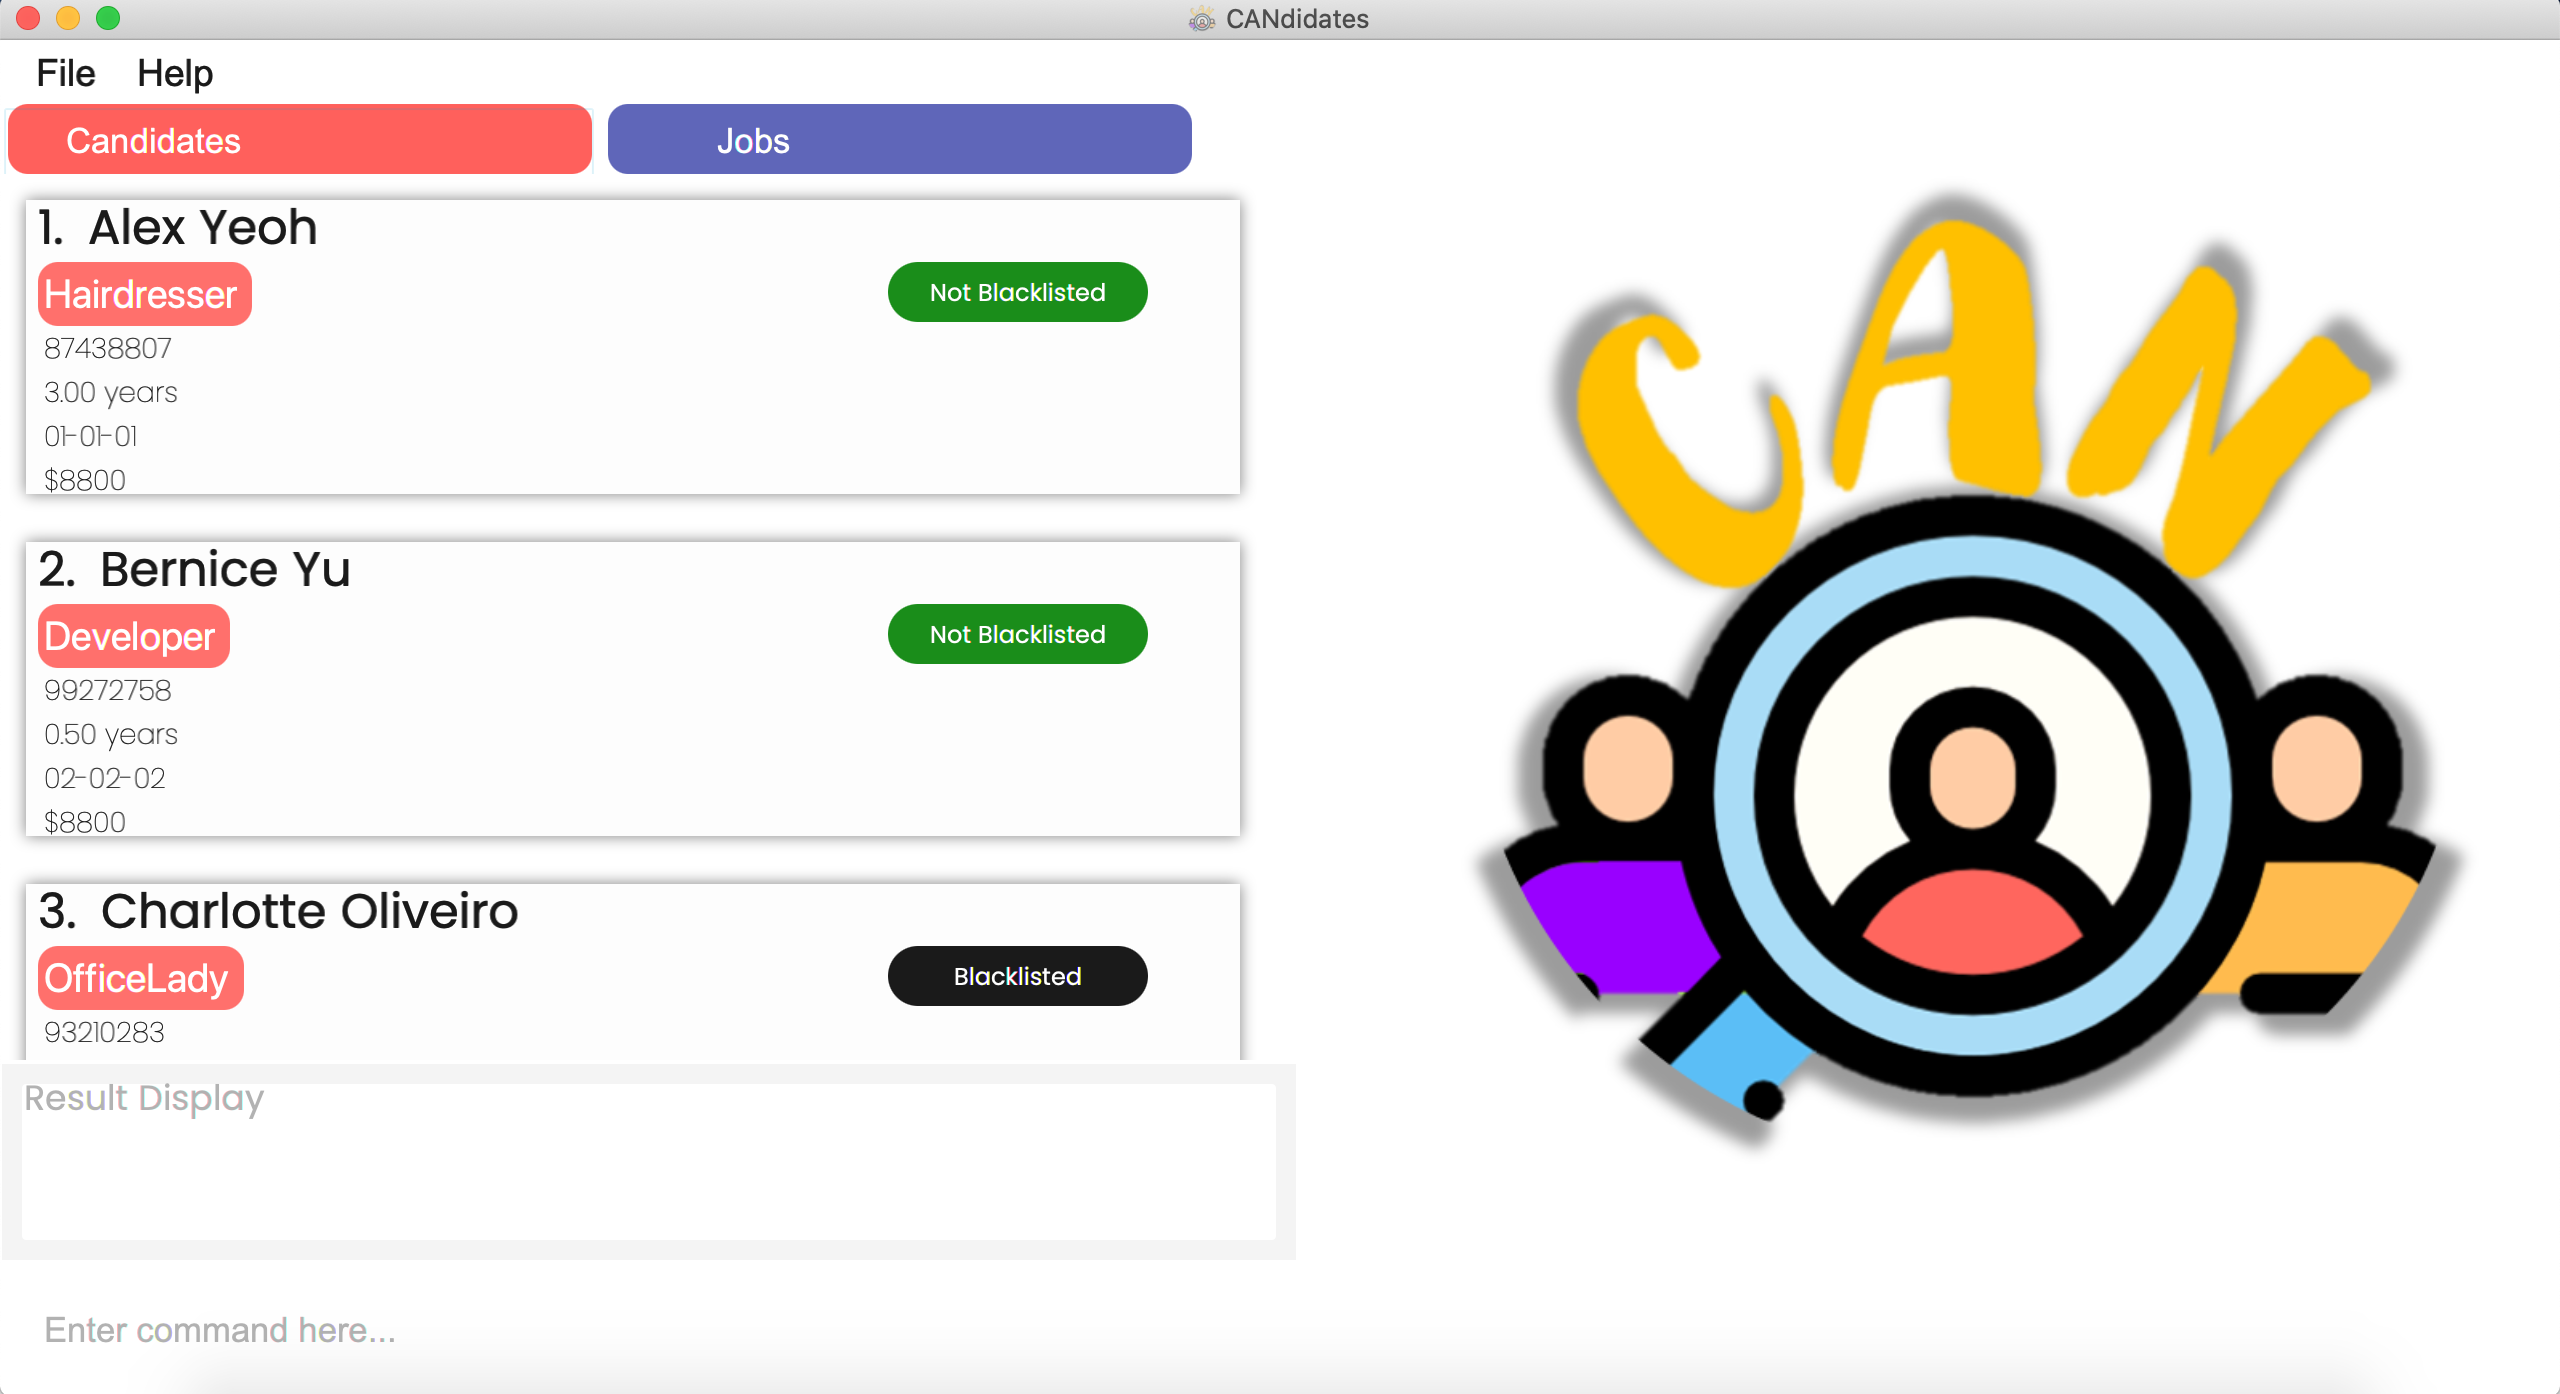
Double-click the file to start the app. The GUI similar to the below should appear in a few seconds. Note how the app contains some sample data.
-
Type the command in the command box and press Enter to execute it. e.g. typing
helpand pressing Enter will open the help window.
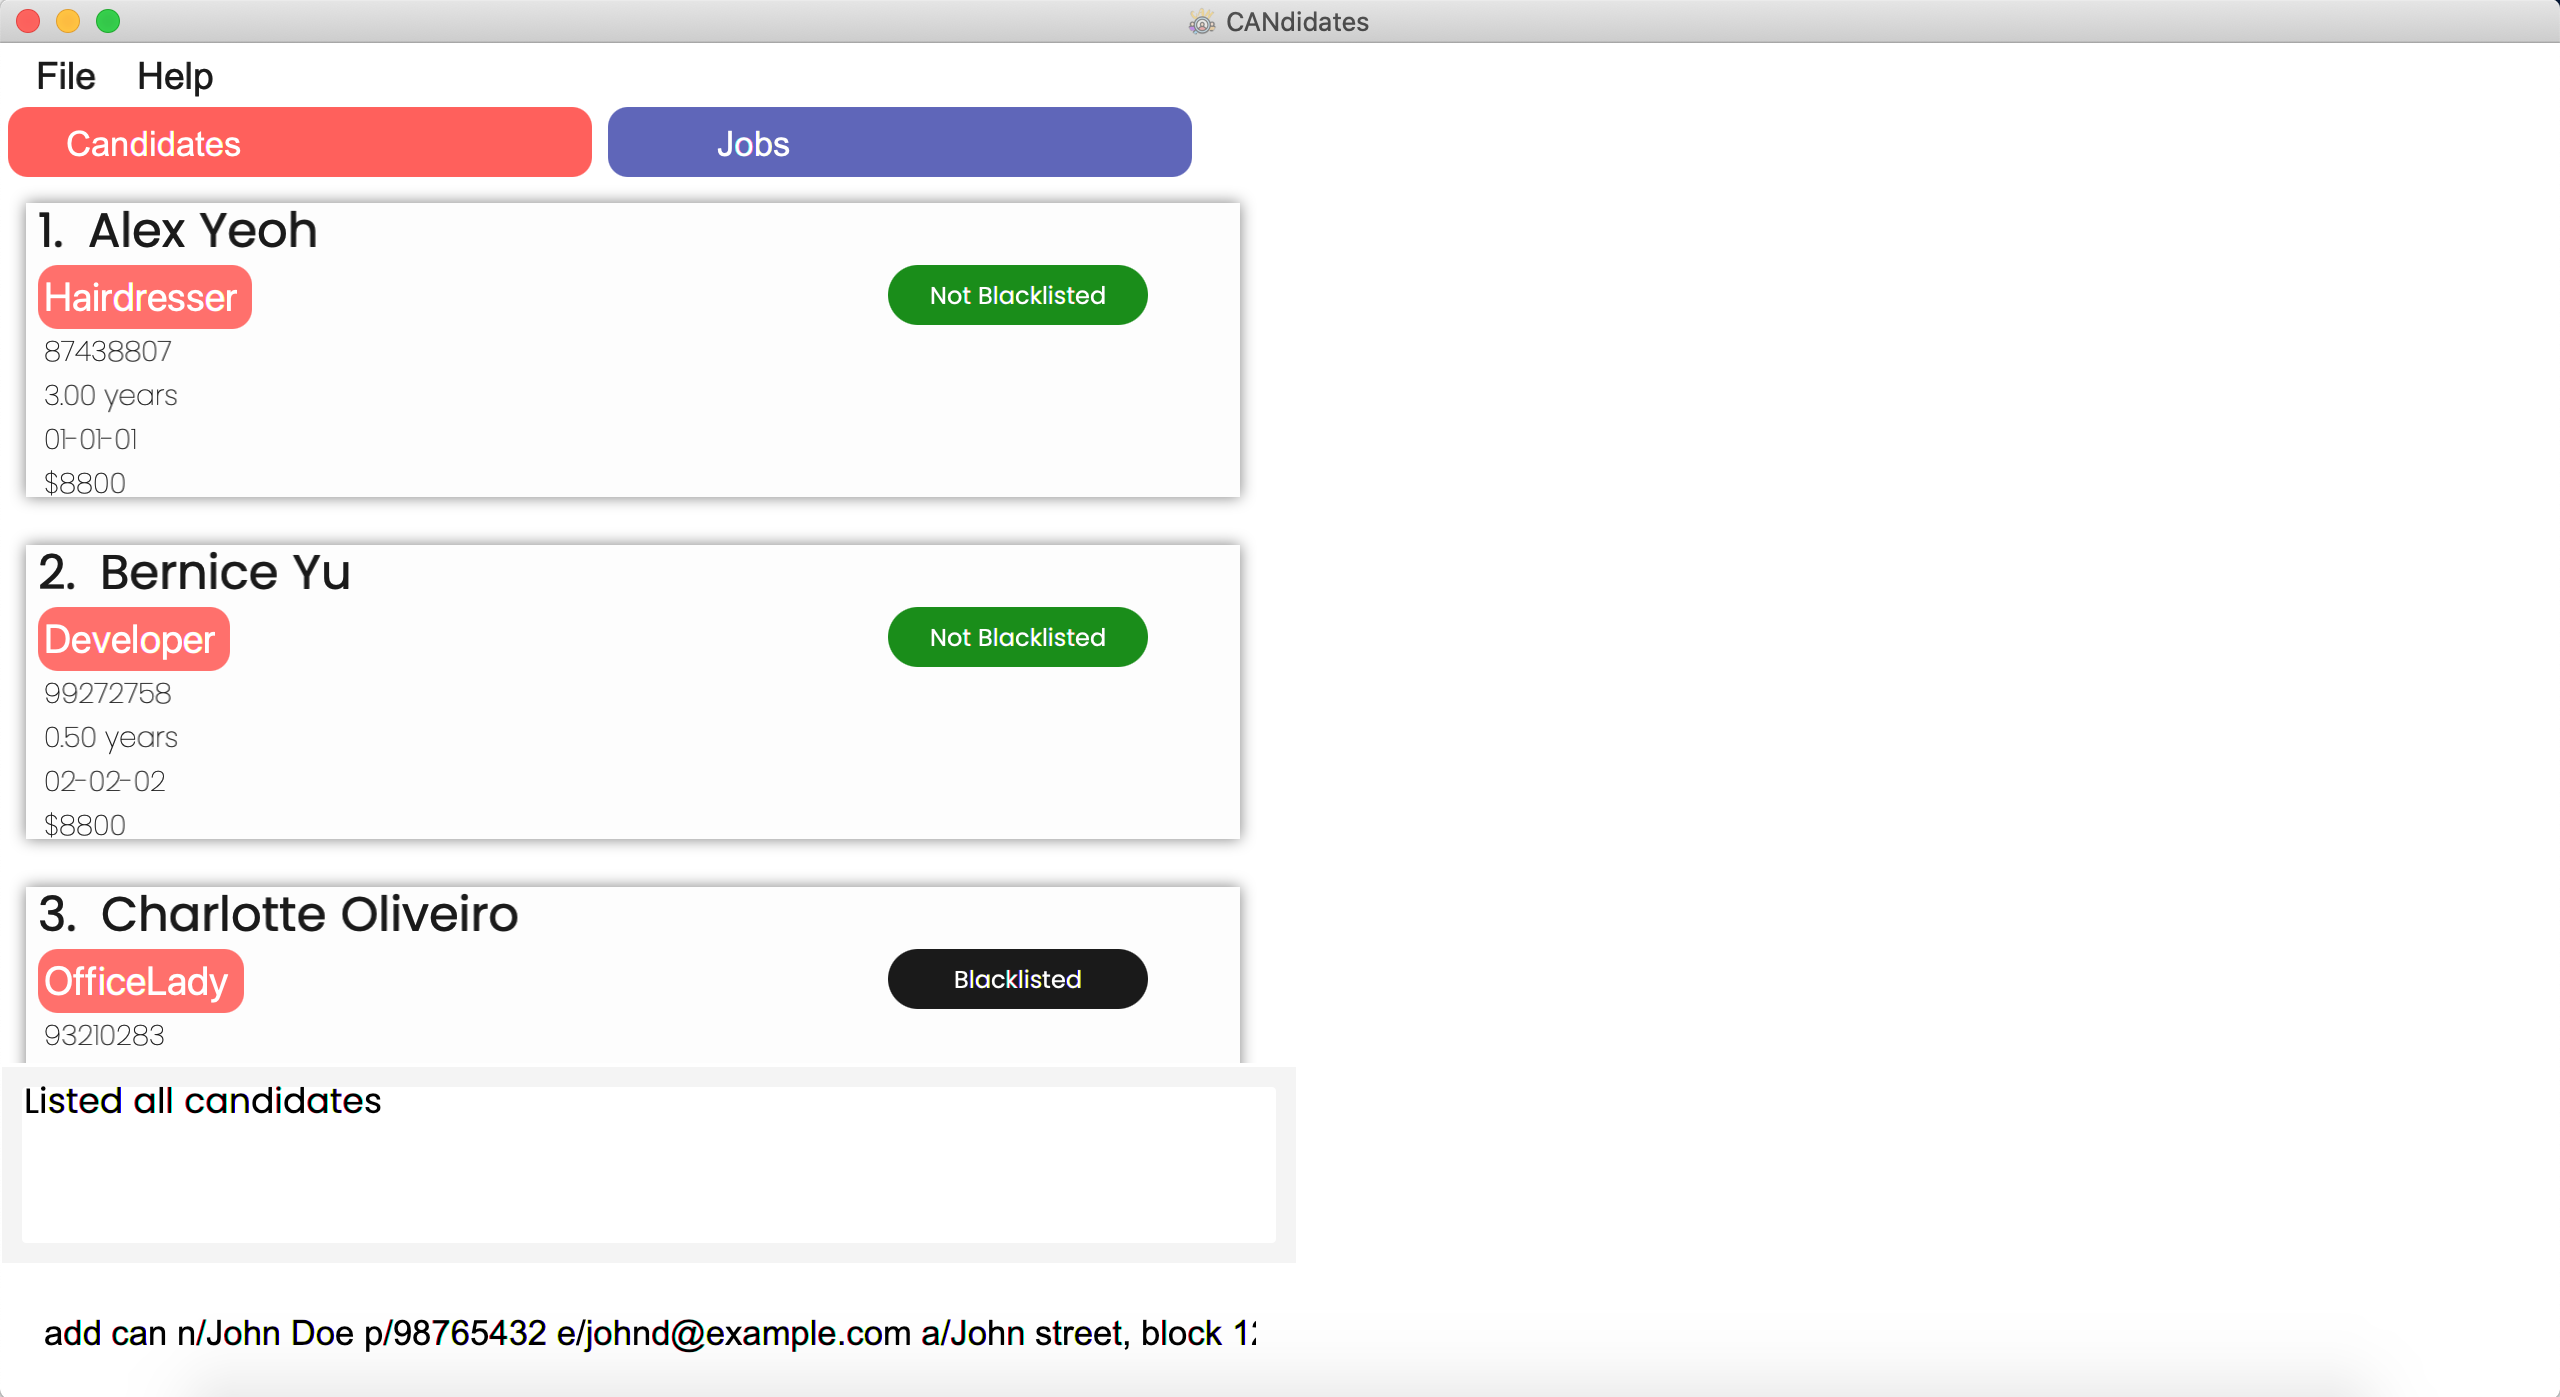
Some example commands you can try:-
list can: Lists all candidates. -
add cann/John Doe p/98765432 e/johnd@example.com a/John street, block 123, #01-01 exp/5 doa/15-10-20: Adds a candidate named John Doe with phone number 98765432, email johnd@example.com, address John street, block 123, #01-01, years of experience 5 and date of application 15th October 2020 to the candidates list. -
delete can3: Deletes the 3rd candidate shown in the current candidates list. -
clear can: Deletes all candidates. -
exit: Exits the app.
-
-
Refer to Section 4. Features for Candidates, Section 5. Features for Jobs and Section 6. Other Features for details of each command.
4. Features for Candidates
This section provides you with features to handle all information of candidates for your utmost convenience!
Refer to Section 5. Features for Jobs for features specific to jobs or to Section 6. Other Features for more general features.
4.1 Adding a candidate: add can
If you have a new candidate who approached you and you would like to put him in CANdidates, you can add him into the list using the command below.
Format: add can n/NAME p/PHONE_NUMBER e/EMAIL exp/YEARS_OF_EXPERIENCE doa/DATE_OF_APPLICATION [a/ADDRESS] [sal/EXPECTED_SALARY] [bl/IS_BLACKLISTED] [link/PROFILE_LINK] [t/JOB_TYPE]…
IS_BLACKLISTED is not specified, it will be set to false by default.
Examples:
![]() To add a candidate with name John Doe, phone 98765432, email johnd@example.com, address John street, block 123, #01-01, job type DogGroomer, with 1 year of experience who applied on 16 October 2020,
To add a candidate with name John Doe, phone 98765432, email johnd@example.com, address John street, block 123, #01-01, job type DogGroomer, with 1 year of experience who applied on 16 October 2020,
add can n/John Doe p/98765432 e/johnd@example.com a/John street, block 123, #01-01
t/DogGroomer exp/1 doa/16-10-20
![]() To add a candidate with name Betsy Crowe, email betsycrowe@example.com, address NUS Temasek Hall, phone 92920033, job types HR and OfficeLady, with 5 years of experience who applied on 10 October 2020, with profile link BetsyCrowe.com, who will not be blacklisted with an expected salary of 3000,
To add a candidate with name Betsy Crowe, email betsycrowe@example.com, address NUS Temasek Hall, phone 92920033, job types HR and OfficeLady, with 5 years of experience who applied on 10 October 2020, with profile link BetsyCrowe.com, who will not be blacklisted with an expected salary of 3000,
add can n/Betsy Crowe e/betsycrowe@example.com a/NUS Temasek Hall p/92920033
t/HR t/OfficeLady exp/5 doa/10-10-20 link/BetsyCrowe.com bl/false sal/3000
Step by Step:
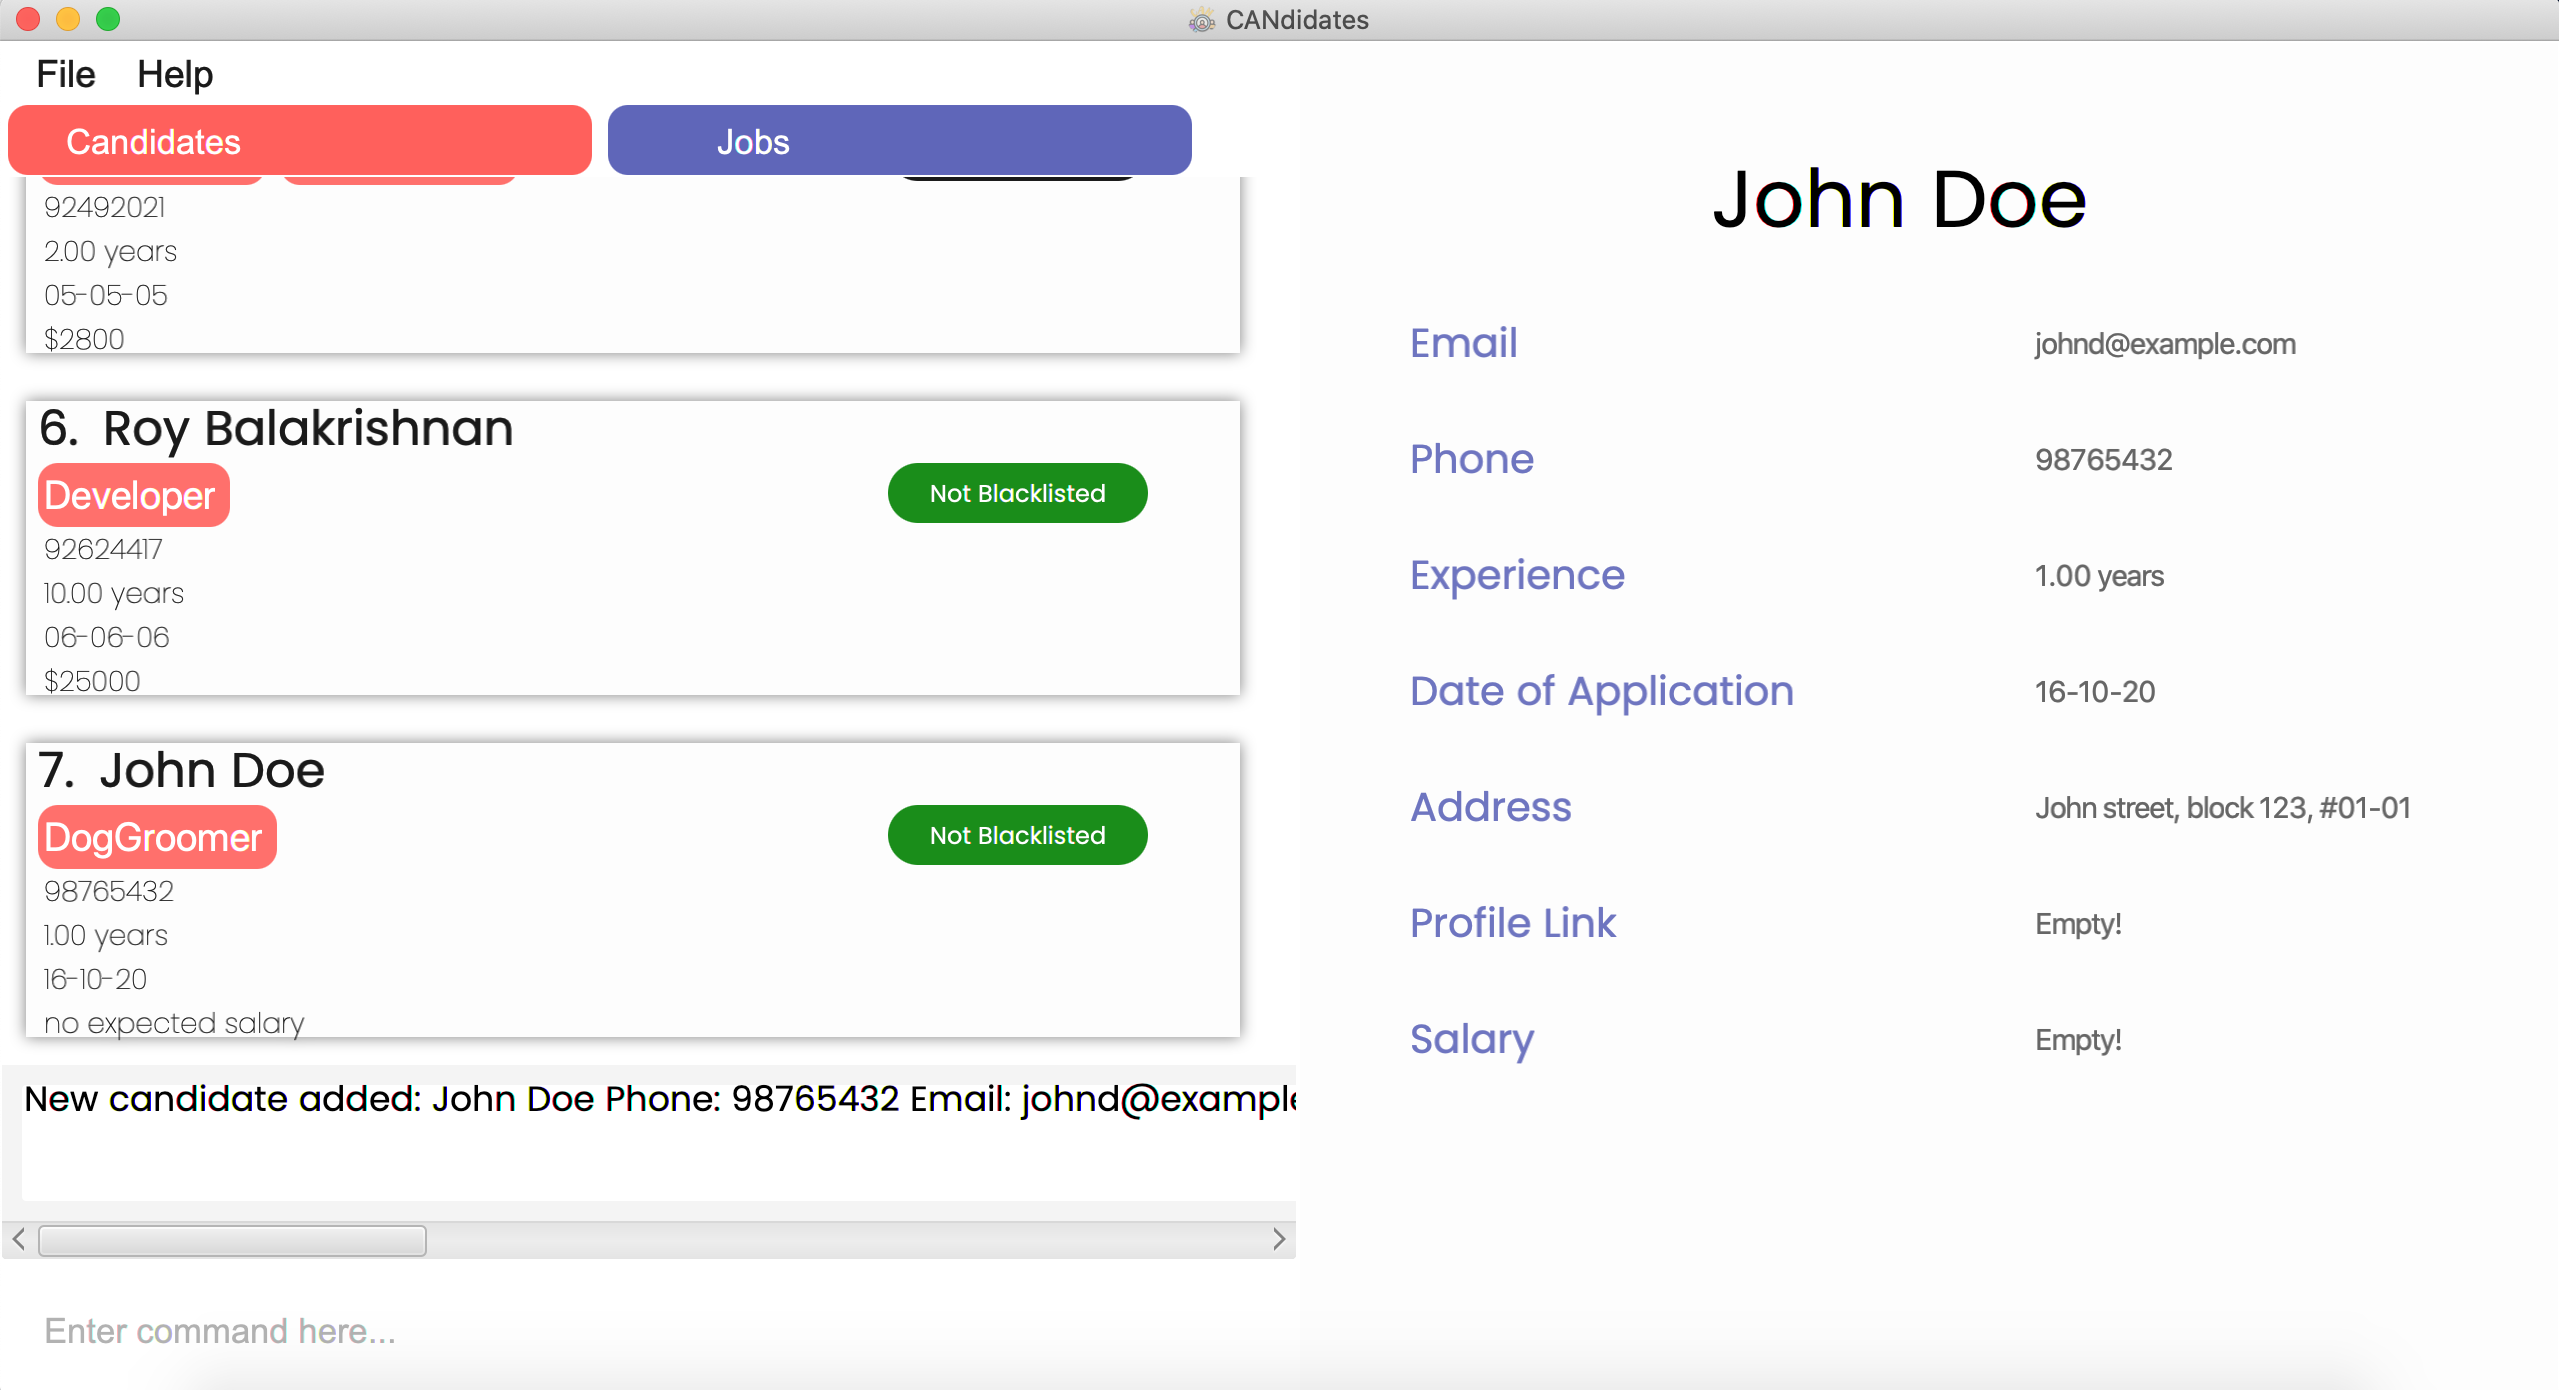
Step 1. Type add can n/John Doe p/98765432 e/johnd@example.com a/John street, block 123, #01-01 t/DogGroomer exp/1 doa/16-10-20 in the command box and press Enter.
Step 2. The CANdidates application will show the following message in the result display.
New person added: John Doe Phone: 98765432 Email: johnd@example.com Experience: 1.0 years Date of Application: 16-10-20 Address: John street, block 123, #01-01 Link: Expected Salary: Blacklisted: false Tags: [DogGroomer].
Step 3. The application will show the updated list of candidates with the newly added candidate in the main list.
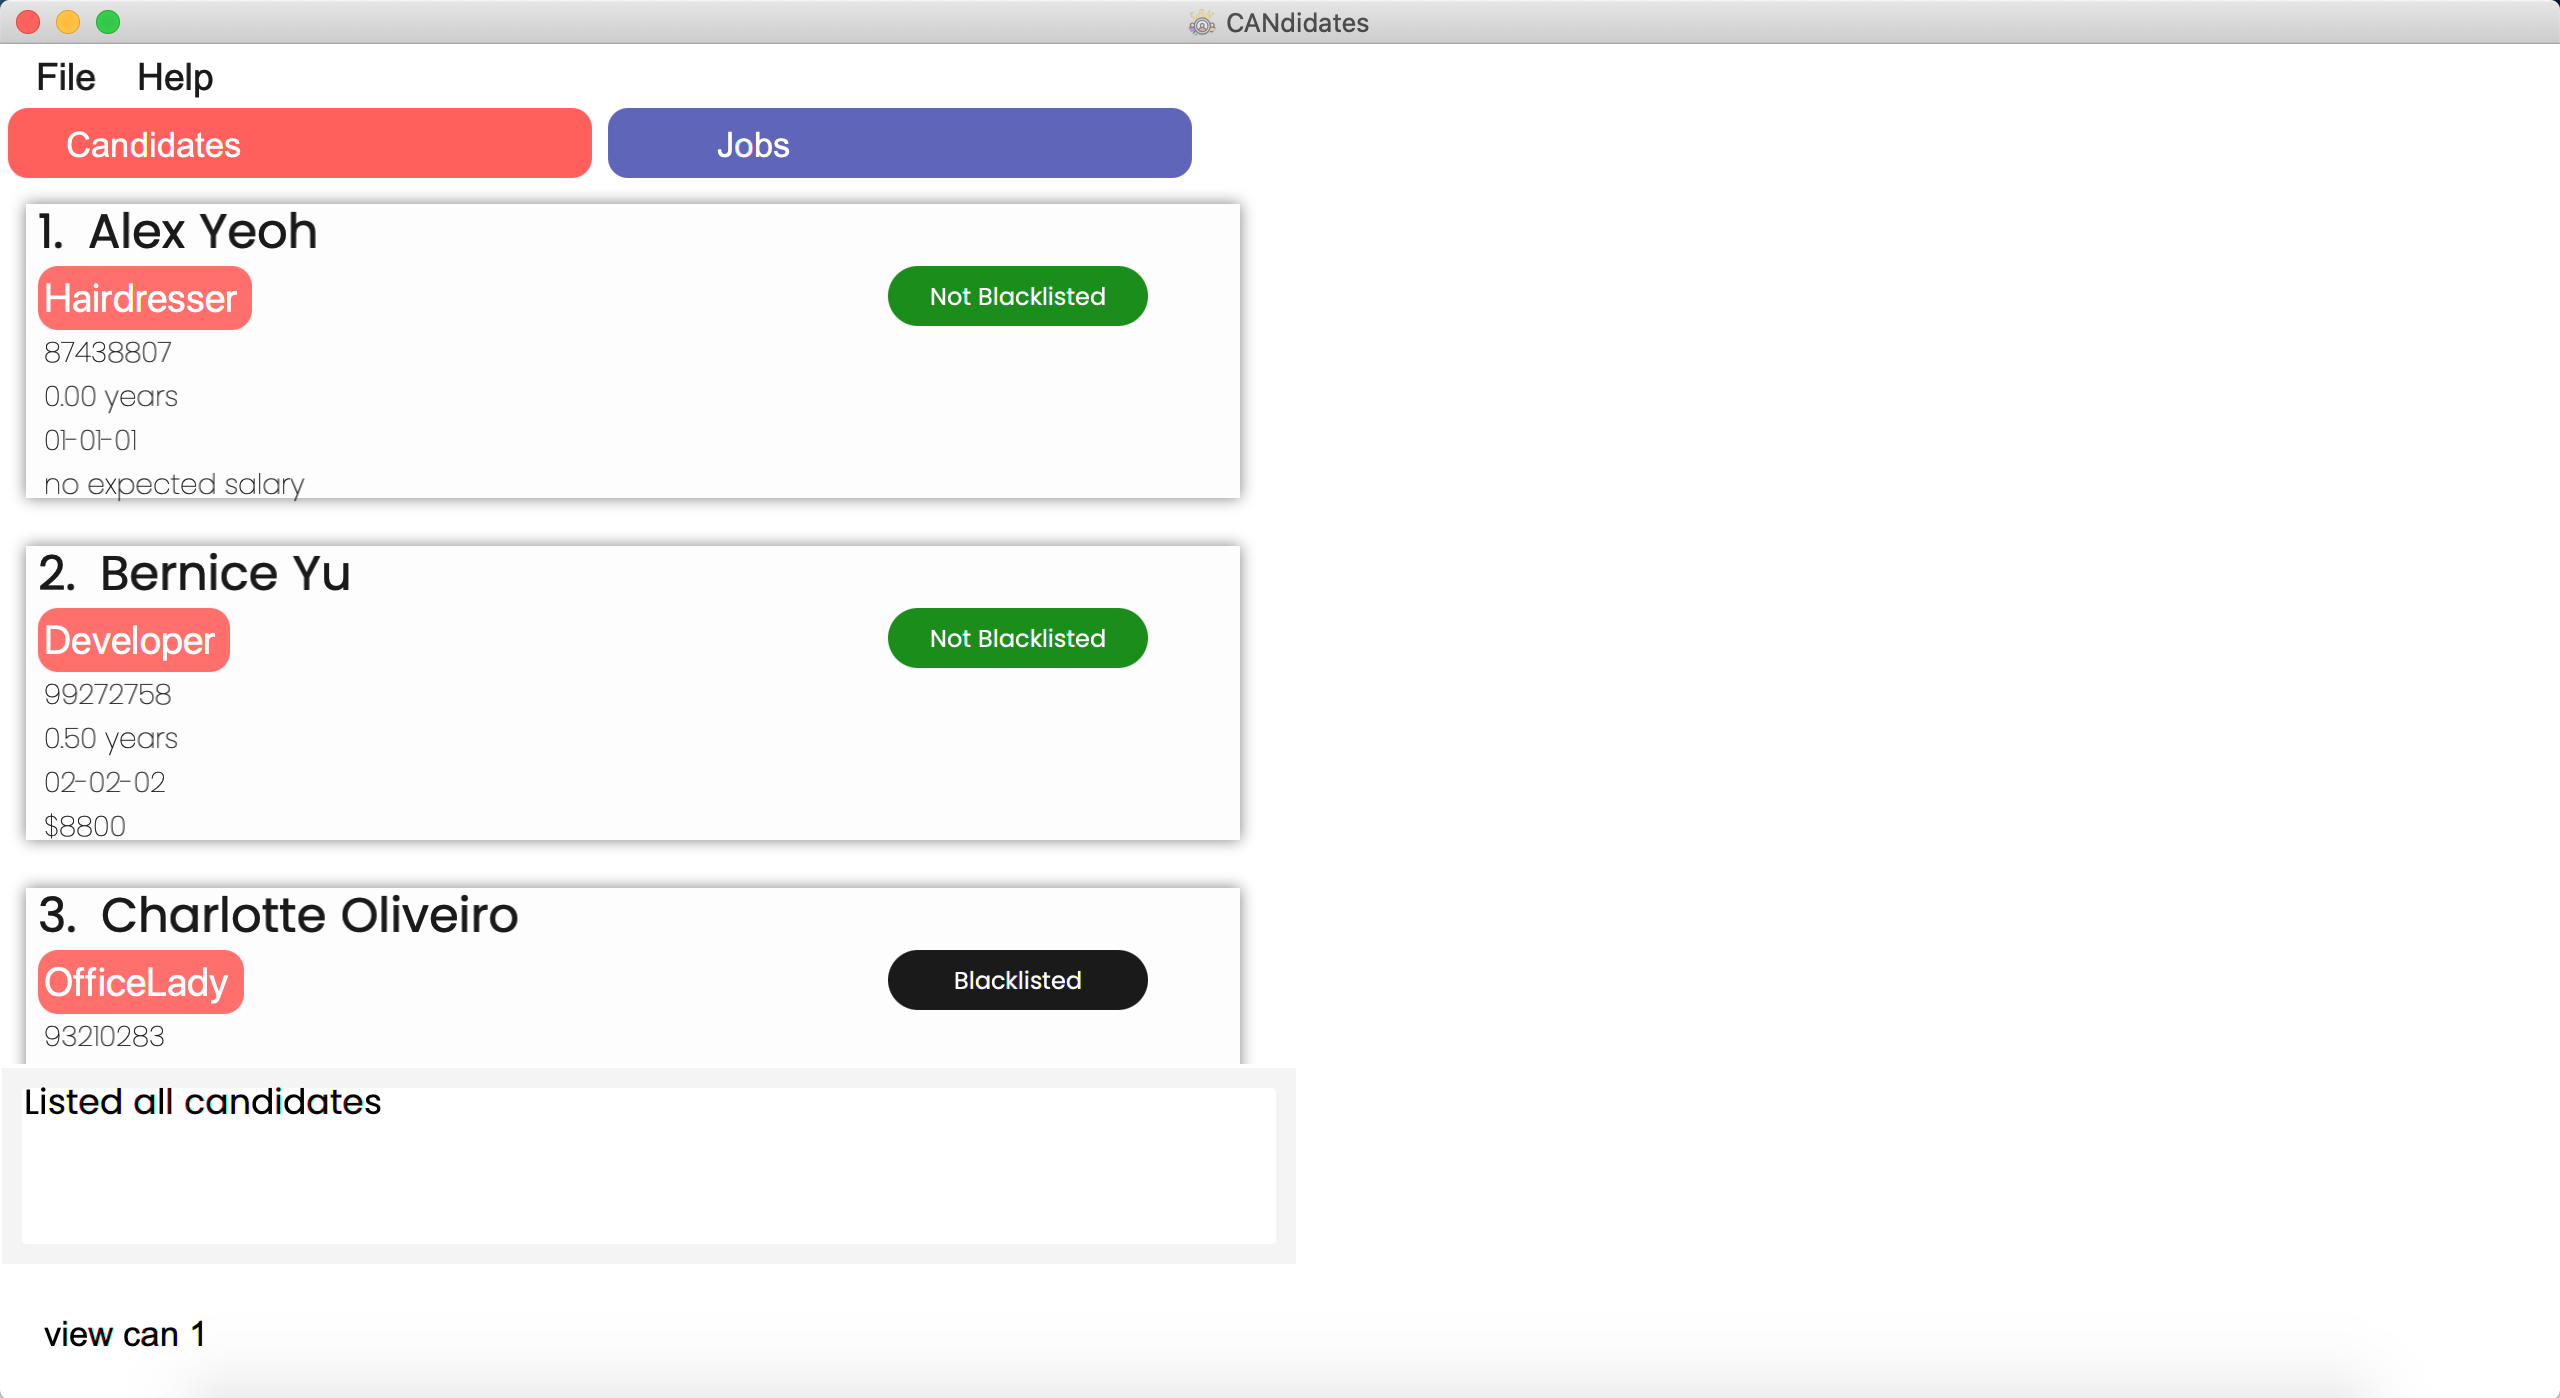
4.2 Listing all candidates: list can
To accurately reflect the latest changes of candidates in the application, you can refresh the list of candidates using the format below.
Format: list can
find can command to show the full list of candidates again.
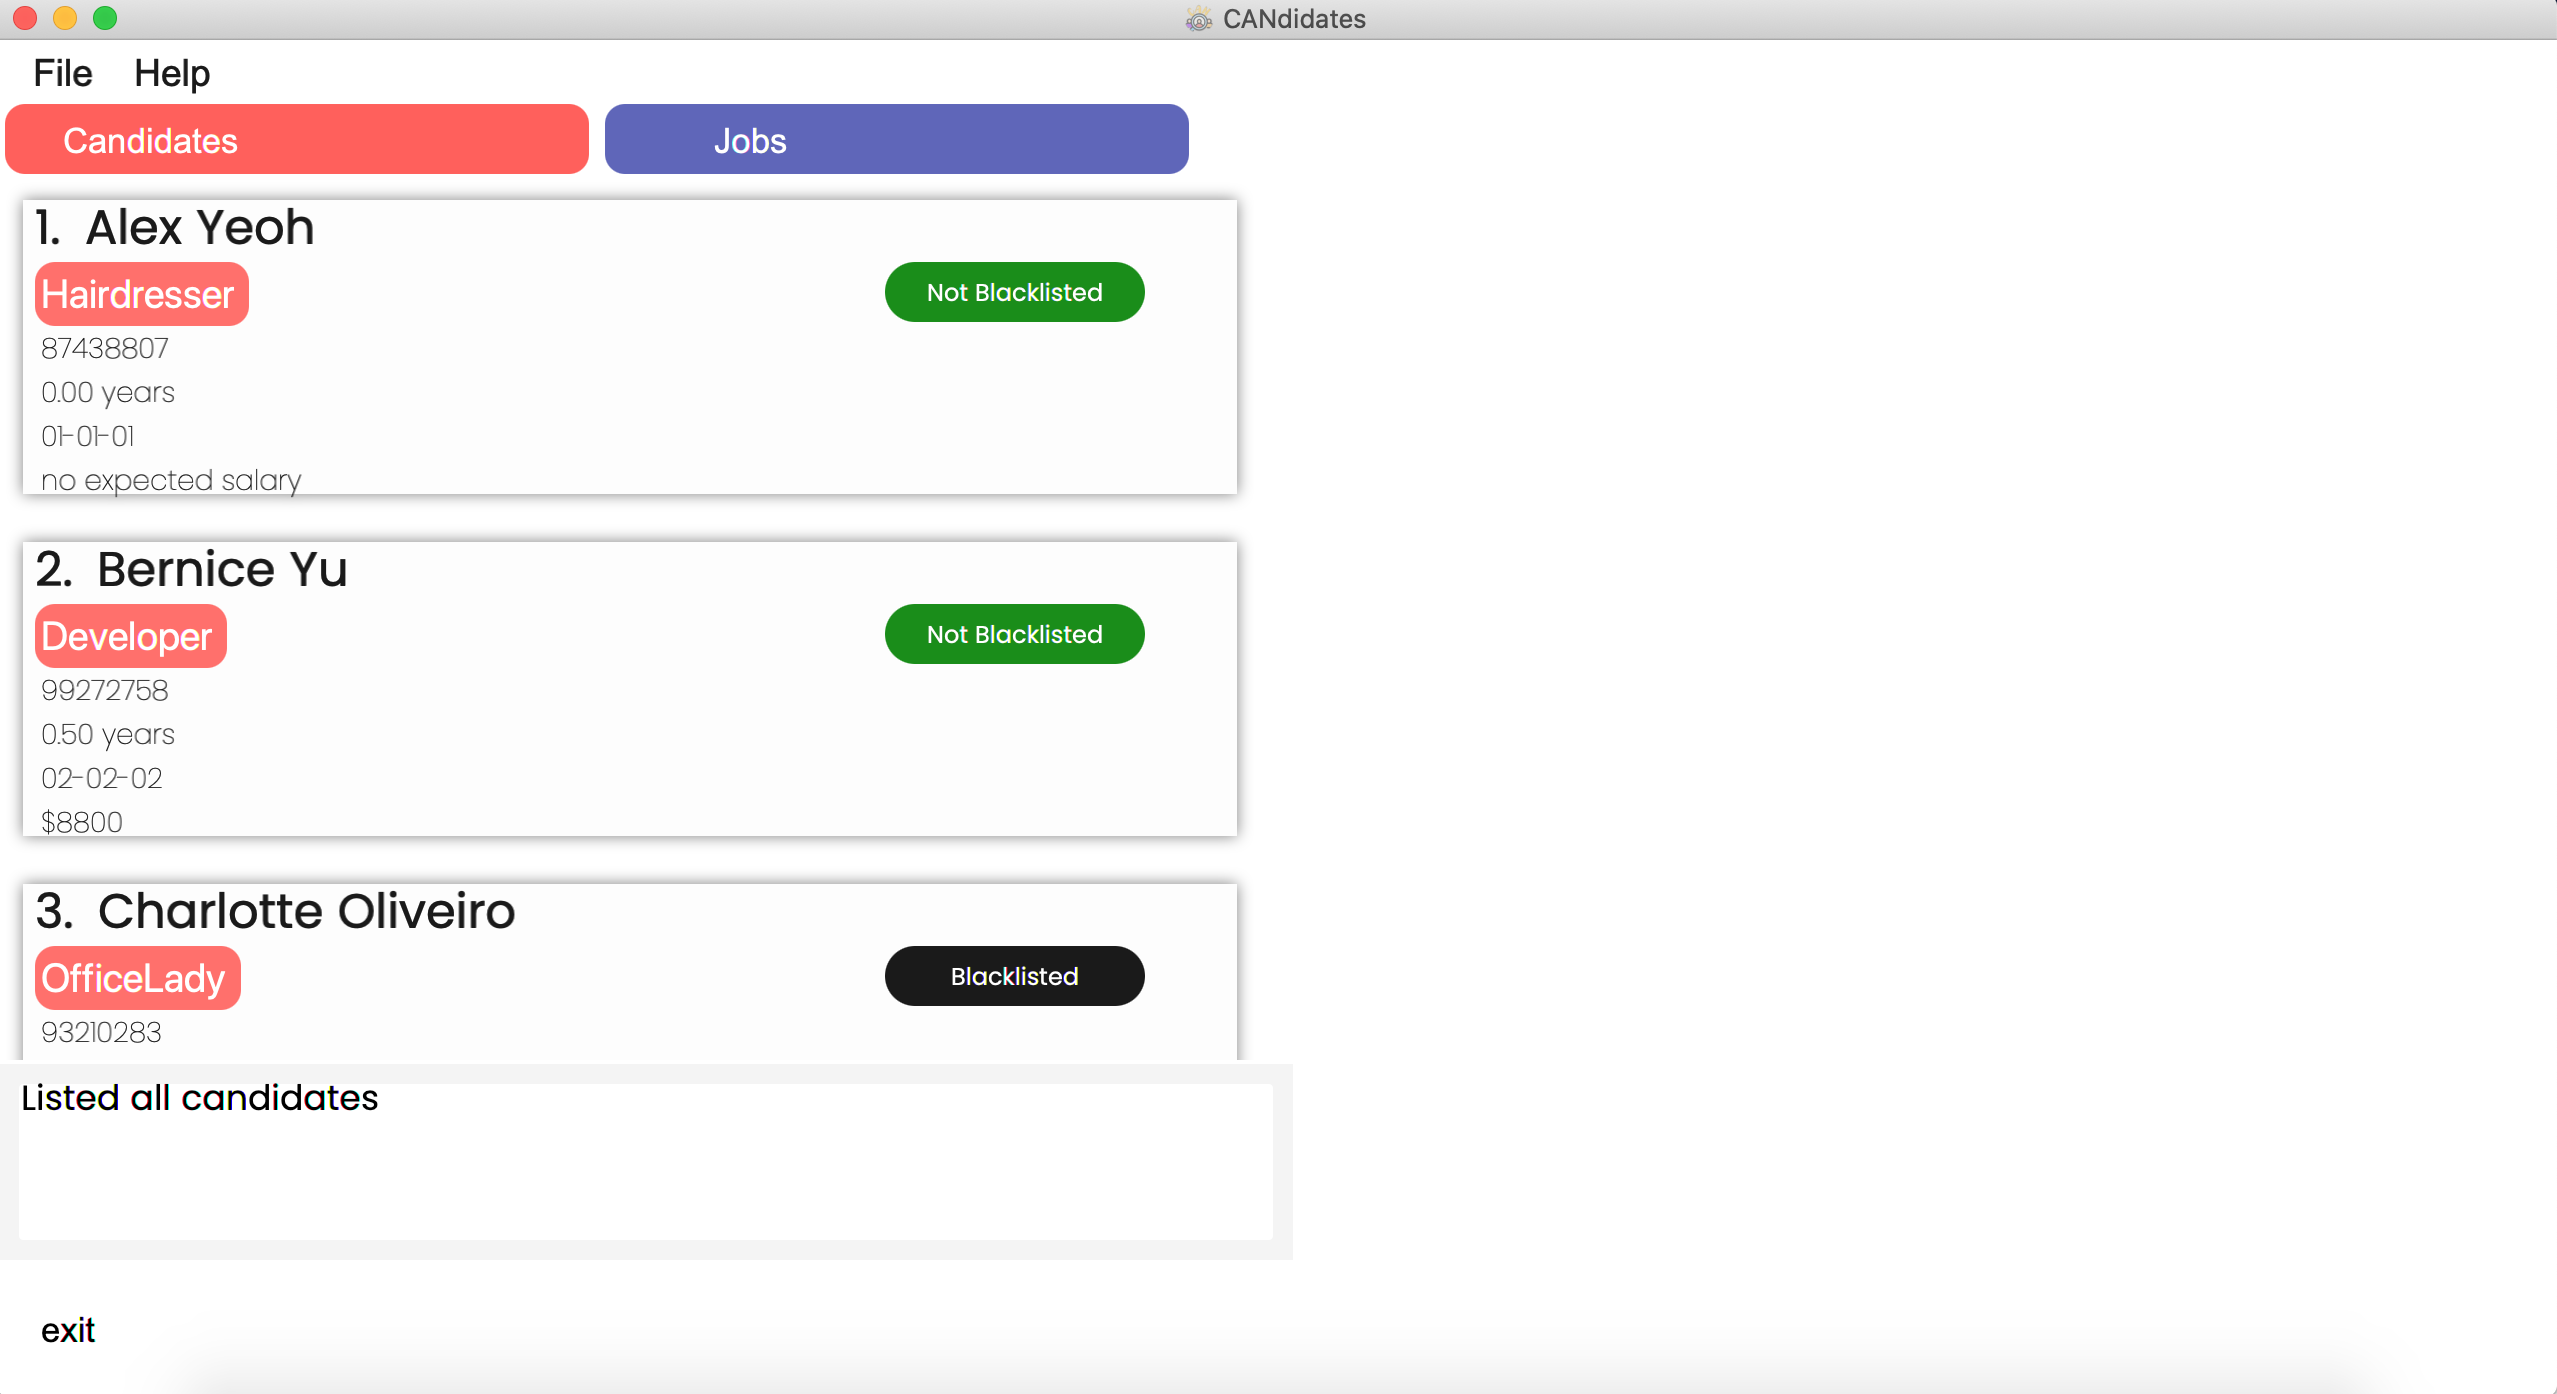
4.3 Editing a candidate: edit can
If you would like to edit the details of a particular candidate, you can use the command below.
Format: edit can INDEX [n/NAME] [p/PHONE] [e/EMAIL] [exp/YEARS_OF_EXPERIENCE] [doa/DATE_OF_APPLICATION] [a/ADDRESS] [sal/EXPECTED_SALARY] [bl/IS_BLACKLISTED] [link/PROFILE_LINK] [t/JOB_TYPE]…
Examples:
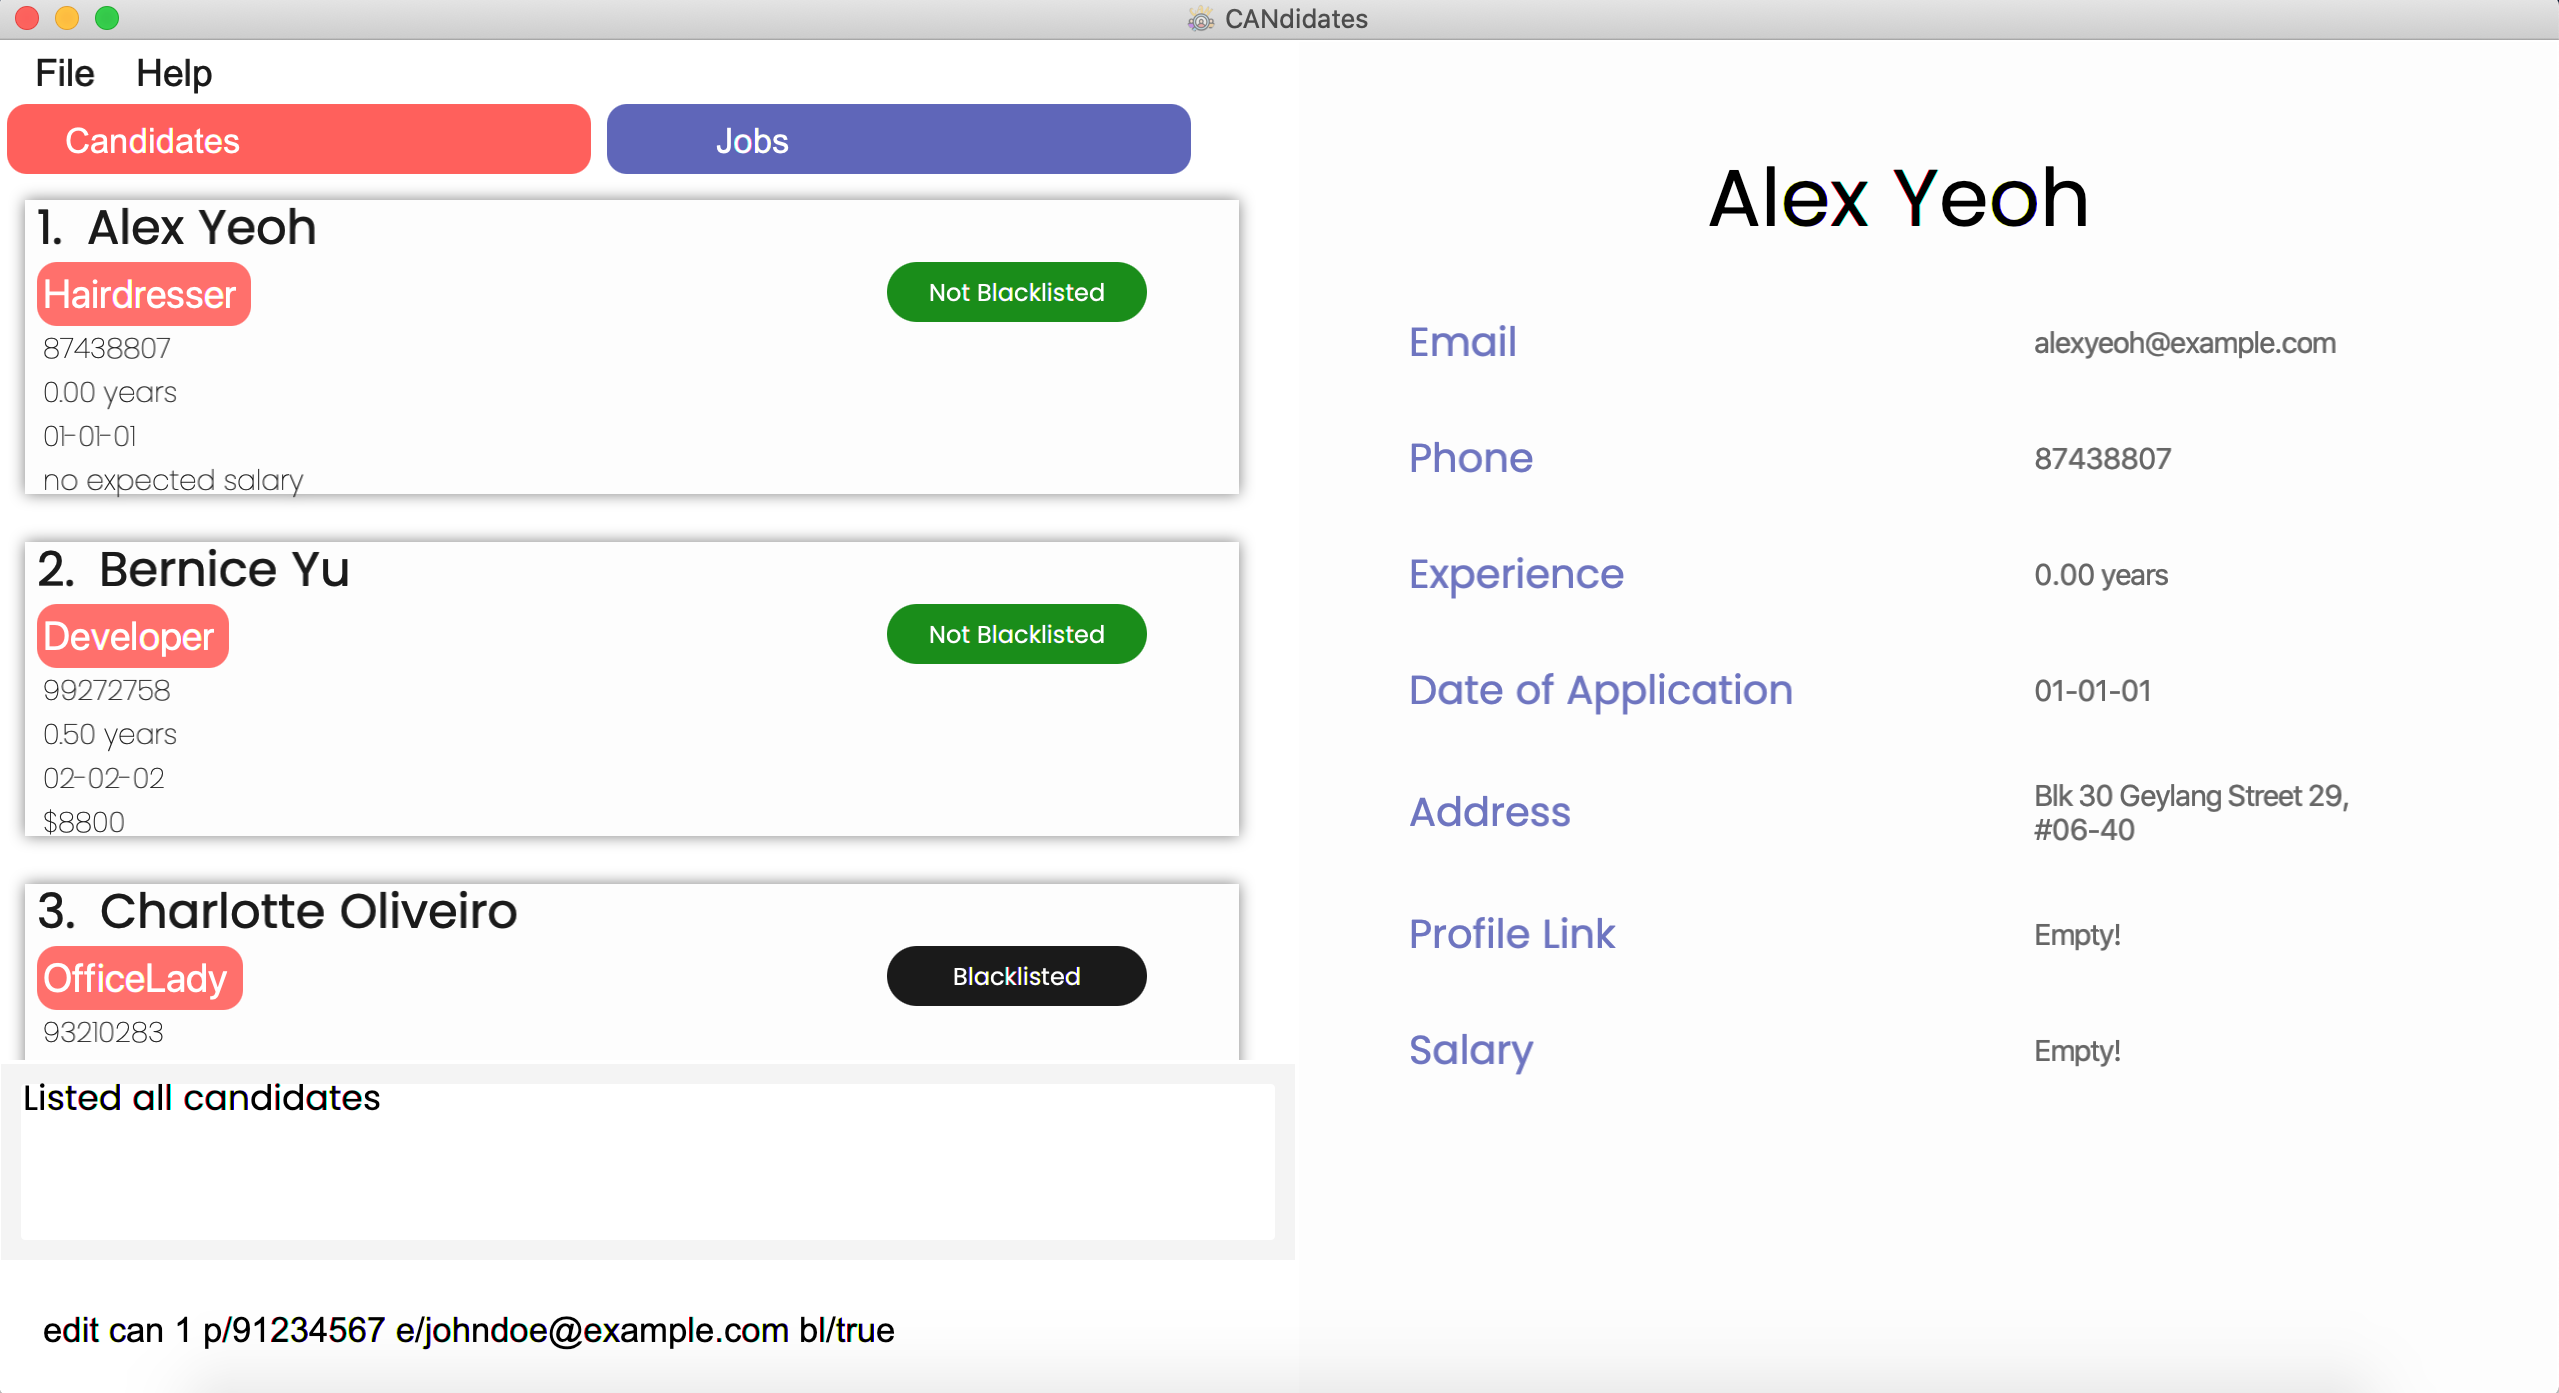
![]() To edit the 1st candidate’s phone number, email and blacklist status to be 91234567, johndoe@example.com and true respectively,
To edit the 1st candidate’s phone number, email and blacklist status to be 91234567, johndoe@example.com and true respectively,
edit can 1 p/91234567 e/johndoe@example.com bl/true
![]() To edit the 2nd candidate and clear existing job types, address, expected salary and profile link,
To edit the 2nd candidate and clear existing job types, address, expected salary and profile link,
edit can 2 t/ a/ sal/ link/
Step by Step:
Step 1. Ensure there is at least 1 candidate in the candidates list.
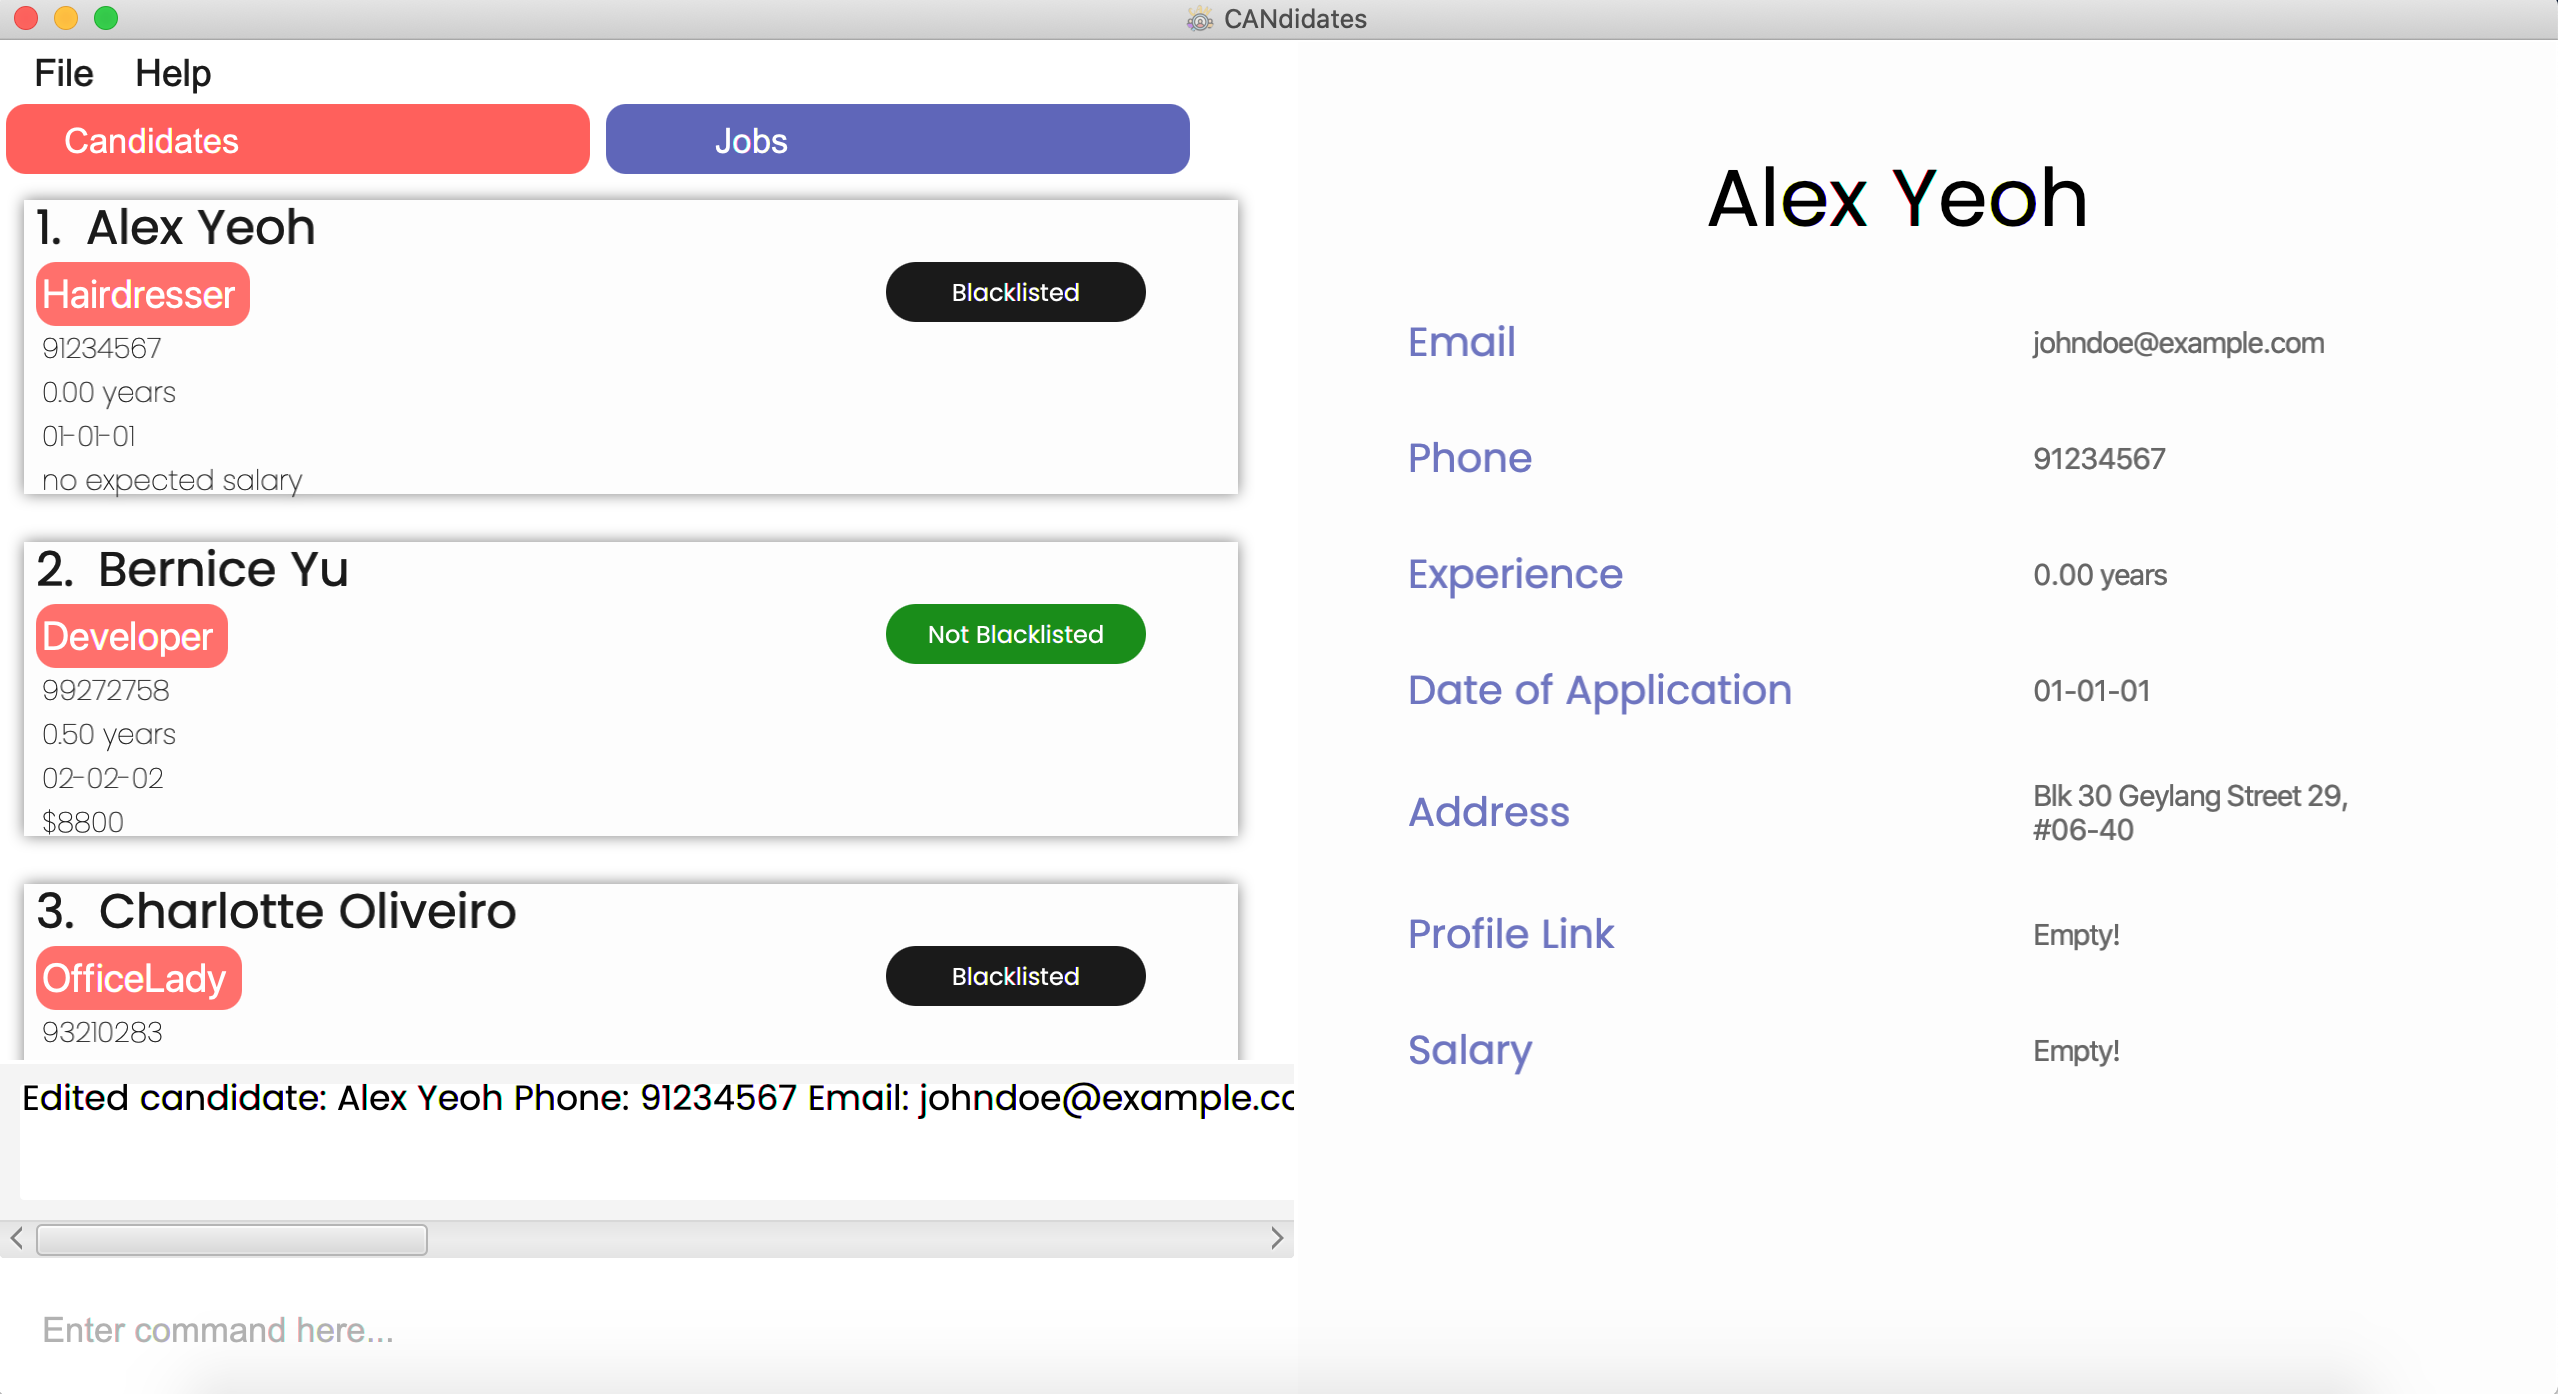
Type edit can 1 p/91234567 e/johndoe@example.com bl/true in the command box and press Enter.
Step 2. The result of the command in the result display will depend on the specific candidate that is being edited, specifically his/her input fields that were not edited. The message that will be shown in the result display is
Edited candidate: {Original Name} Phone: 91234567 Email: johndoe@example.com Experience: {Original Experience} Date of Application: {Original Date of Application} Address: {Original Address} Link: {Original Link} Expected Salary: {Original Expected Salary} Blacklisted: true Tags: {Original Tags}.
Step 3. The application will show the updated list of candidates with the edited candidate. Type view can 1 or click the edited candidate’s
card to view the candidate’s new information in detail.
4.4 Finding a candidate: find can
Too many candidates with different information? CANdidates provide you with a simple and quick way for you to find candidates who fulfil certain criteria(s) or even a specific candidate from the long list. All you have to do is tell CANdidates the field you are interested in, along with the keyword you are looking for!
Format: find can [n/NAME] [p/PHONE_NUMBER] [e/EMAIL] [exp/YEARS_OF_EXPERIENCE] [doa/DATE_OF_APPLICATION] [a/ADDRESS] [sal/EXPECTED_SALARY] [bl/IS_BLACKLISTED] [link/PROFILE_LINK] [t/JOB_TYPE]…
find can t/teacher tuition will show a list of candidates with both the tags “teacher” and “tuition”
find can bl/false, the resulting list will show only non-blacklisted candidates.
sort can type/sal order/asc
(Refer to Section 4.5, Sorting all candidates).
Candidates with no expected salary will be displayed at the top of the list.
Examples:
![]() To find candidates with tag(s) containing the word “developer” and an expected salary of exactly $4000,
To find candidates with tag(s) containing the word “developer” and an expected salary of exactly $4000,
find can t/developer sal/4000
![]() To find candidates who are blacklisted,
To find candidates who are blacklisted,
find can bl/true
Step by Step:
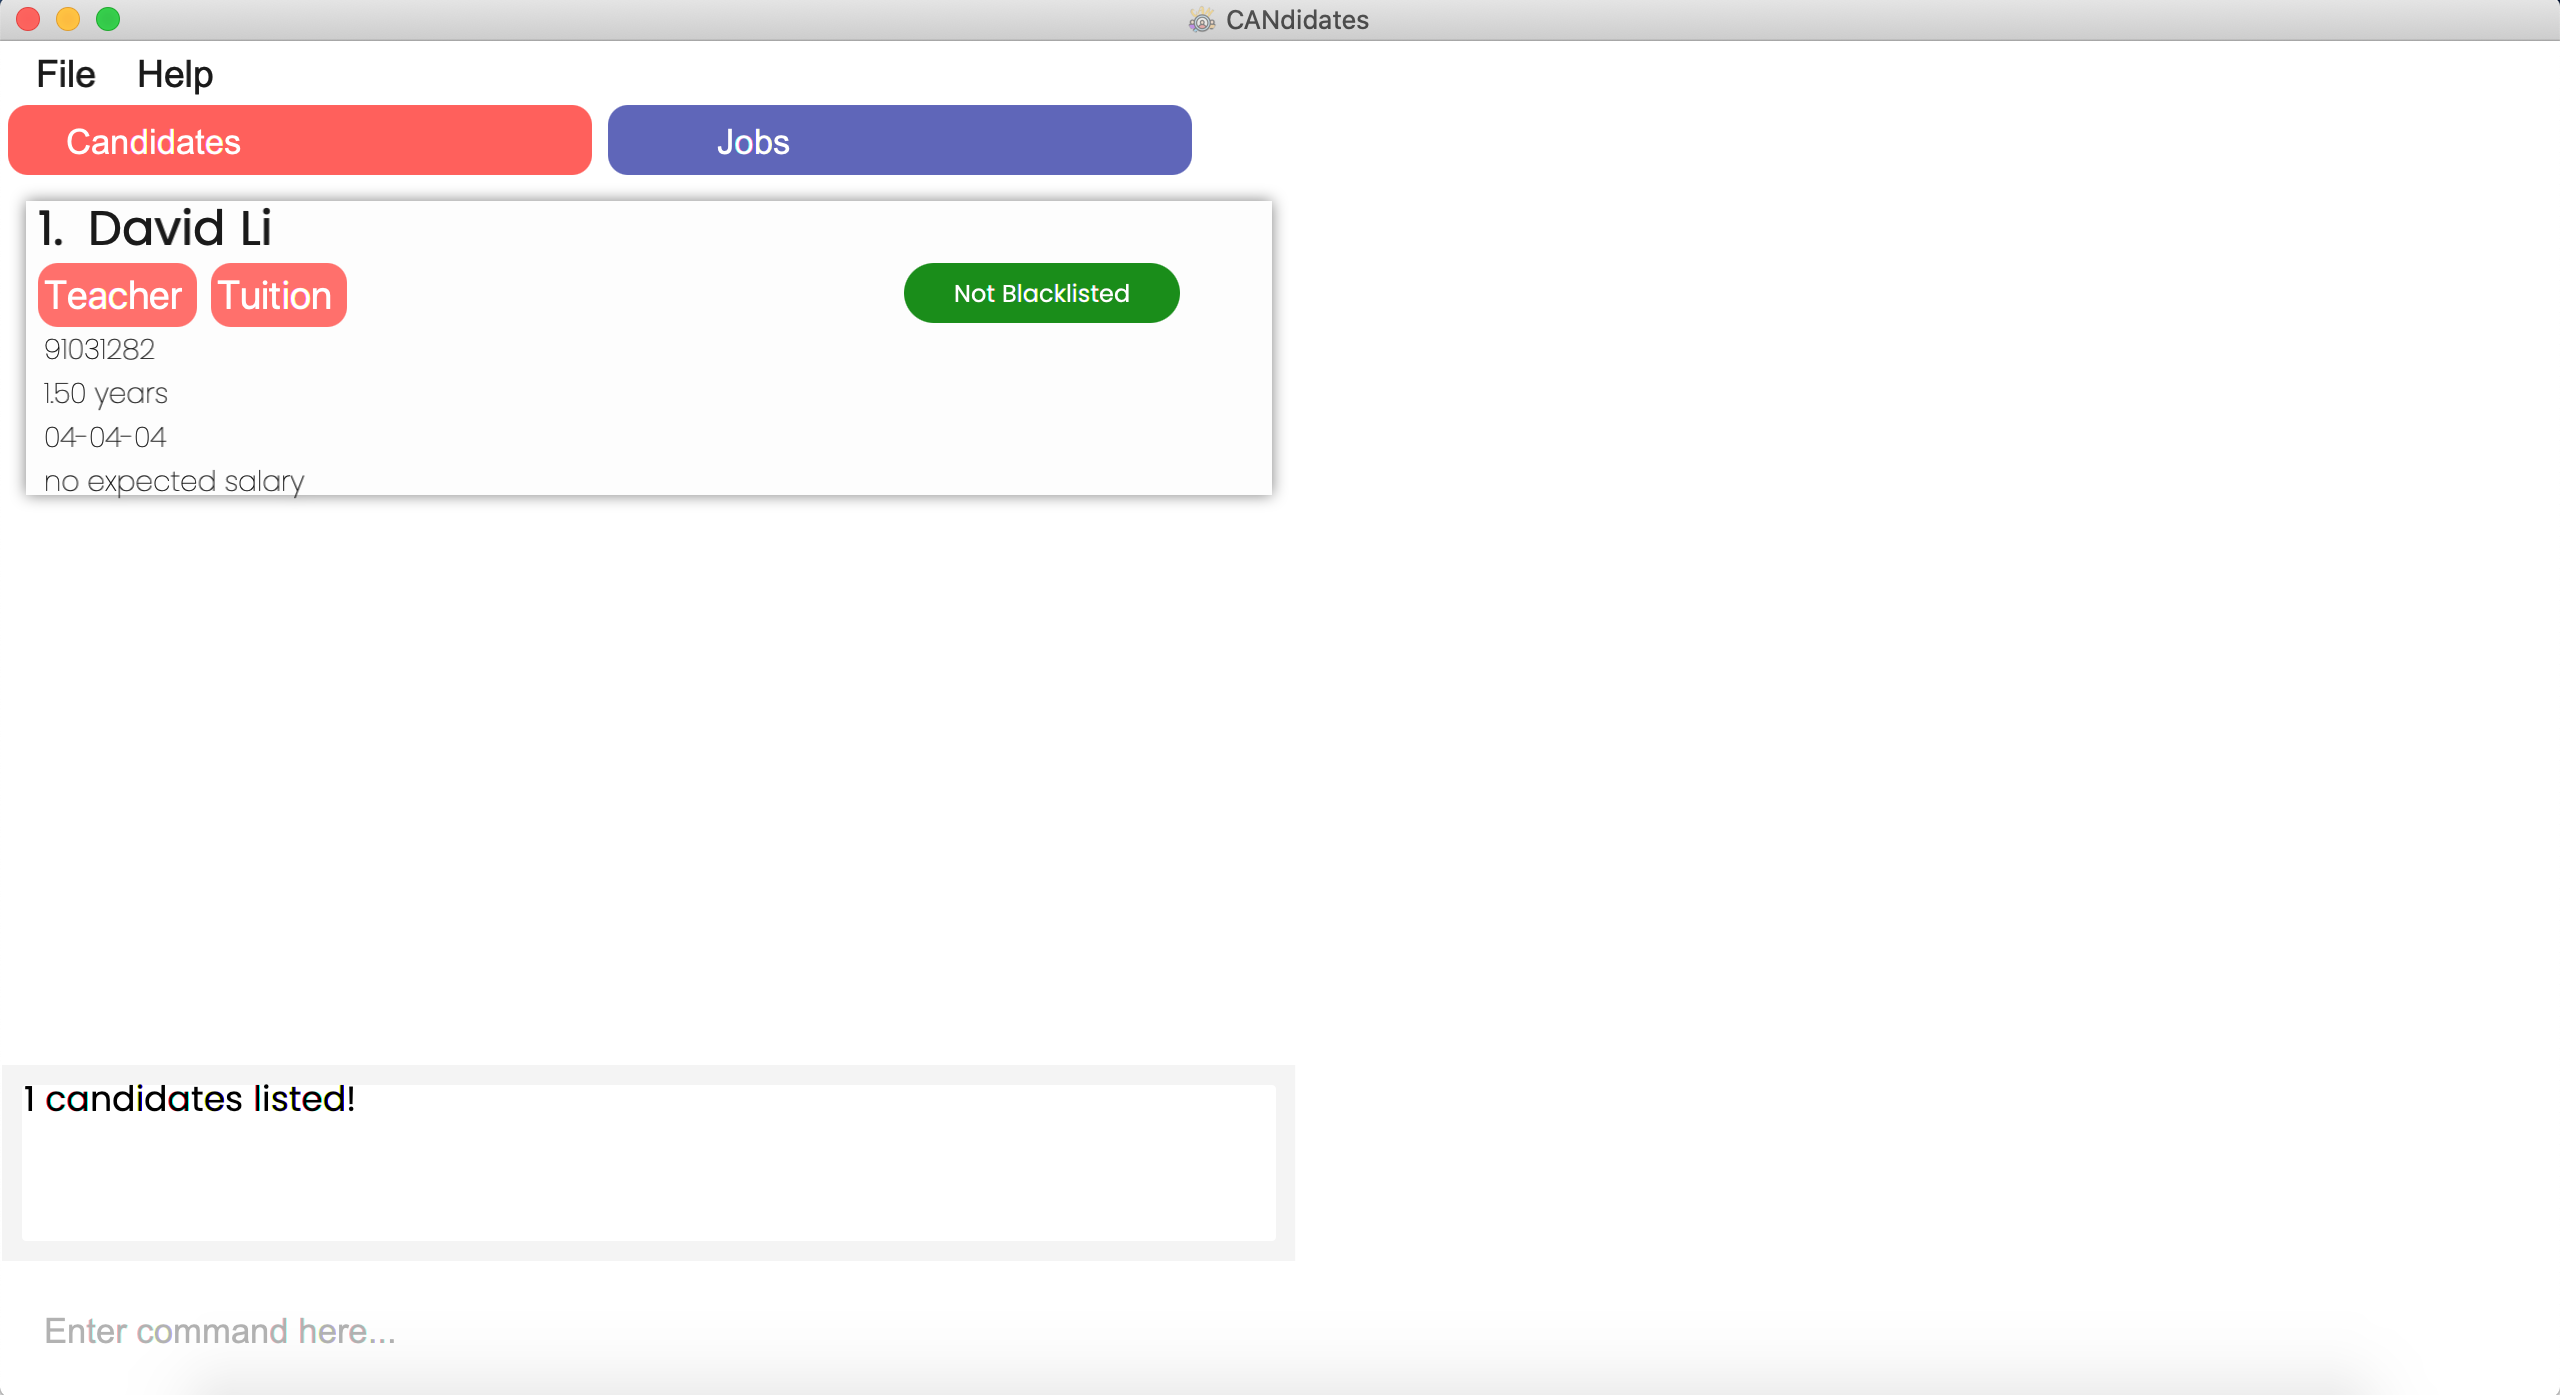
Step 1. Type find can n/David t/Teacher in the command box and press Enter.
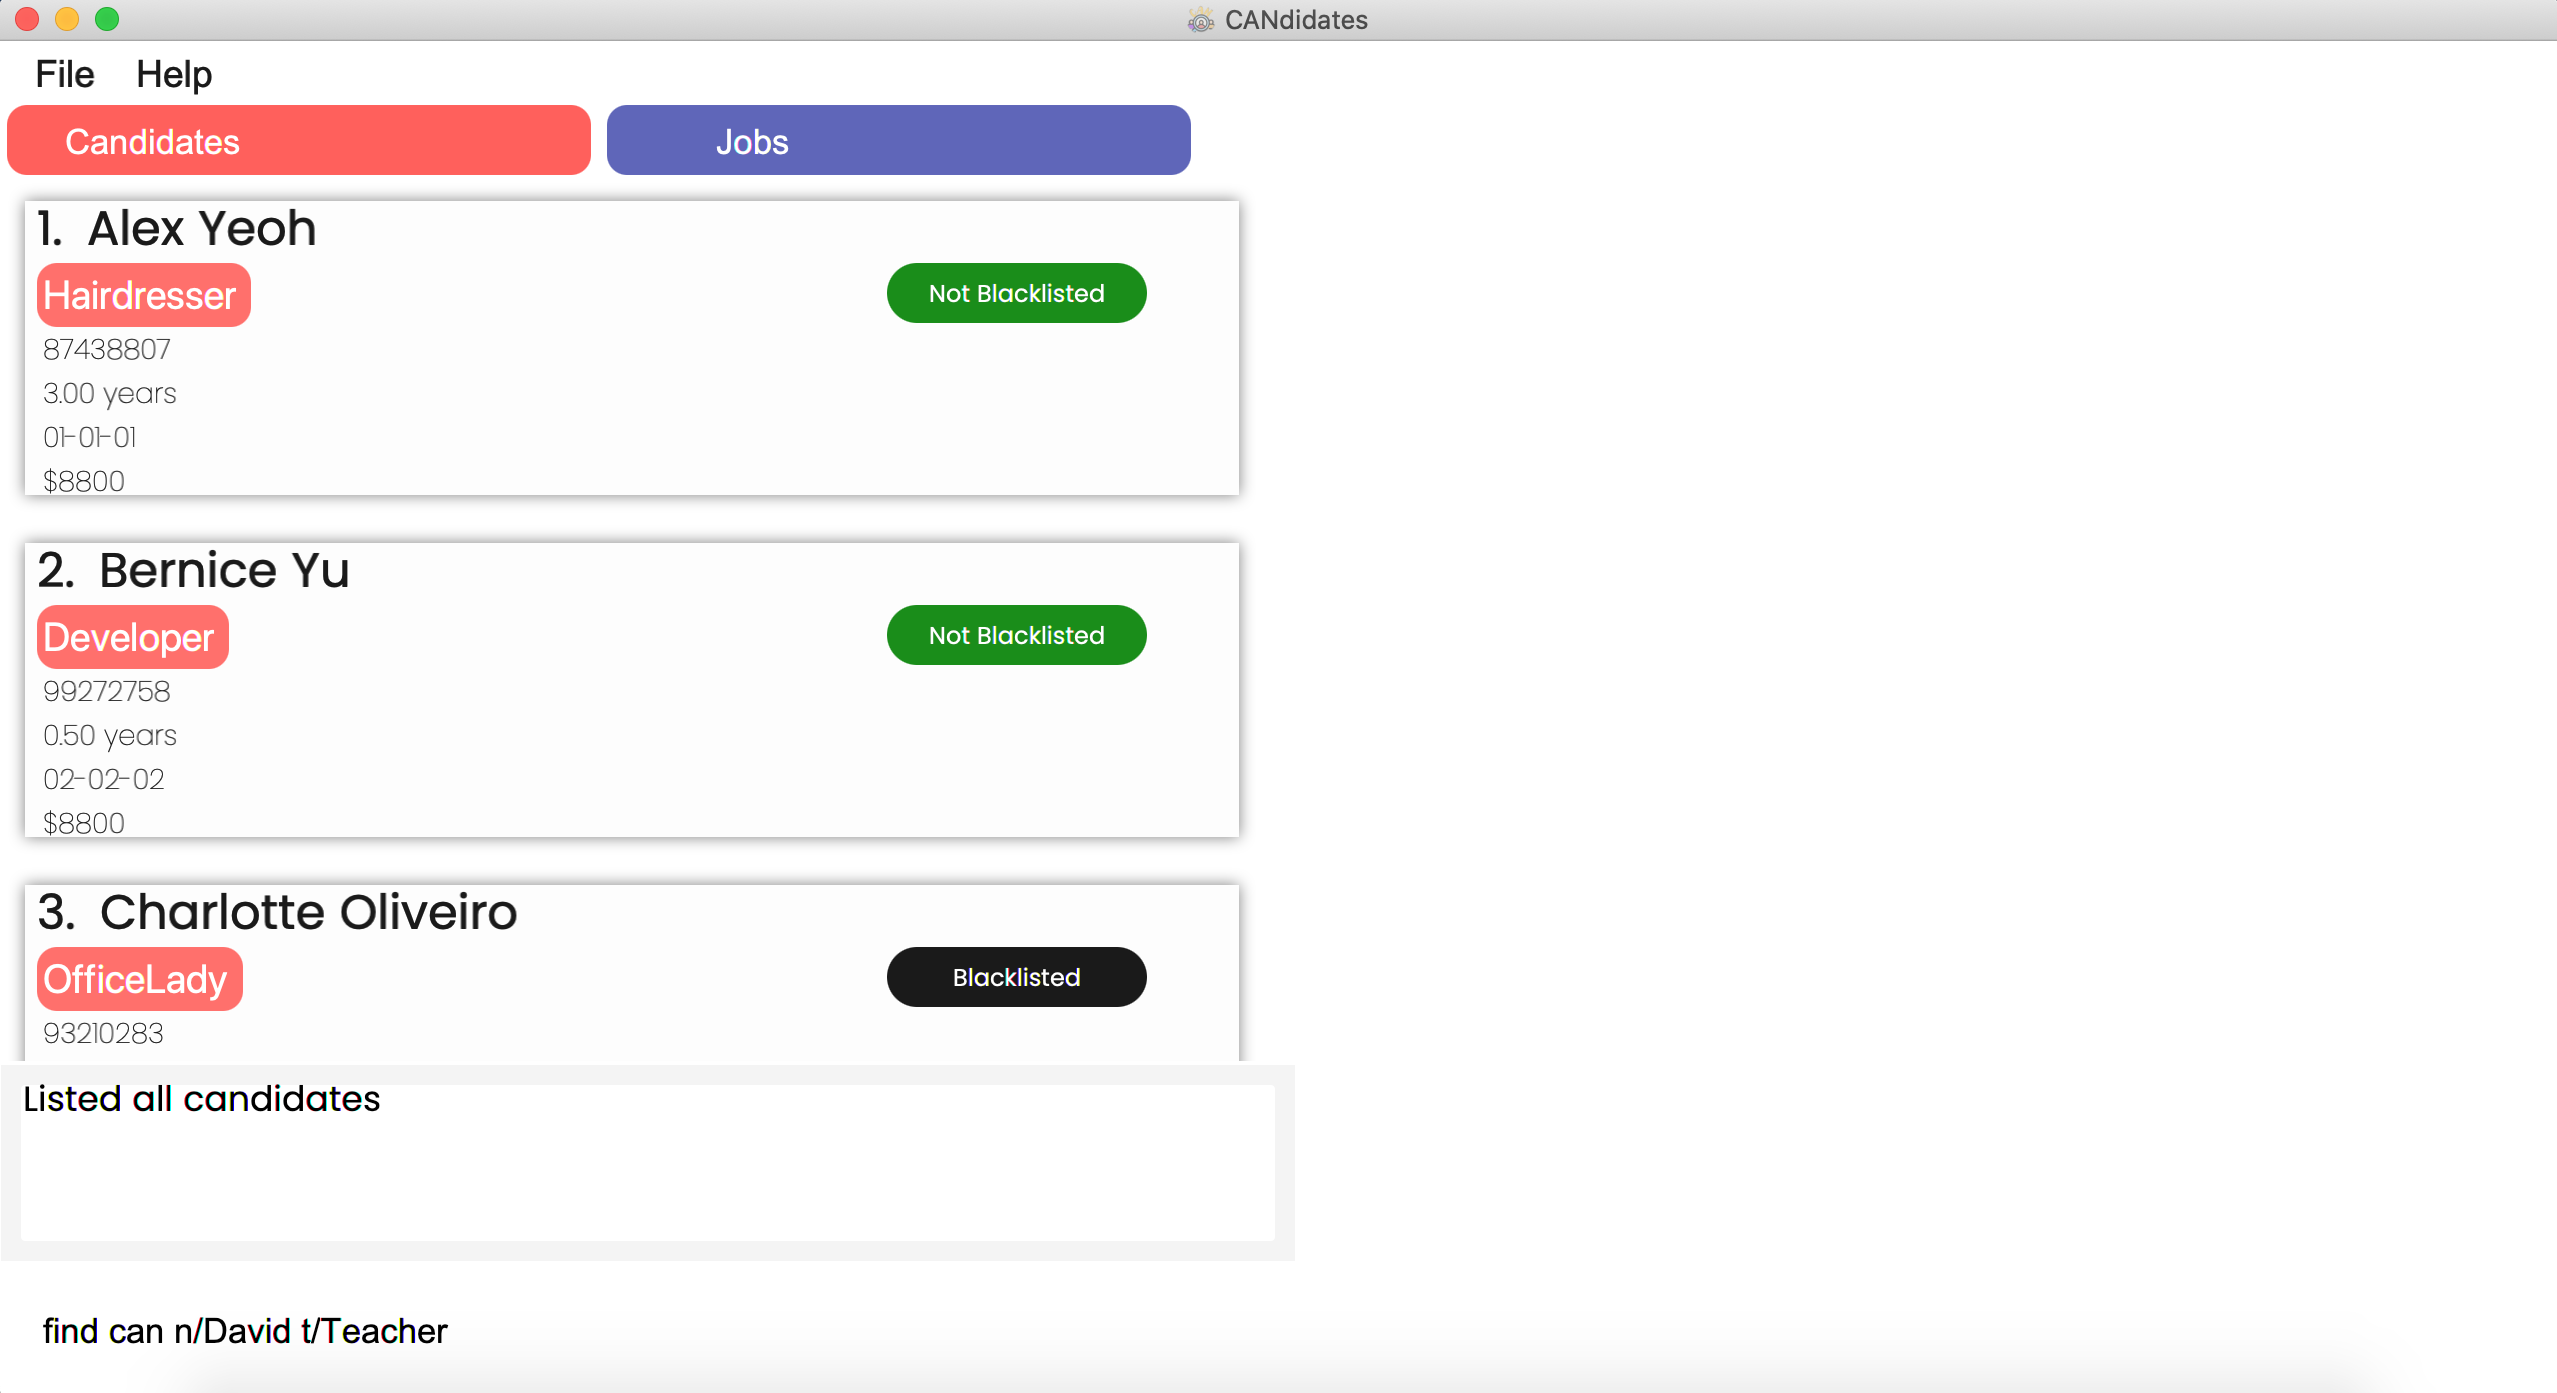
Step 2. The CANdidates application will show the following message in the result display.
{Number of candidates found} candidates listed!
Step 3. The application will show candidates with all matching fields in the main list.
4.5 Sorting all candidates: sort can
You can view all the candidates in the order you wish to by typing in your desired order. Upon execution of the command, the sorted list of candidates would be displayed on the app!
Format: sort can type/FIELD_TO_SORT order/ORDER
sort can command after a find can command will only sort the list of candidates that were listed after the find can command.
type/n, type/exp, type/sal, type/bl or type/doa depending on whether you wish to sort the candidates by their name, experience, expected salary, blacklist status or data of application respectively.
order/asc or order/desc depending on whether you wish the sorting to be done in an ascending or descending manner.
Examples:
![]() To sort the list of candidates starting from the lowest number of years of experience,
To sort the list of candidates starting from the lowest number of years of experience,
sort can type/exp order/asc
![]() To sort the list of candidates starting from the most recent application date,
To sort the list of candidates starting from the most recent application date,
sort can type/doa order/desc
![]() To view all blacklisted candidates followed by non-blacklisted candidates,
To view all blacklisted candidates followed by non-blacklisted candidates,
sort can type/bl order/desc
Step by Step:
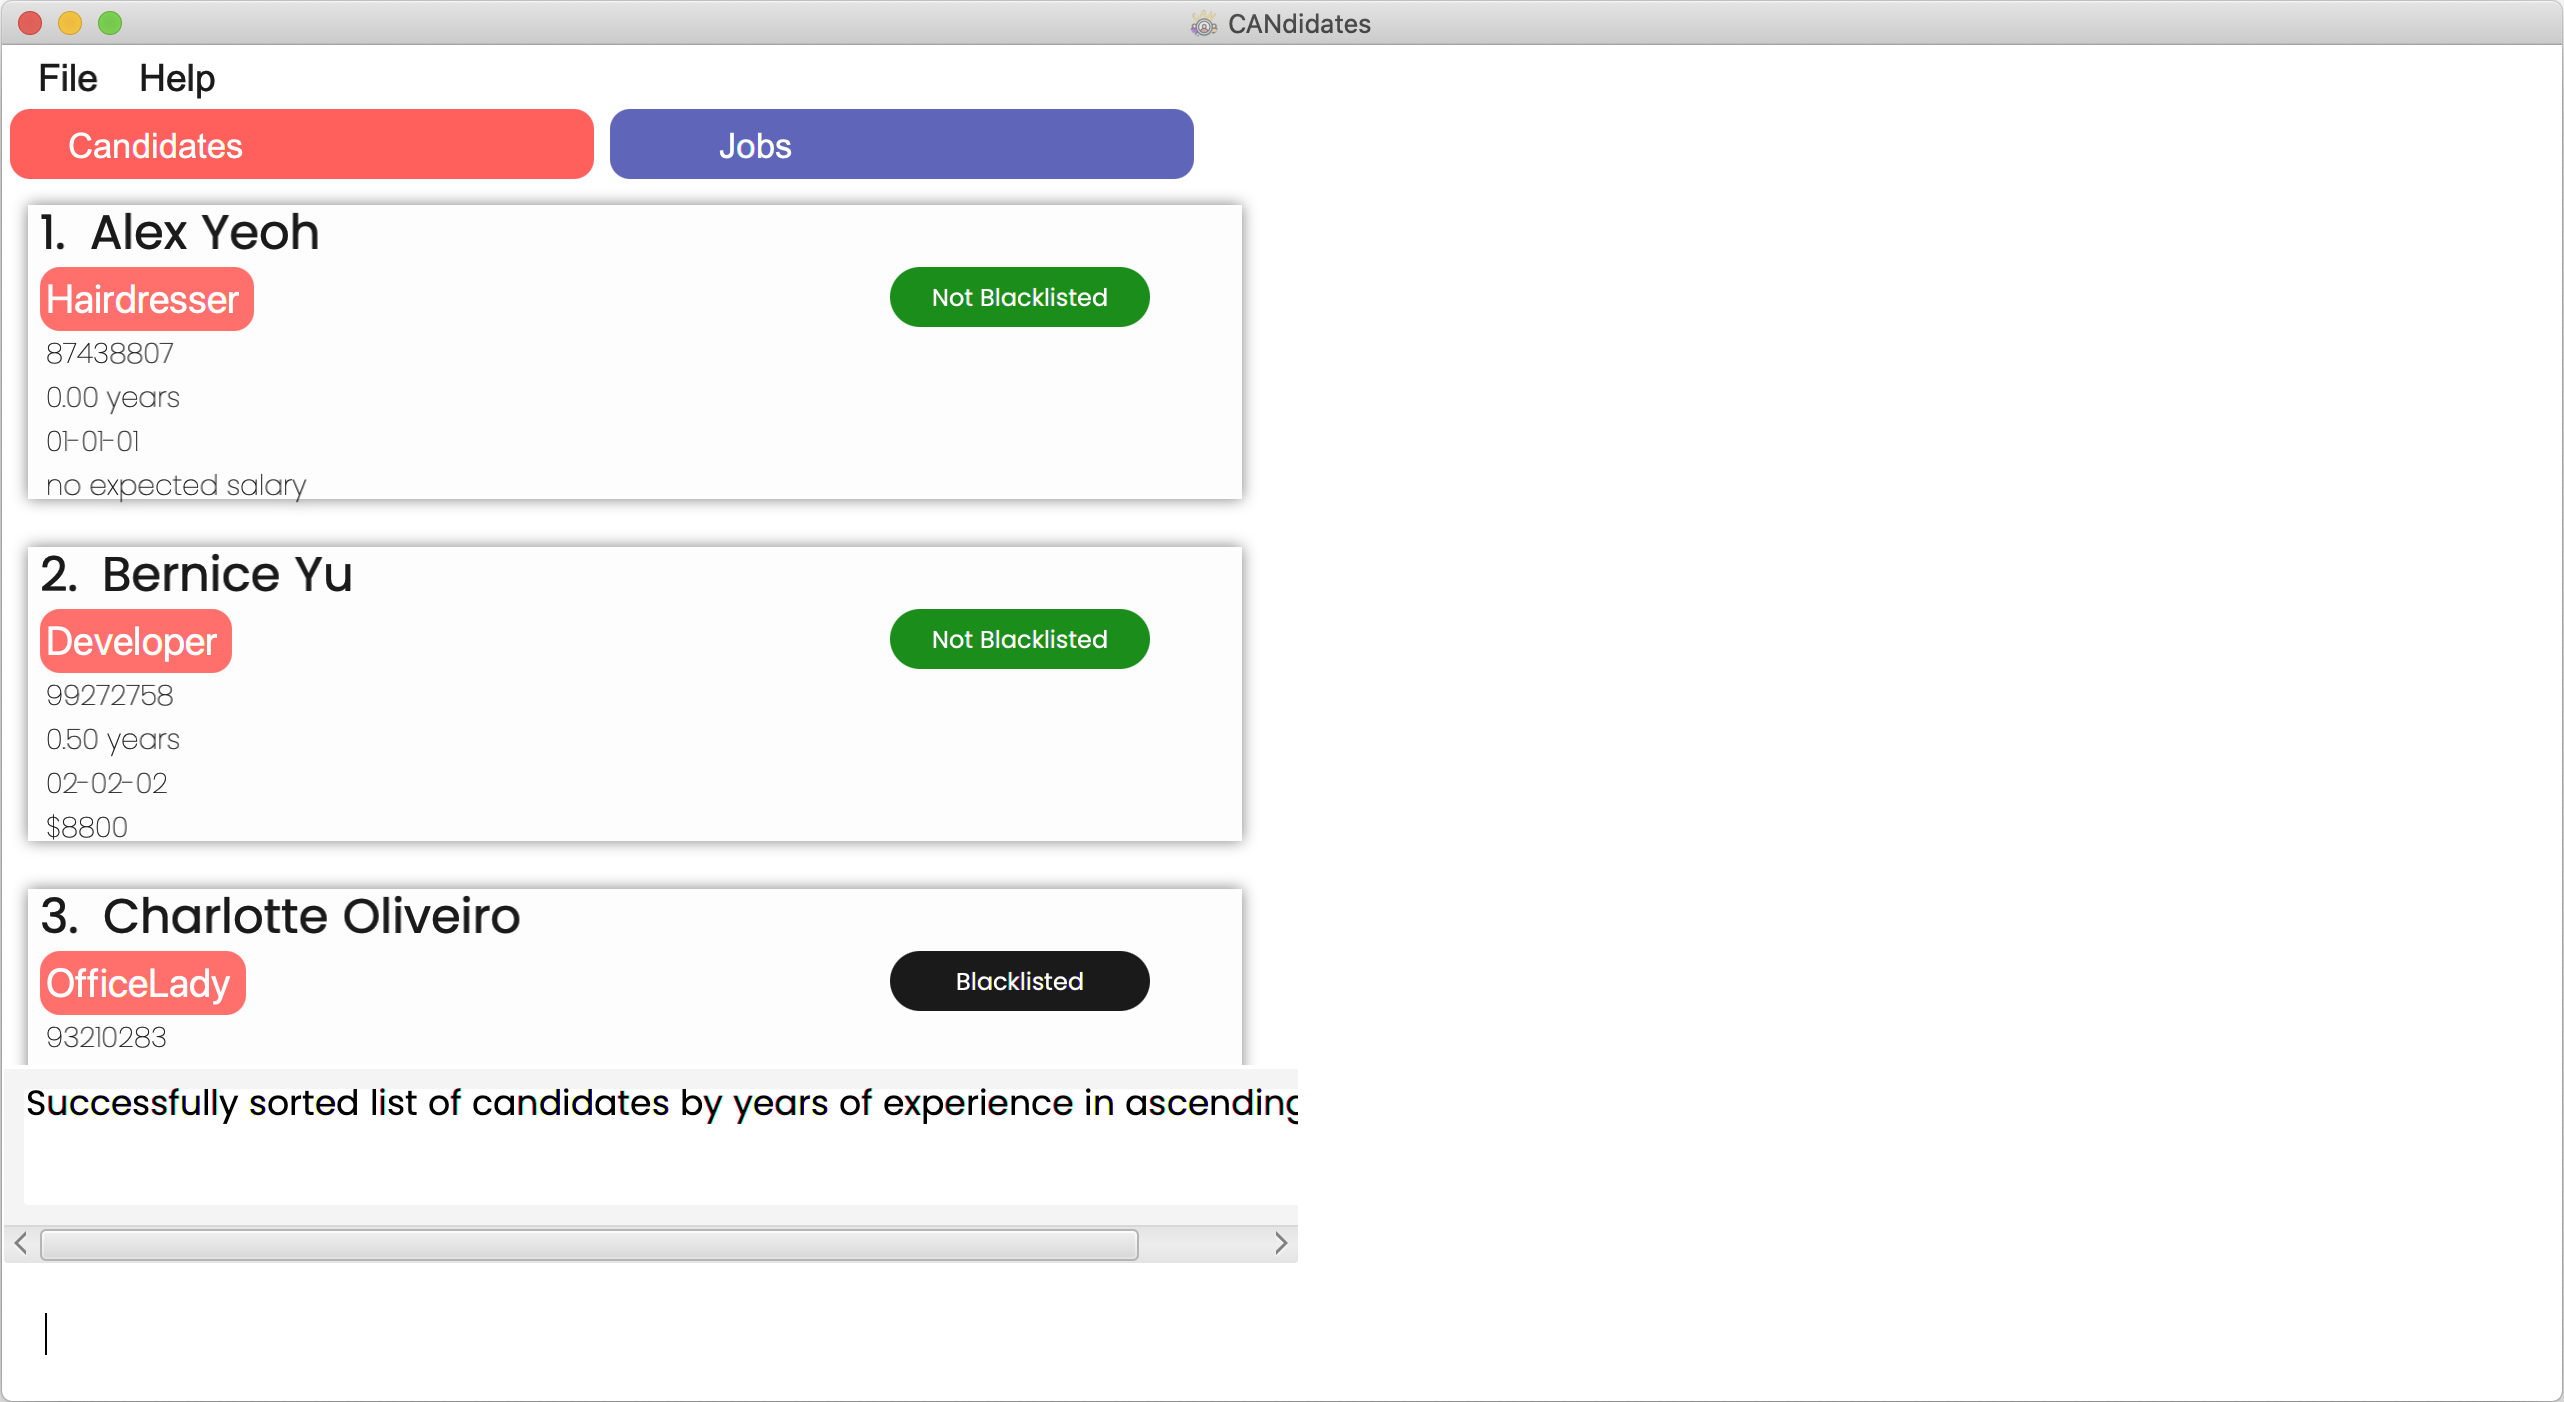
Step 1. Type sort can type/exp order/asc in the command box and press Enter.
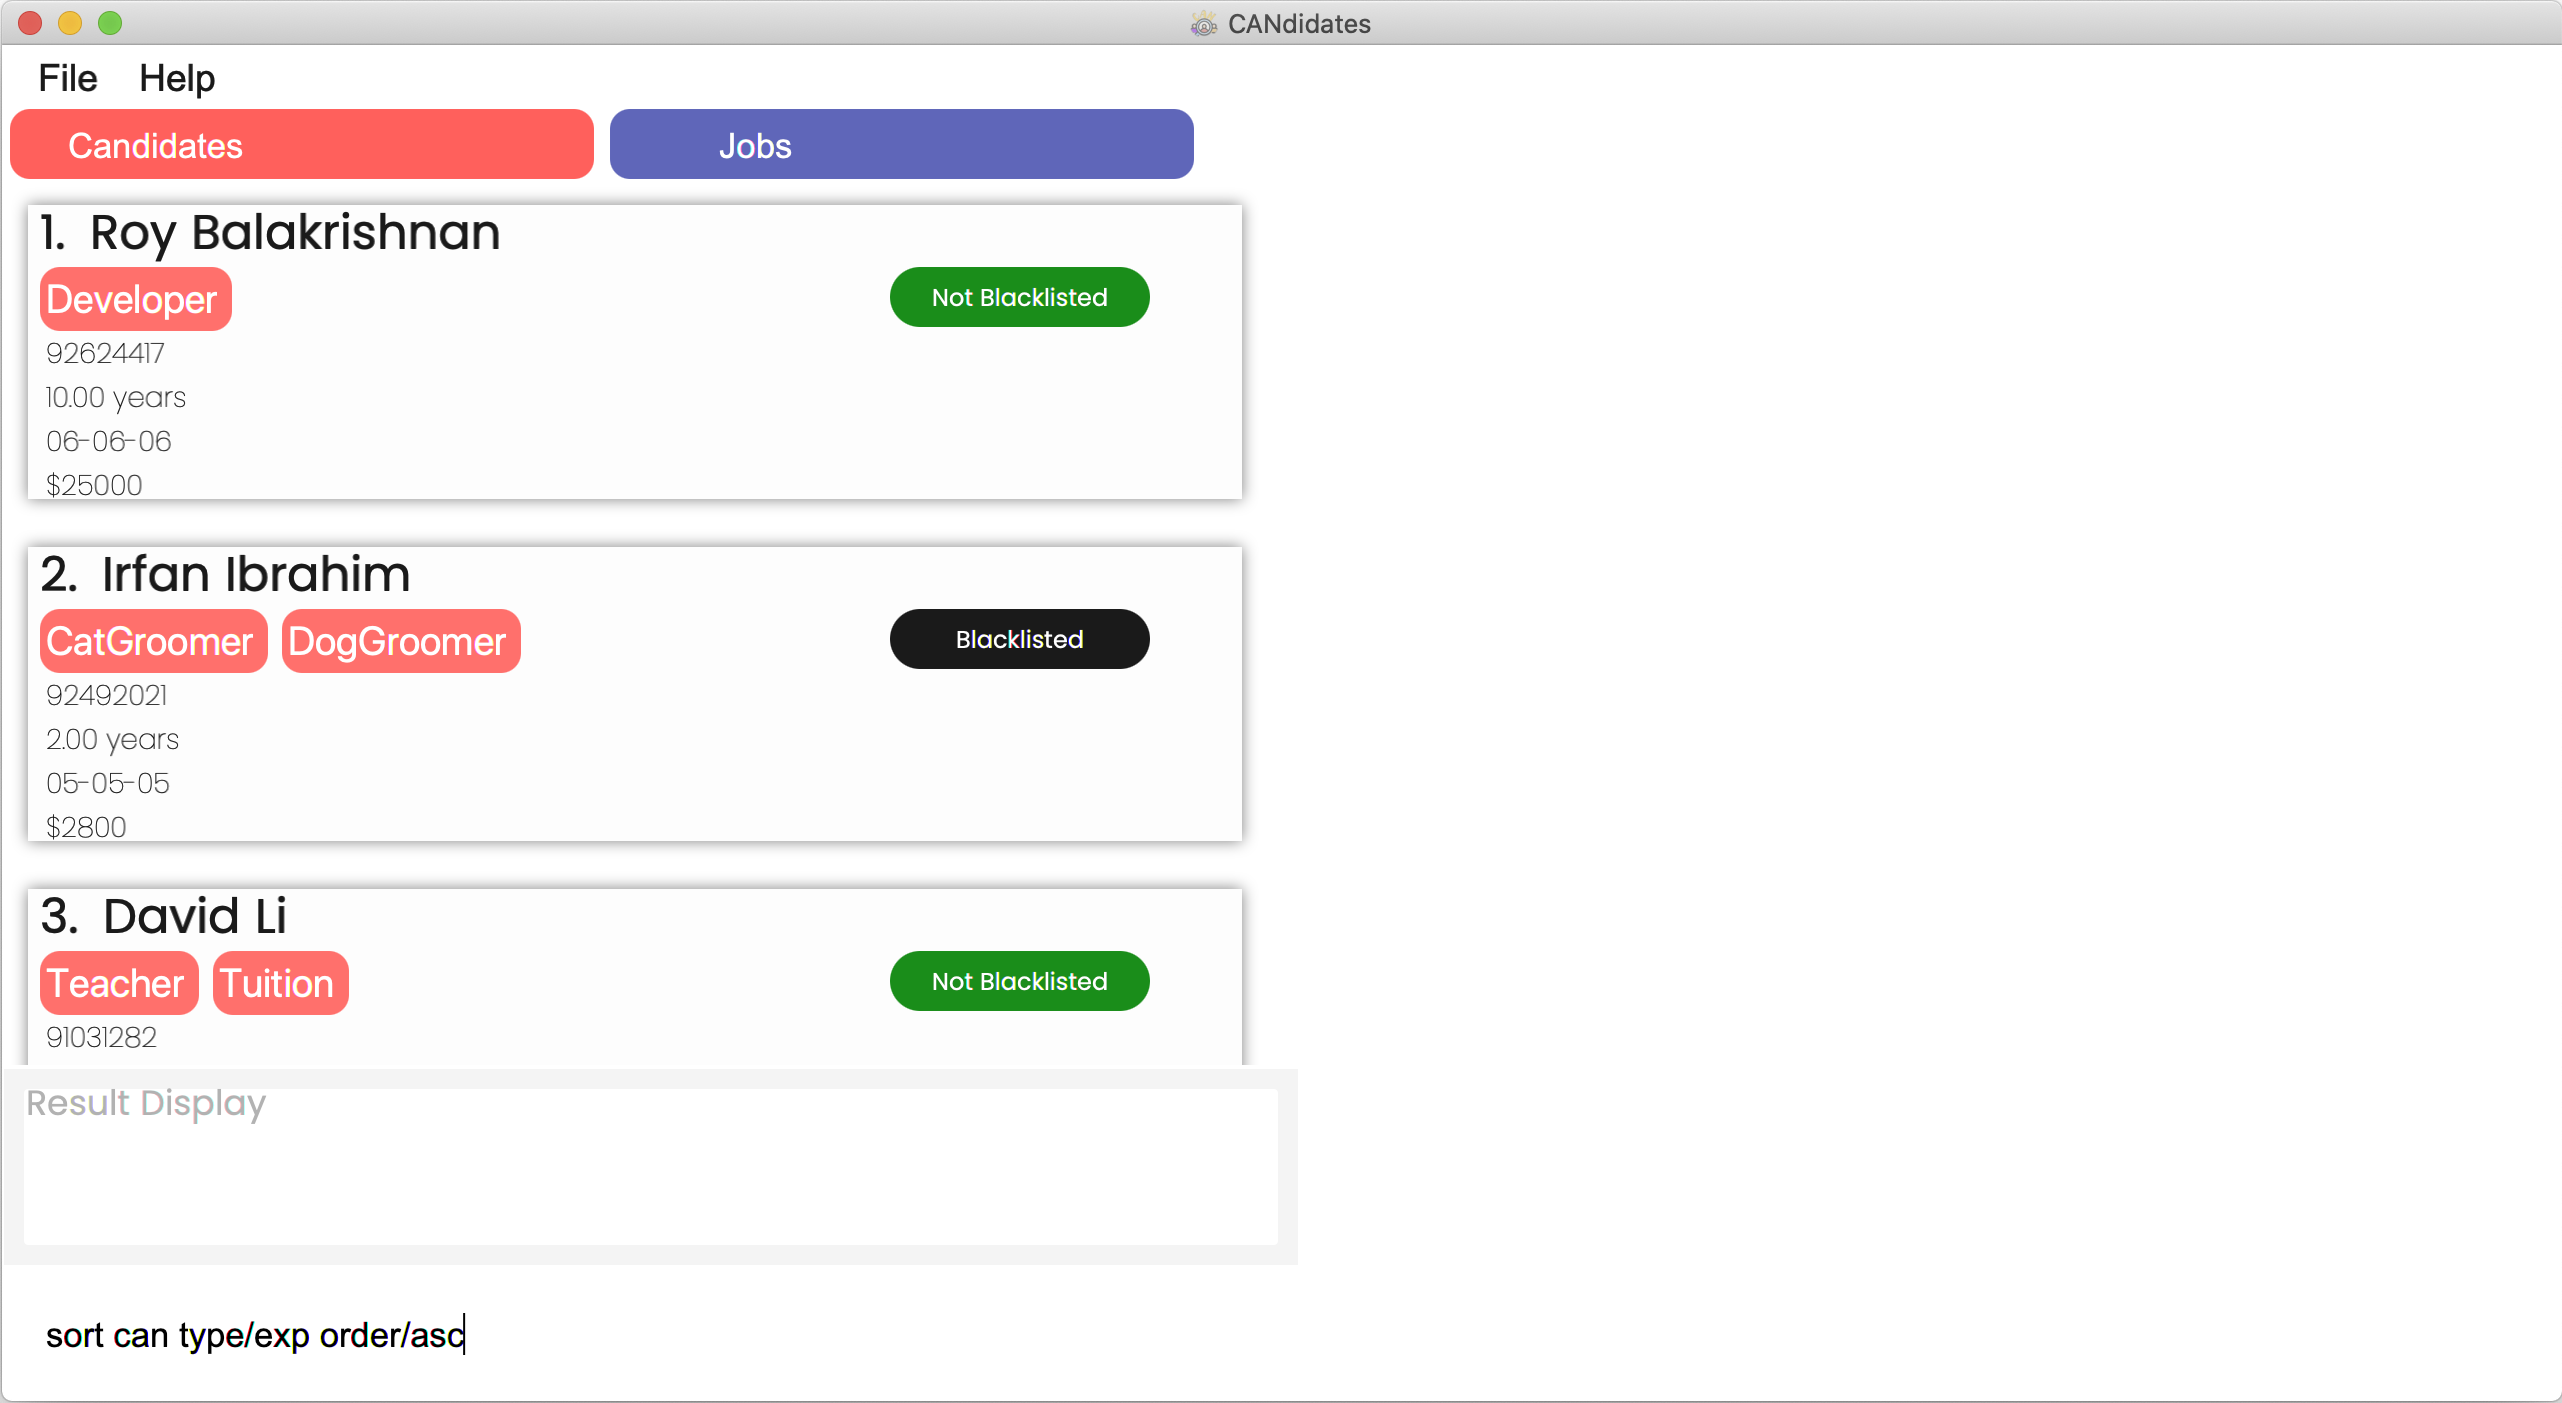
Step 2. The CANdidates application will show the following message in the result display.
Successfully sorted list of candidates by years of experience in ascending order.
Step 3. The application will show the sorted candidates list based on the sort condition given.
4.6 Deleting a candidate: delete can
Have you successfully found a job for a candidate and you no longer need to keep his/her details in CANdidates? To delete a particular candidate from the list, you can use the command below.
Format: delete can INDEX
Examples:
![]() To delete the candidate at index 1,
To delete the candidate at index 1,
delete can 1
![]() To delete the candidate at index 3,
To delete the candidate at index 3,
delete can 3
Step by Step:
Step 1. Ensure there is at least 1 candidate in the candidate list.
Type delete can 1 in the command box and press Enter.
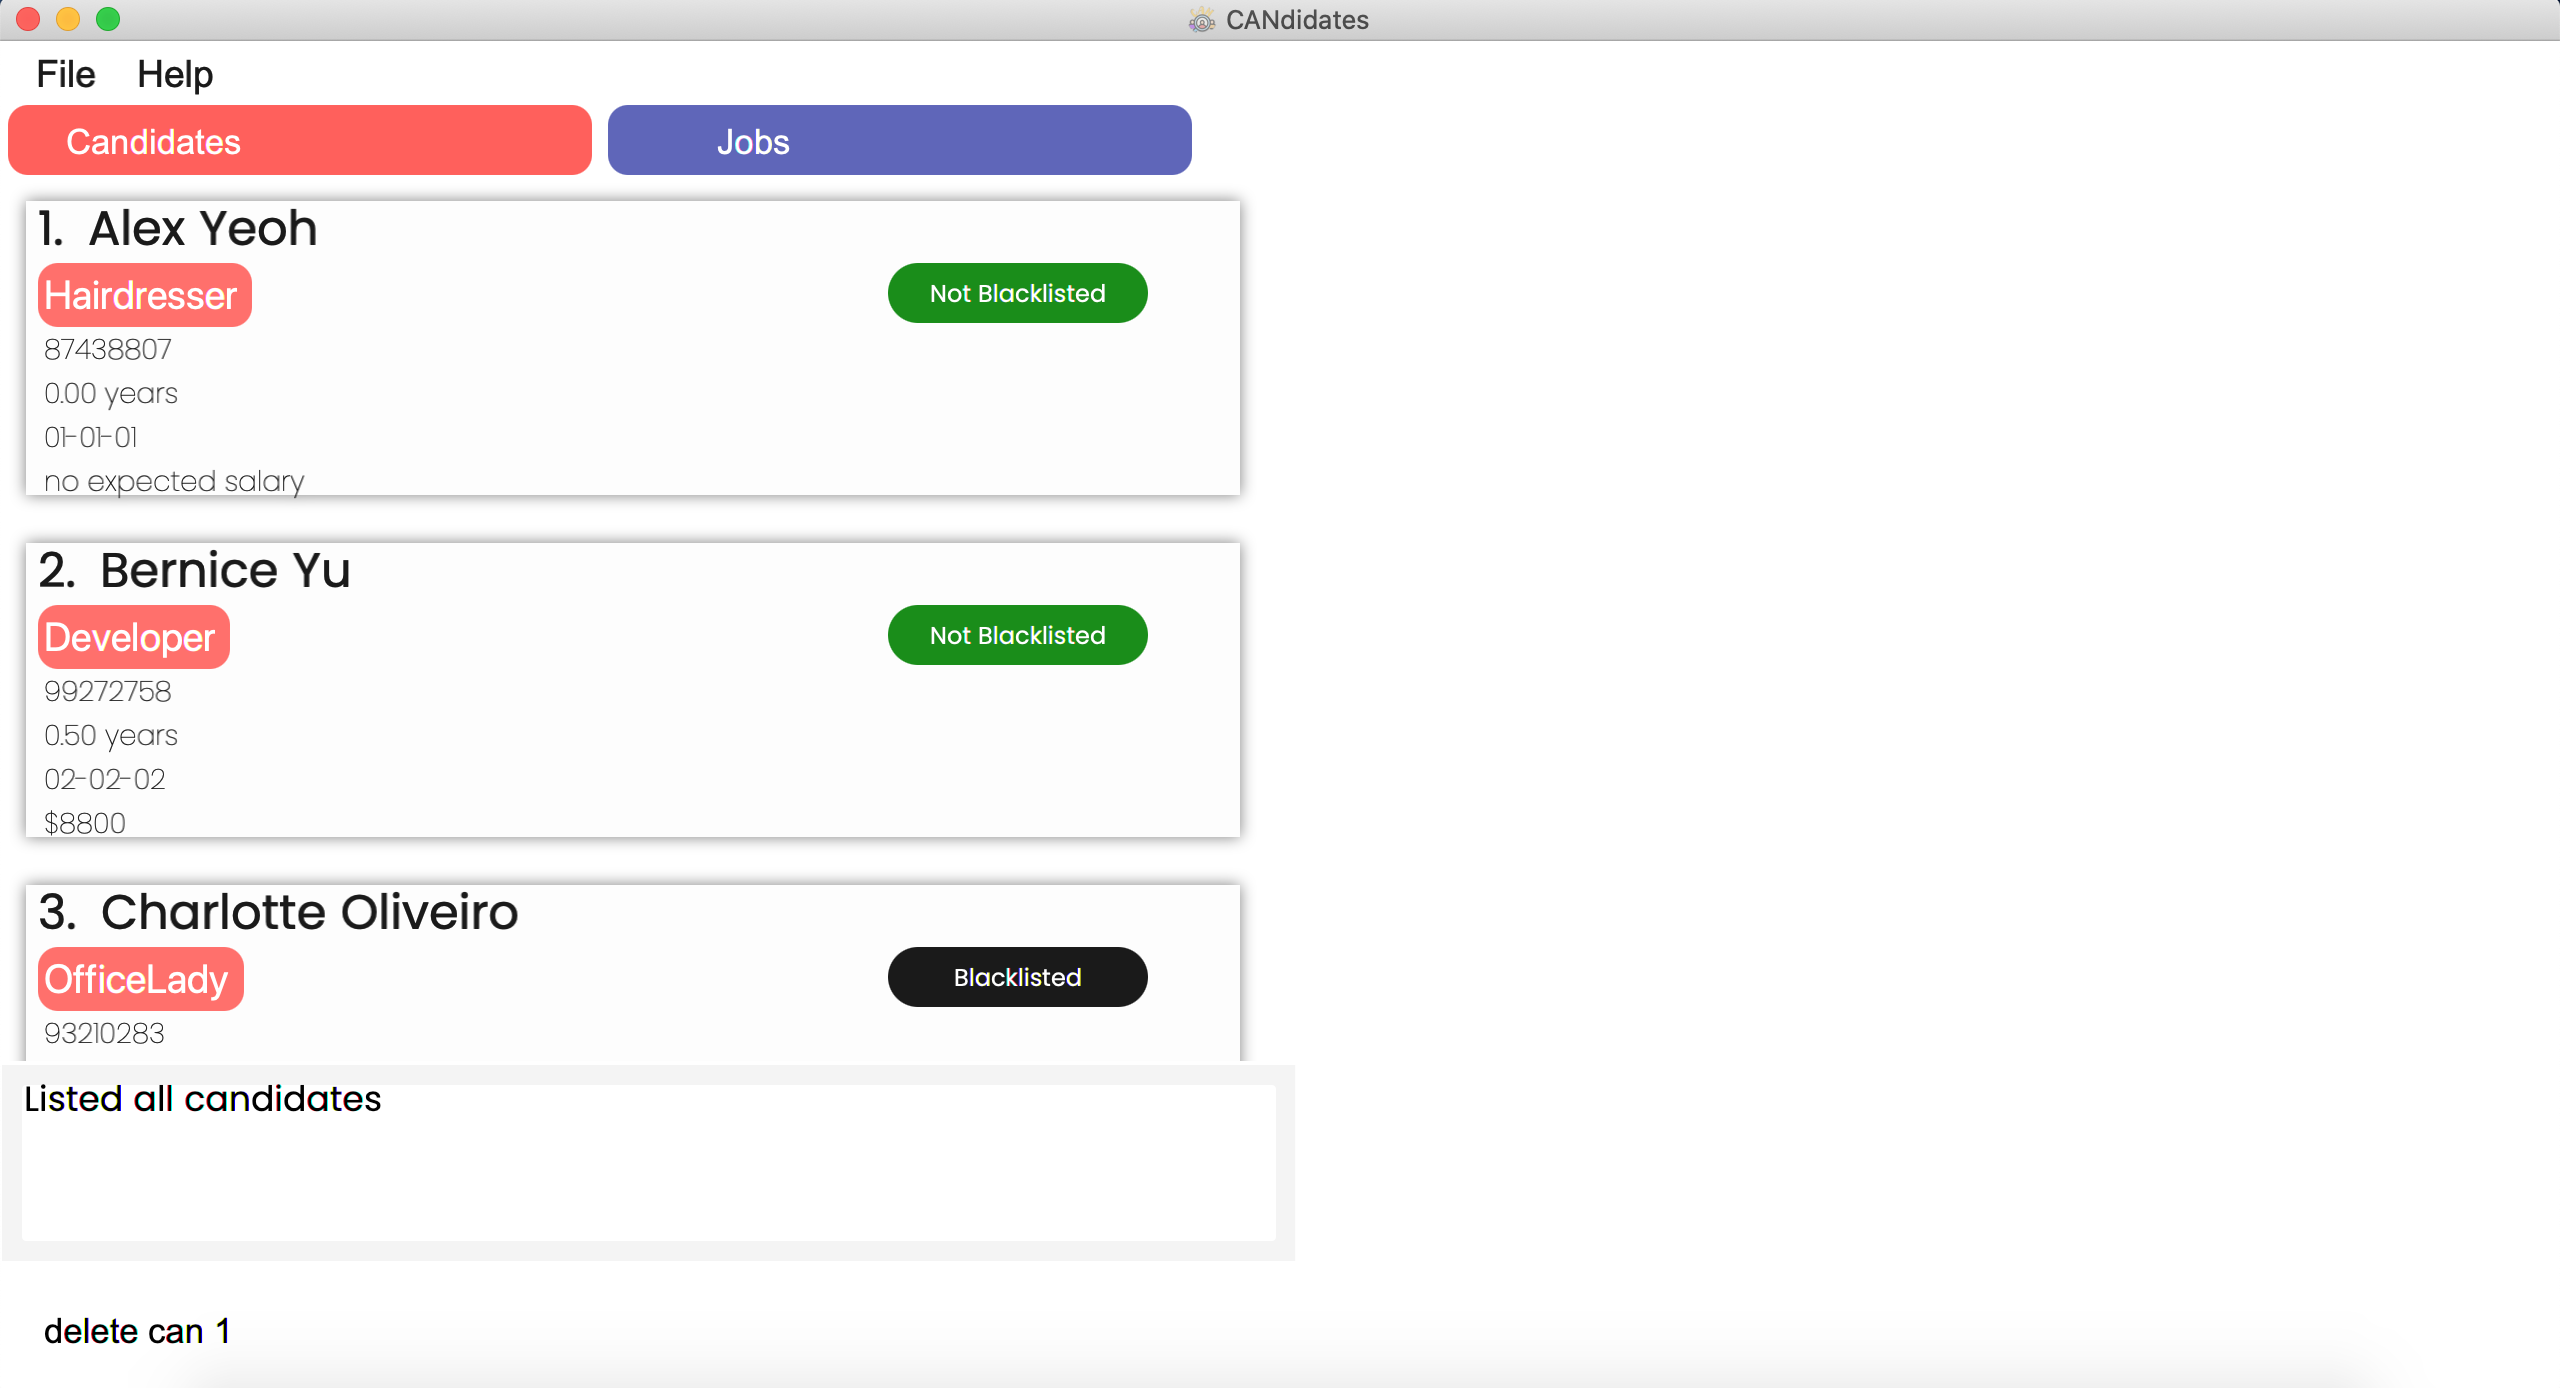
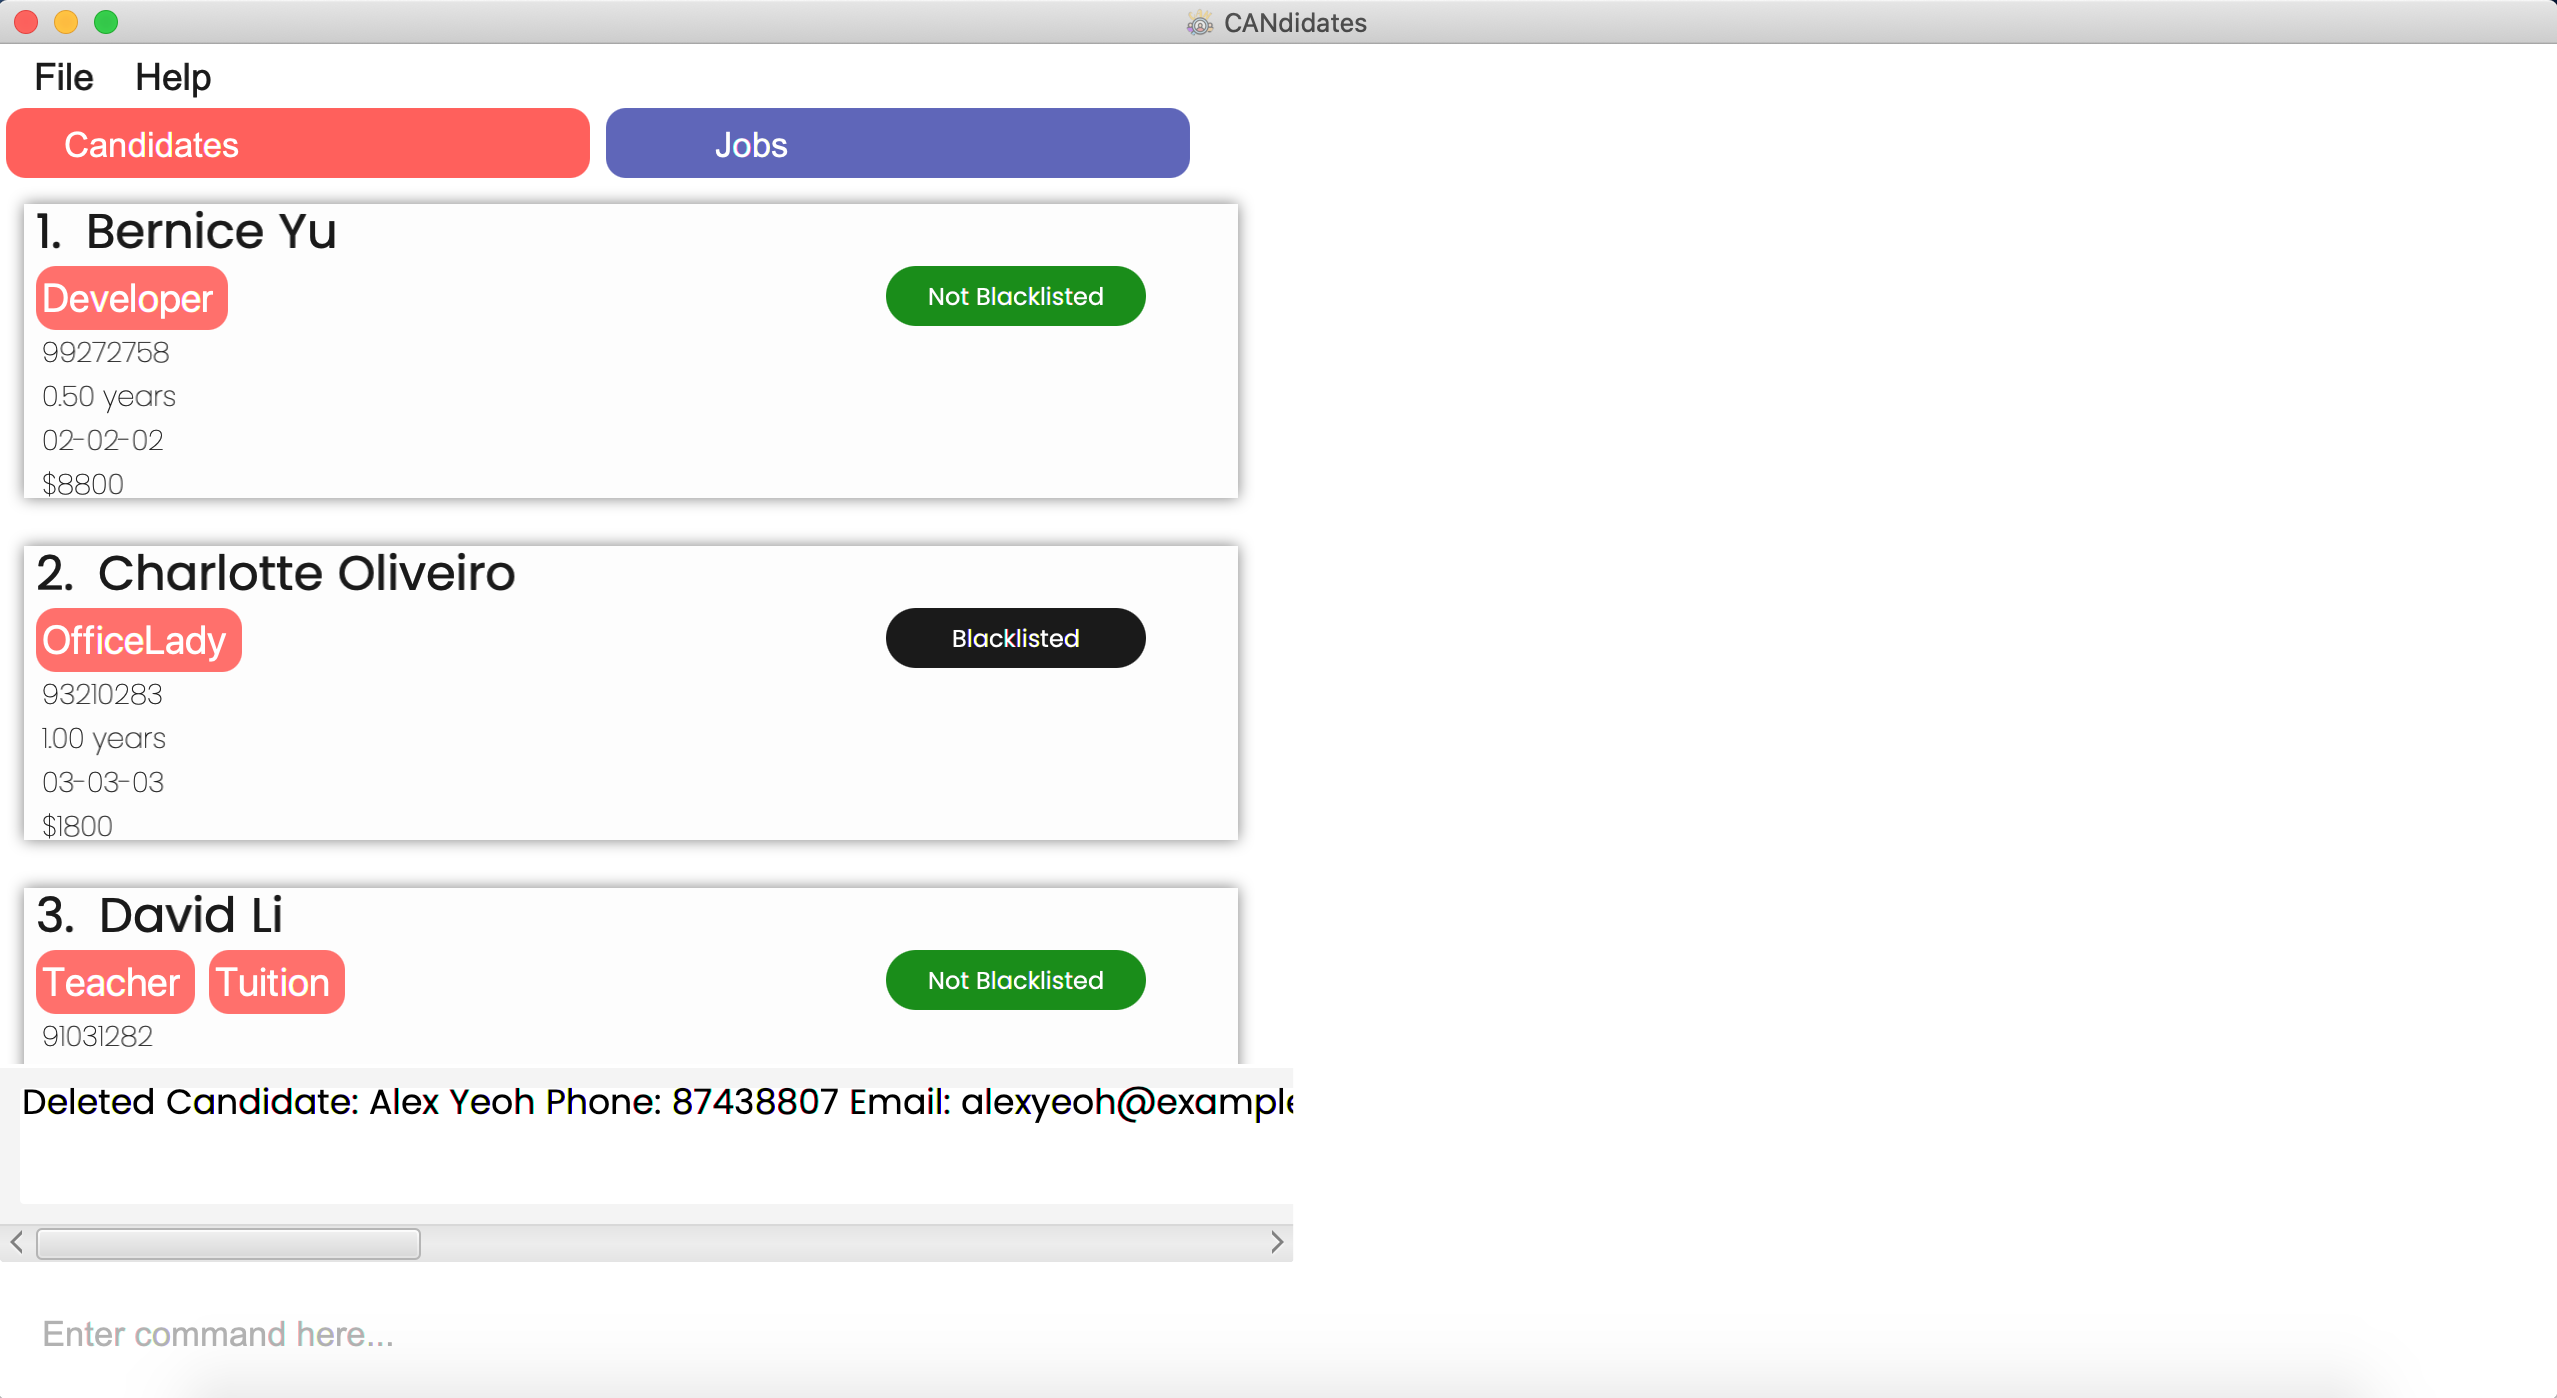
Step 2. The result of the command in the result display will depend on the specific candidate that is being deleted. The message that will be shown in the result display is
Deleted candidate: {Name} Phone: {Phone} Email: {Email} Experience: {Experience} Date of Application: {Date of application} Address: {Address} Link: {Link} Expected Salary: {Expected salary} Blacklisted: {Blacklist status} Tags: {Tags}
Step 3. The application will show the updated candidates list without the deleted candidate.
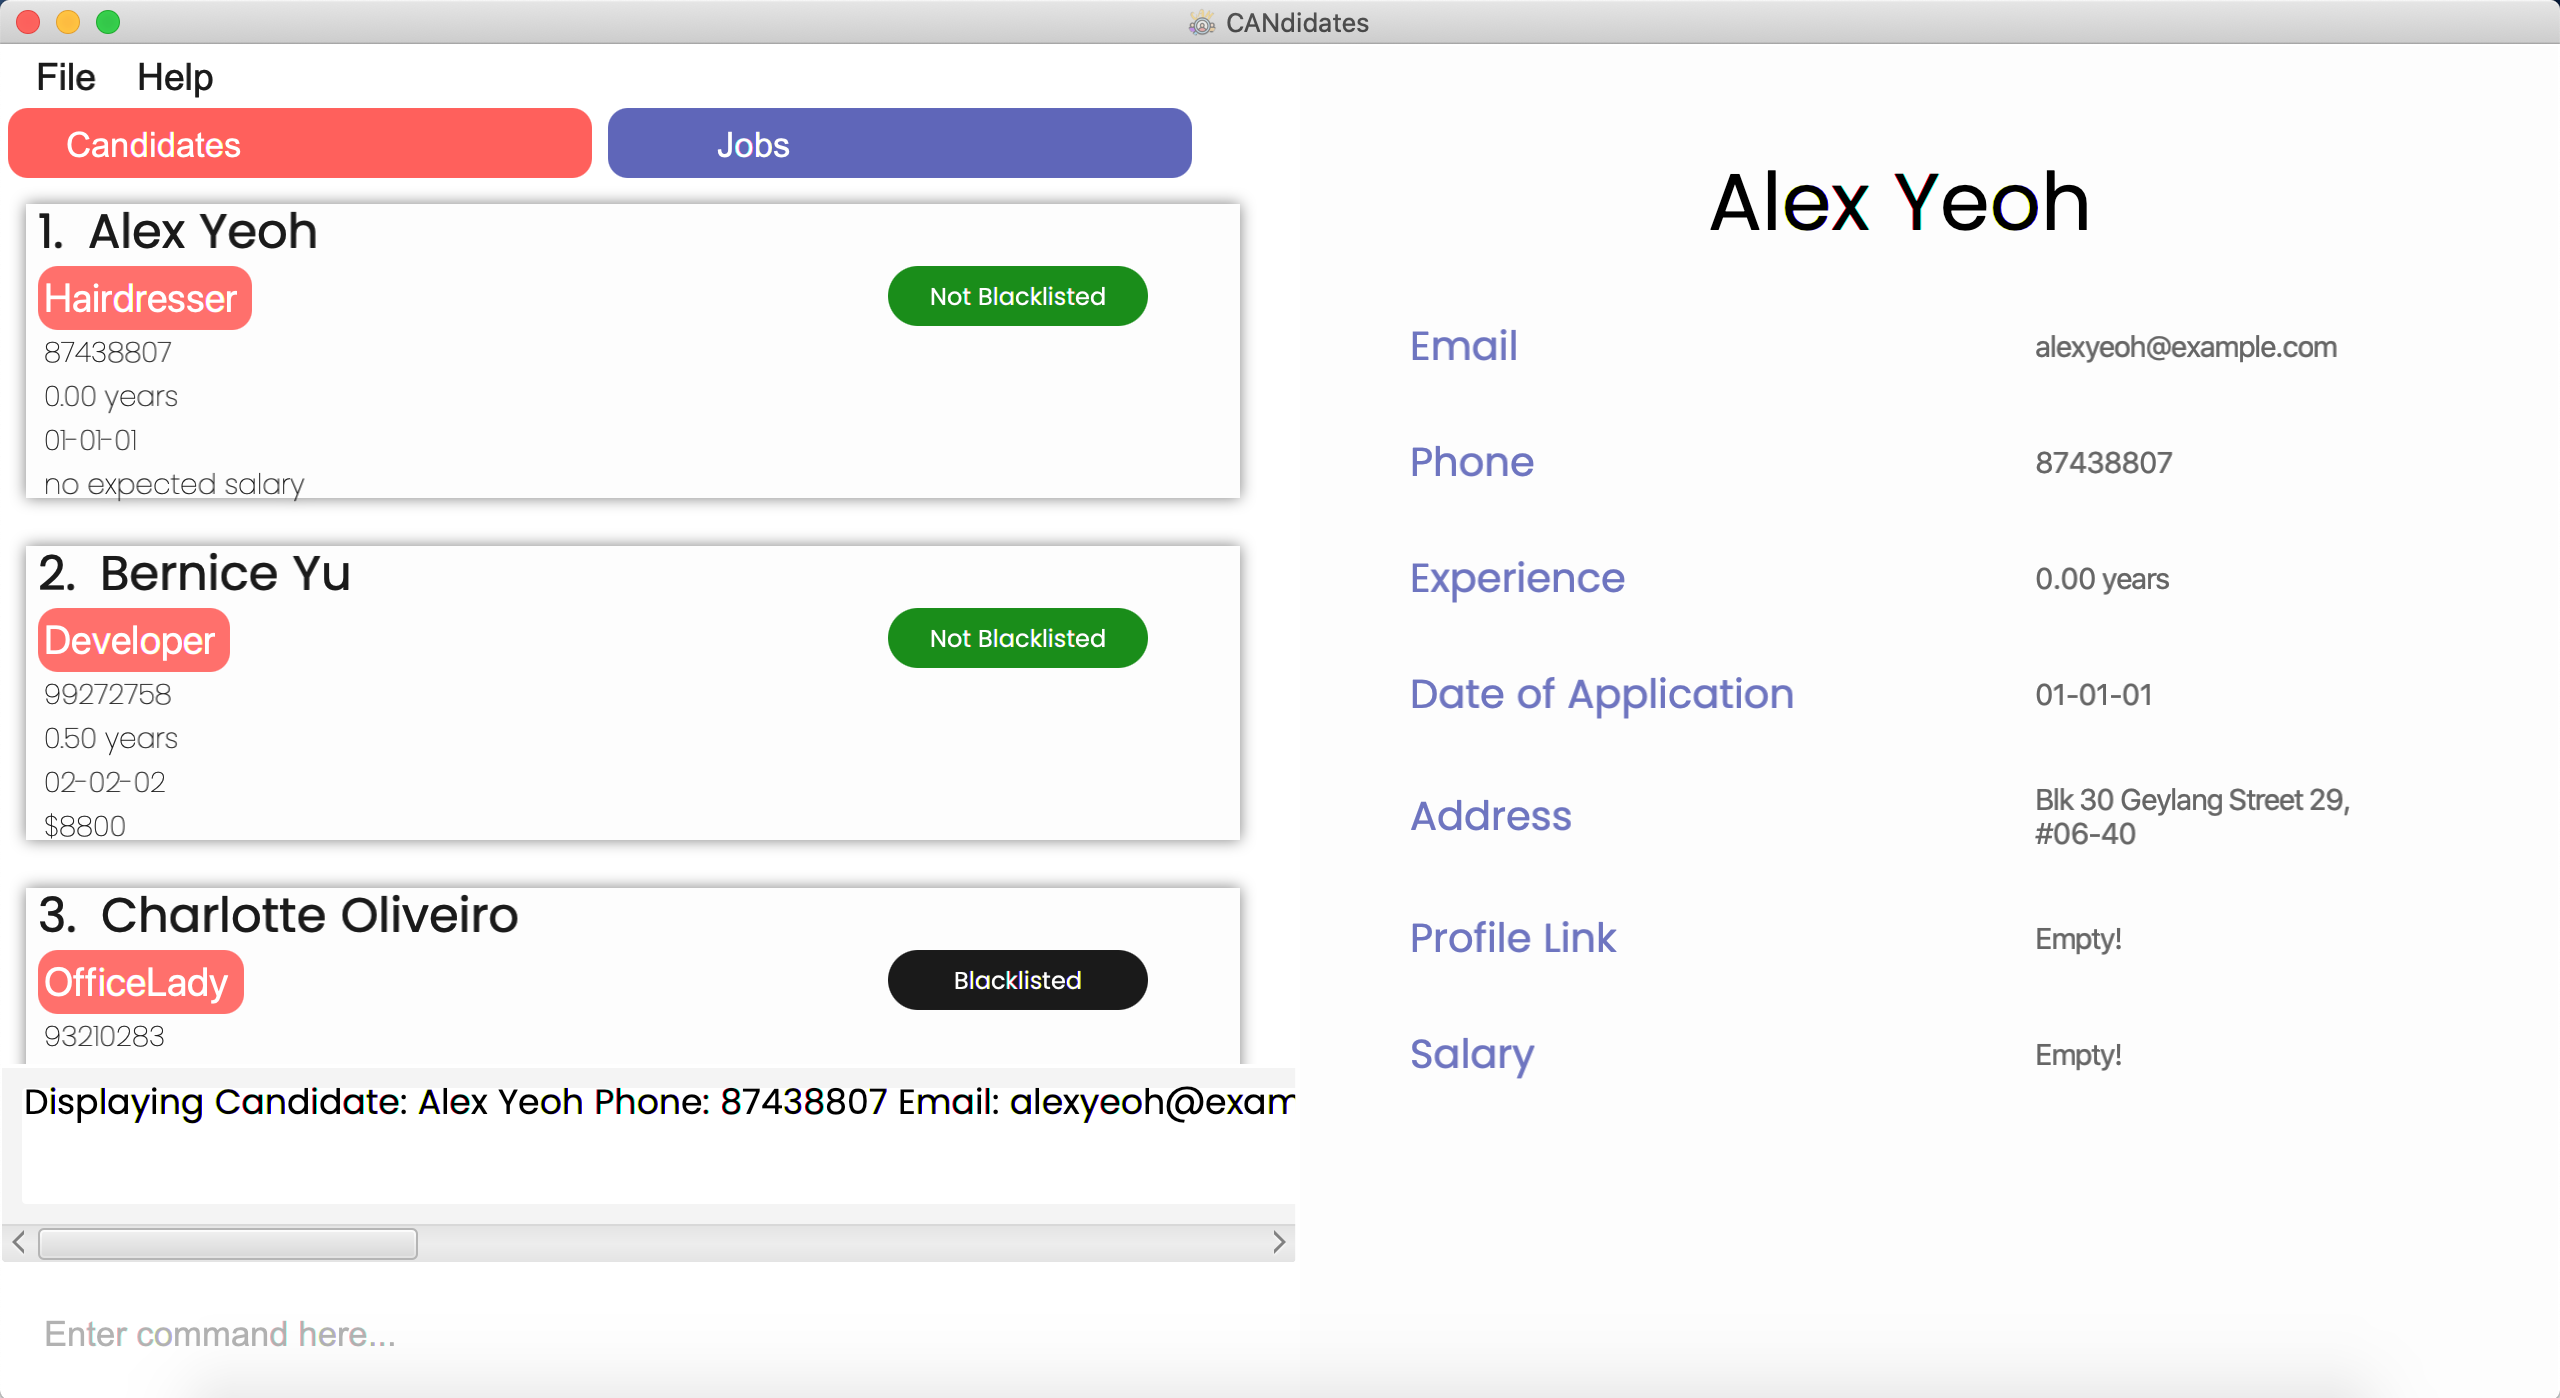
4.7 Viewing a candidate: view can
Want to view all the information of a particular candidate? CANdidates provides an easy way for you to do it! Simply utilise the command below to display all the information of a candidate on the display panel of the application!
Format view can INDEX
INDEX refers to the number beside the name of the candidate in the Main List. Thus INDEX cannot be a number lesser than the number beside the first candidate in the list or greater than the number beside the last candidate in the list.
Examples:
![]() To view the candidate at index 1,
To view the candidate at index 1,
view can 1
![]() To view the candidate at index 3,
To view the candidate at index 3,
view can 3
Step by Step:
Step 1. Type view can 1 in the command box and press Enter.
Step 2. The command result will depend on the candidate you have selected to display on the detailed panel. The CANdidates application will show the following message in the result display
Display Candidate: {Name} Phone: {Phone} Email: {Email} Experience: {Experience} Date of Application: {Date of application} Address: {Address} Link: {Link} Expected Salary: {Expected salary} Blacklisted: {Blacklist status} Tags: {Tags}
Step 3. All the information of the specified candidate would be displayed on the display panel.
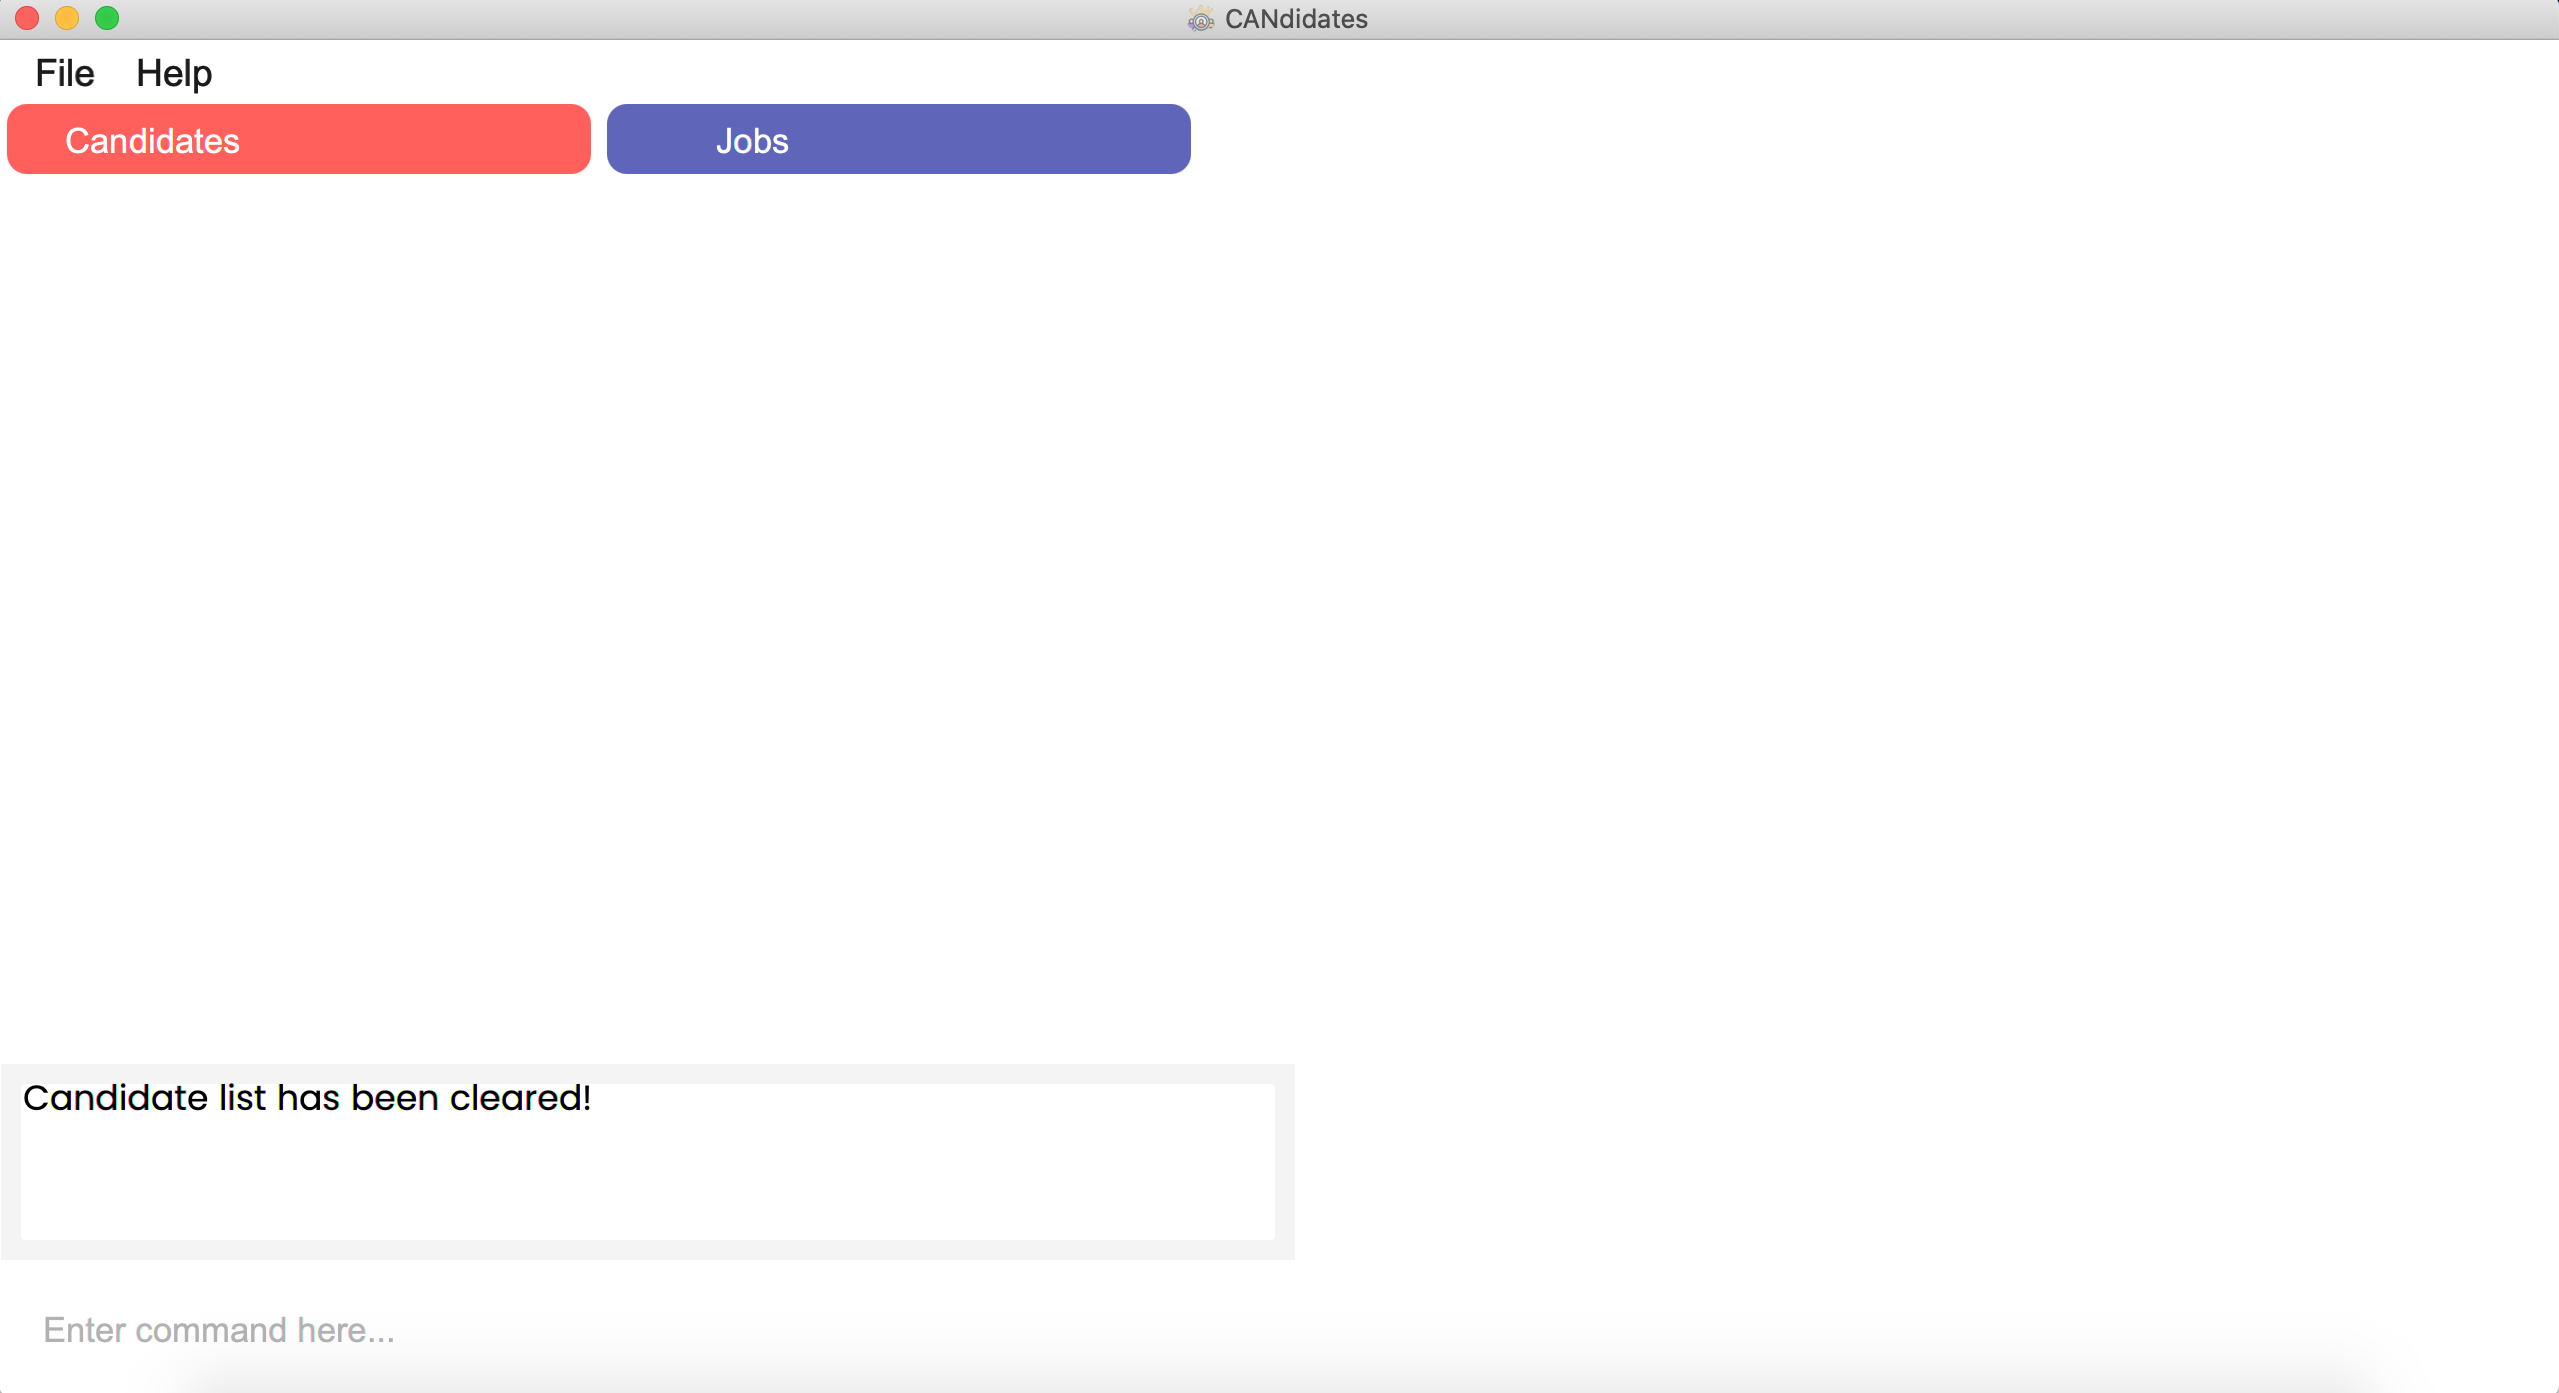
4.8 Clearing all candidate entries: clear can
Want to clear all the candidates in the list quickly without having to delete one by one? Simply use the command below!
Format: clear can
Step by Step:
Step 1. Type clear can in the command box and press Enter.

Step 2. The following message will be shown in the result display
Candidate list has been cleared!
Step 3. The application will show the updated candidate list which is empty.
5. Features for Jobs
This section provides you with features to handle all information of job listings for your utmost convenience!
Refer to Section 4. Features for Candidates for features specific to candidates or to Section 6. Other Features for more general features.
5.1 Adding a job listing: add job
If you are informed of a job opening and you would like to add it in CANdidates, you can add it into the list using the command below.
Format: add job n/JOB_TITLE c/COMPANY_NAME p/PHONE_NUMBER e/EMAIL a/ADDRESS v/VACANCY [pr/PRIORITY] [t/JOB_DESCRIPTION]…
PRIORITY is not specified, it will be set to moderate by default.
Examples:
![]() To add a job with job title Waiter, company name Amelia’s Eating House, phone 98765432, email ameliatjy@example.com, address Amelia Street, Block 123, #01-01, priority low, job description MultipleLocations and with 1 vacancy,
To add a job with job title Waiter, company name Amelia’s Eating House, phone 98765432, email ameliatjy@example.com, address Amelia Street, Block 123, #01-01, priority low, job description MultipleLocations and with 1 vacancy,
add job n/Waiter c/Amelia’s Eating House p/98765432 e/ameliatjy@example.com
a/Amelia Street, Block 123, #01-01 pr/low t/MultipleLocations v/1
![]() To add a job with job title Delivery Man, company name FedEx, email fedex@example.com, address Joo Koon,phone 93333222, priority high, job descriptions delivery and west, with 10 vacancies,
To add a job with job title Delivery Man, company name FedEx, email fedex@example.com, address Joo Koon,phone 93333222, priority high, job descriptions delivery and west, with 10 vacancies,
add job n/Delivery Man c/FedEx e/fedex@example.com a/Joo Koon p/93333222
pr/high t/delivery t/west v/10
Step by Step:
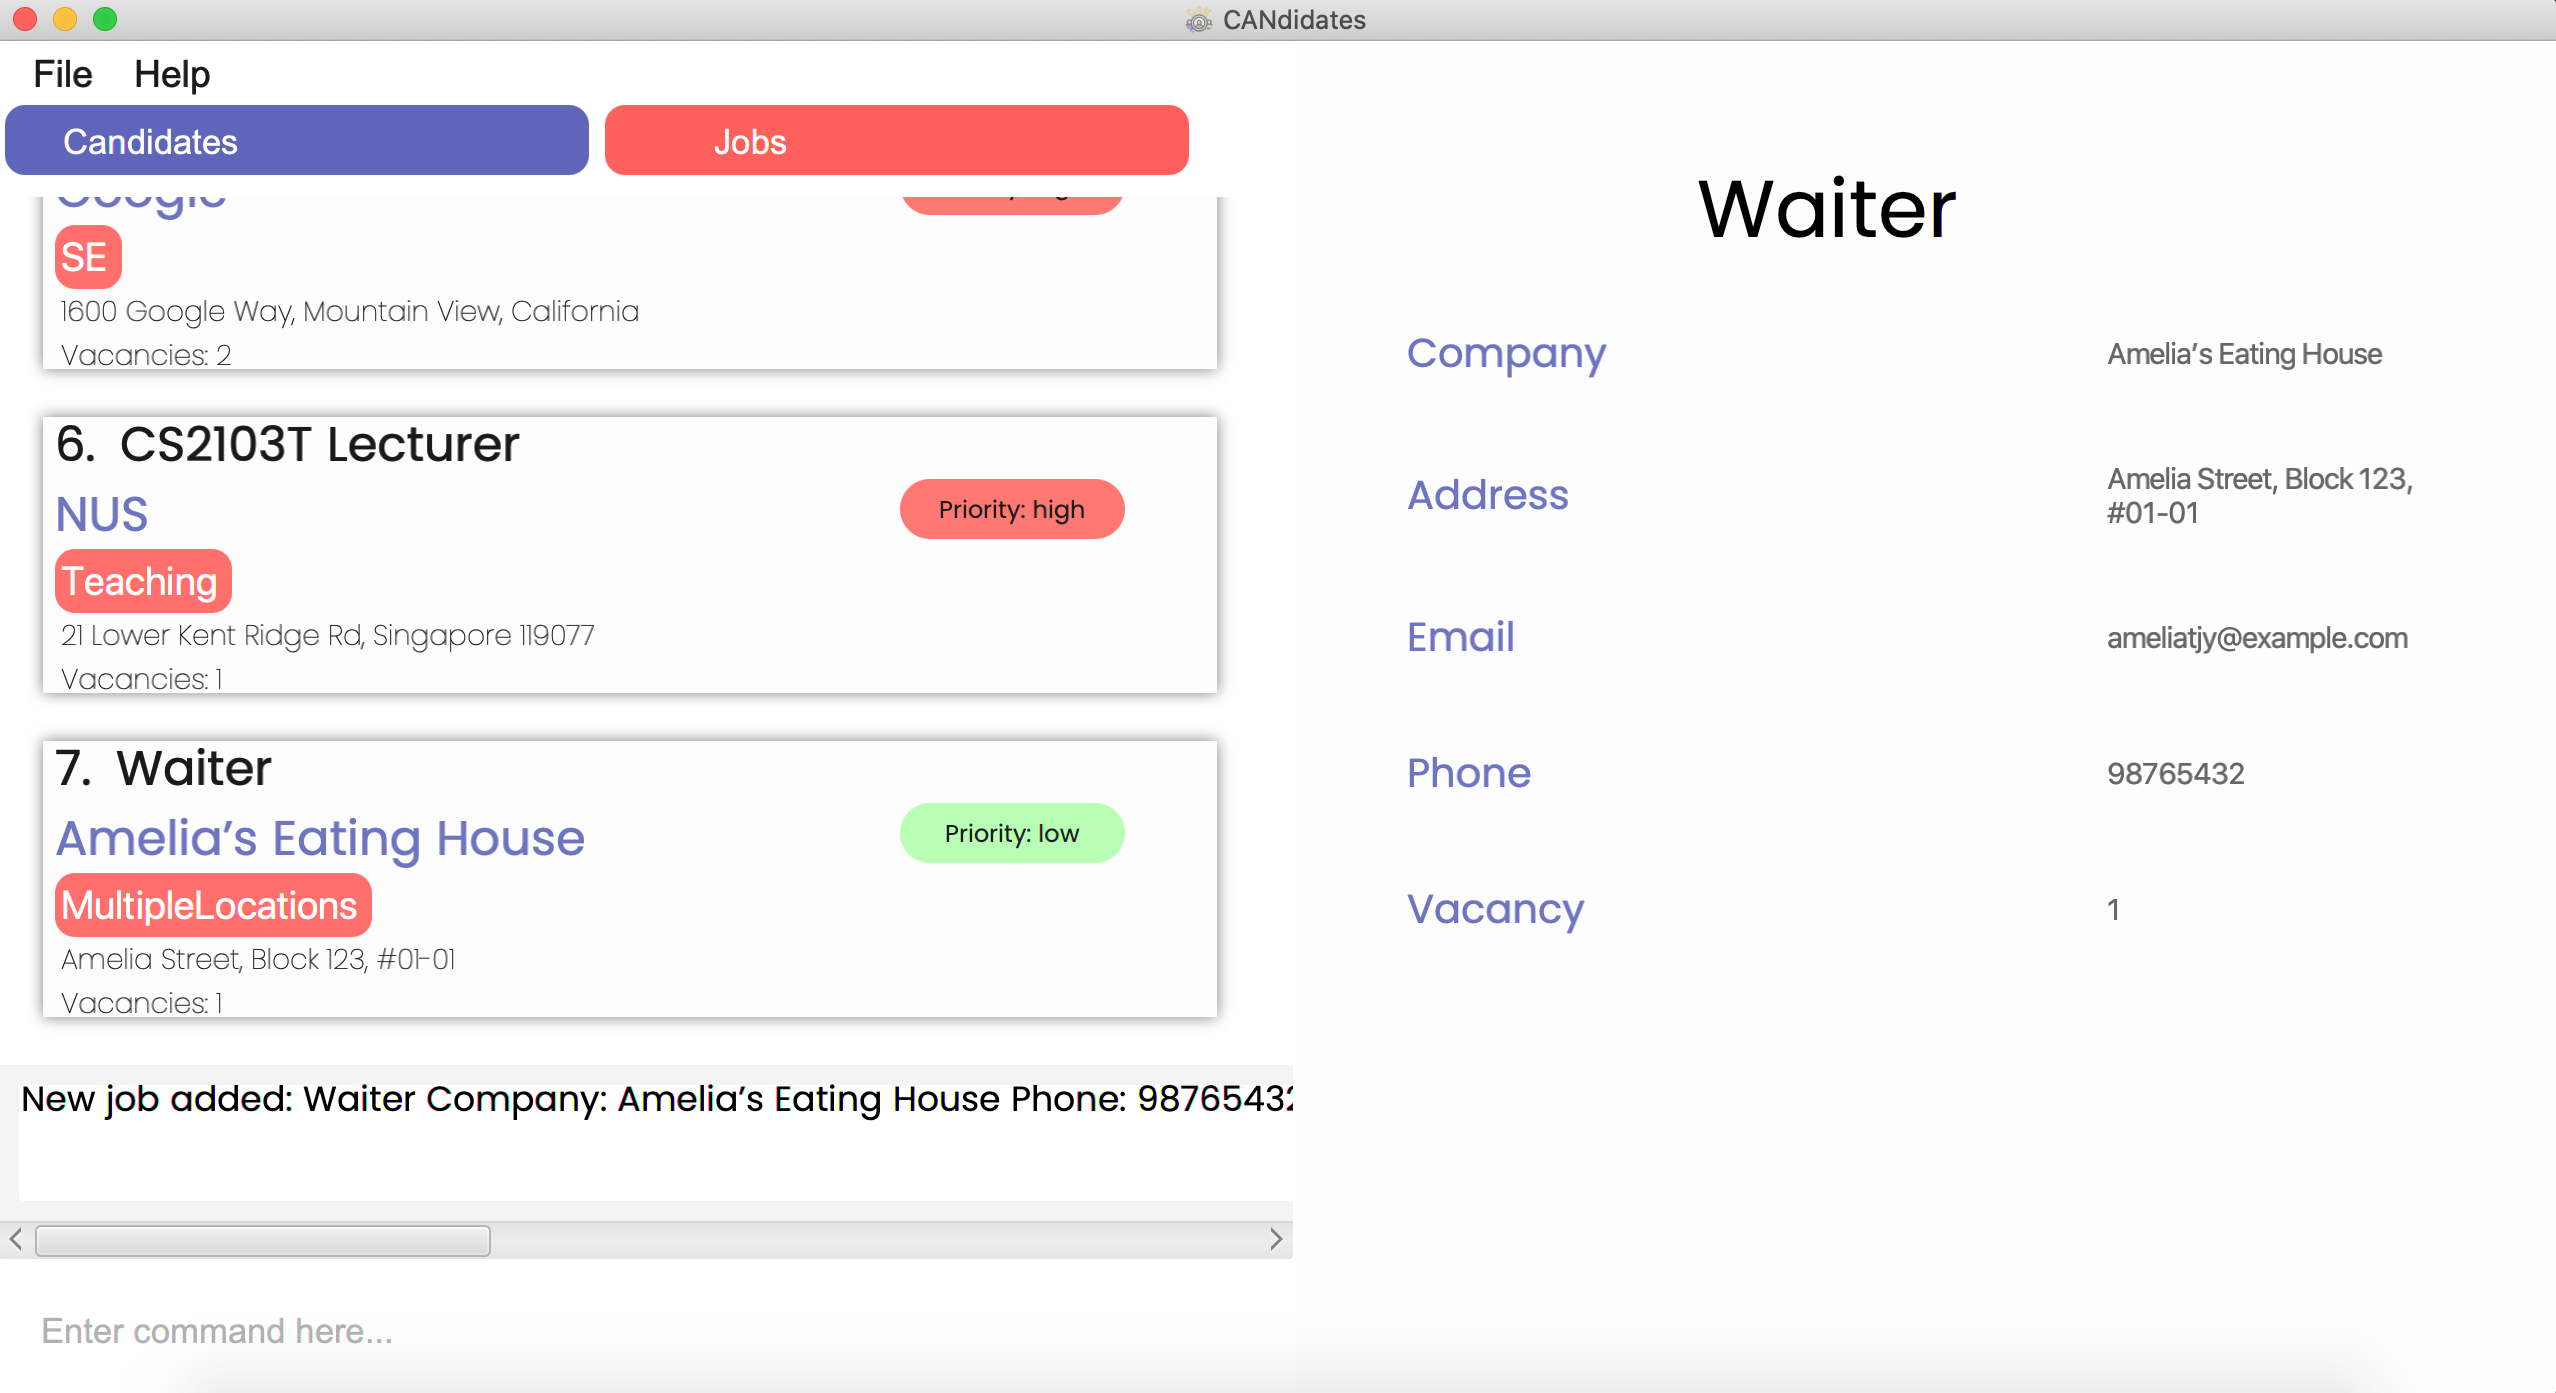
Step 1. Type add job n/Waiter c/Amelia’s Eating House p/98765432 e/ameliatjy@example.com a/Amelia Street, Block 123, #01-01 pr/low t/MultipleLocations v/1 in the command box and press Enter.
Step 2. The CANdidates application will show the following message in the result display.
New job added: Waiter Company: Amelia’s Eating House Phone: 98765432 Email: ameliatjy@example.com Address: Amelia Street, Block 123, #01-01 Priority: low Vacancy: 1 Tags: [MultipleLocations]
Step 3. The application will show the updated job listings with the newly added job in the main list.
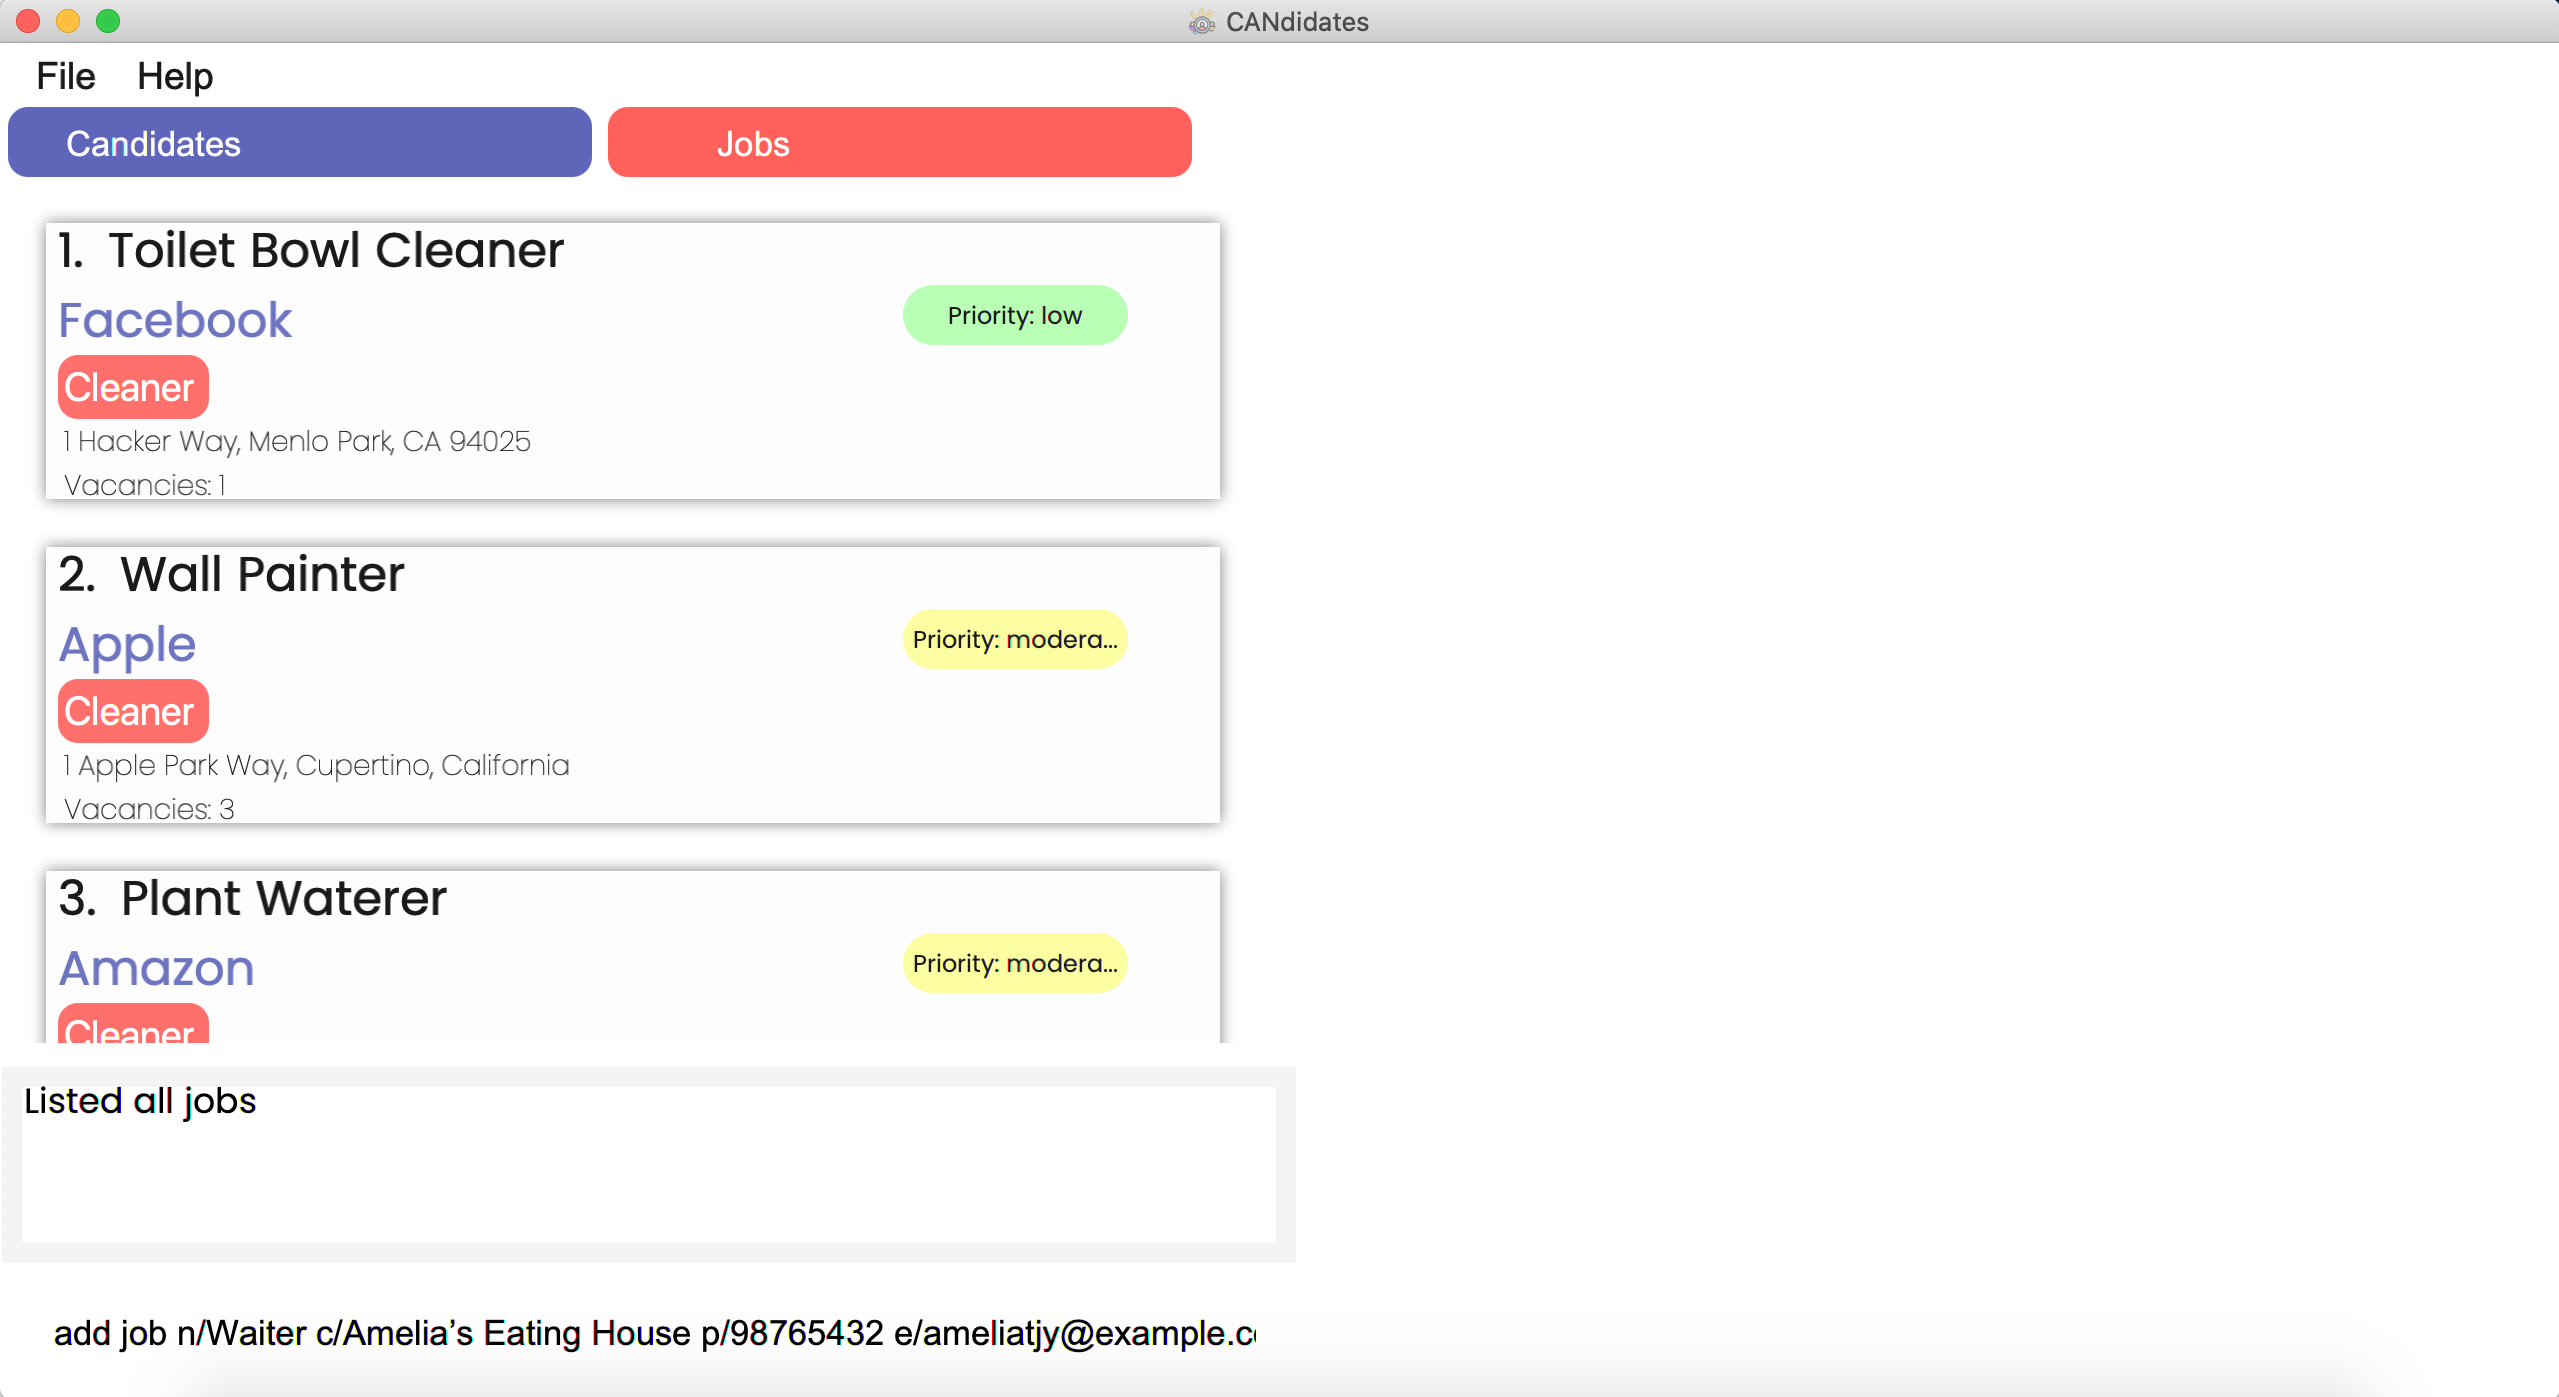
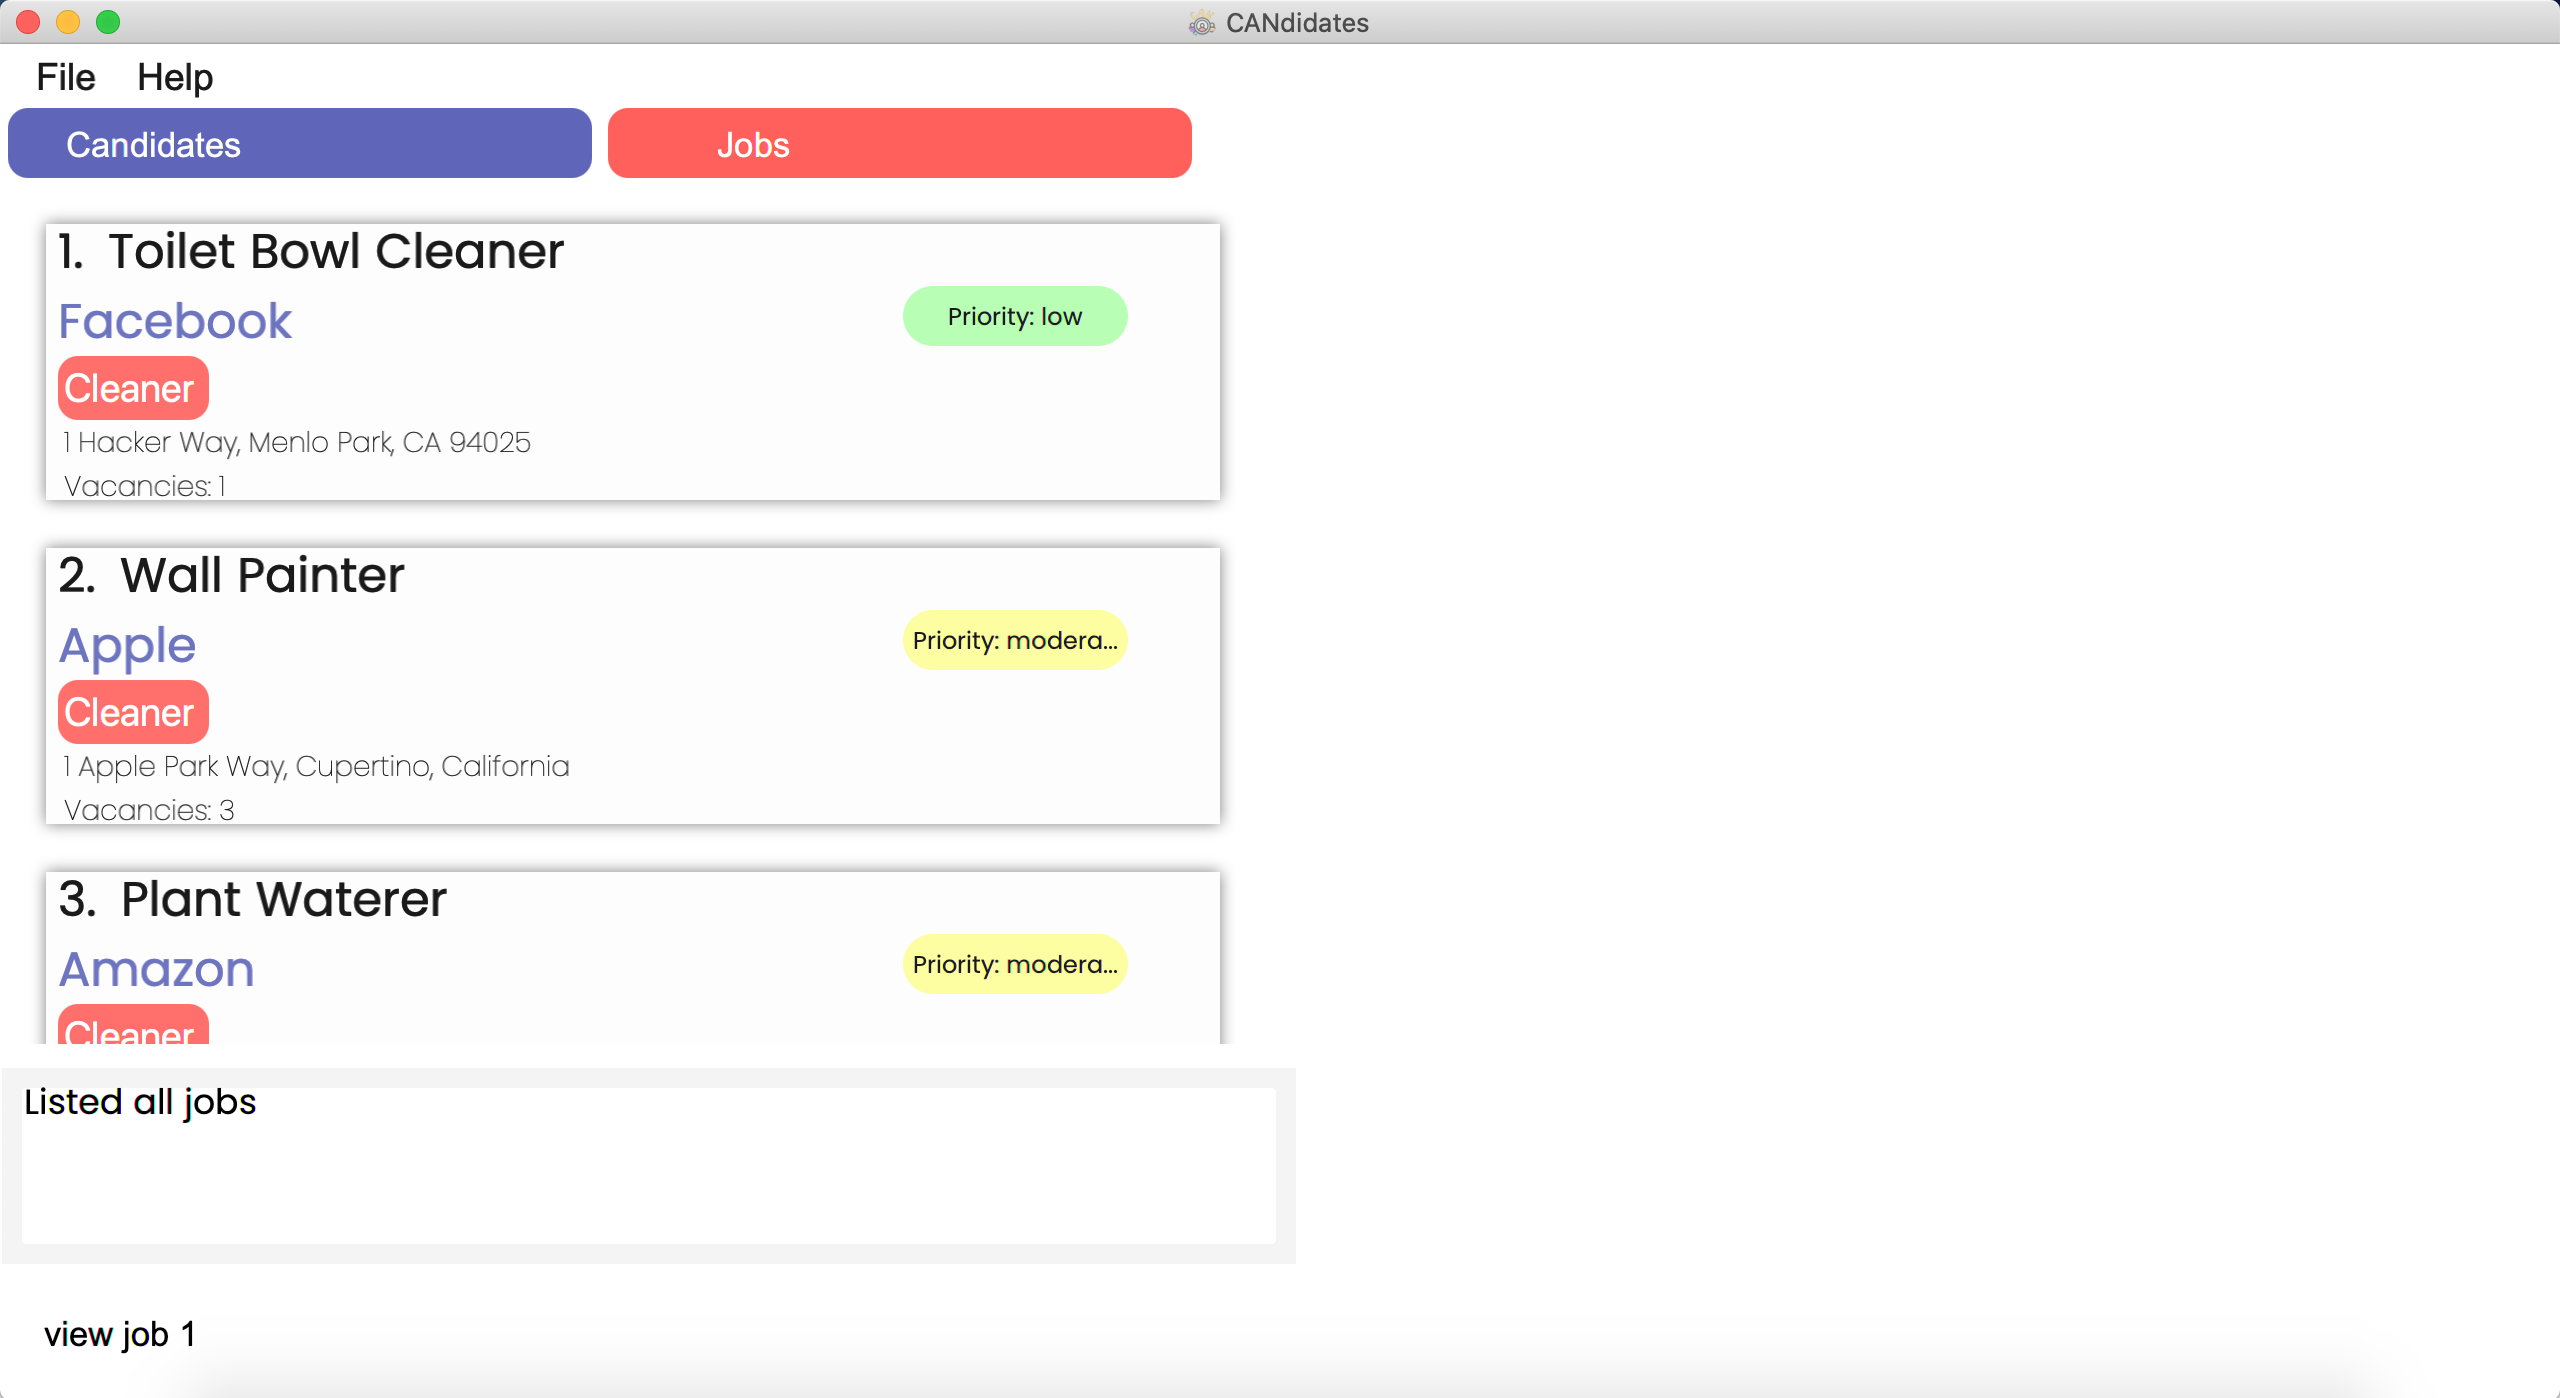
5.2 Listing all jobs: list job
To accurately reflect the latest changes of jobs in the application, you can refresh the job listings using the format below.
Format: list job
find job command to show the full list of job listings again.
5.3 Editing a job: edit job
If you would like to edit the details of a particular job, you can use the command below.
Format: edit job INDEX [n/JOB_TITLE] [c/COMPANY_NAME] [p/PHONE_NUMBER] [e/EMAIL] [a/ADDRESS] [v/VACANCY] [pr/PRIORITY] [t/JOB_DESCRIPTION]…
Examples:
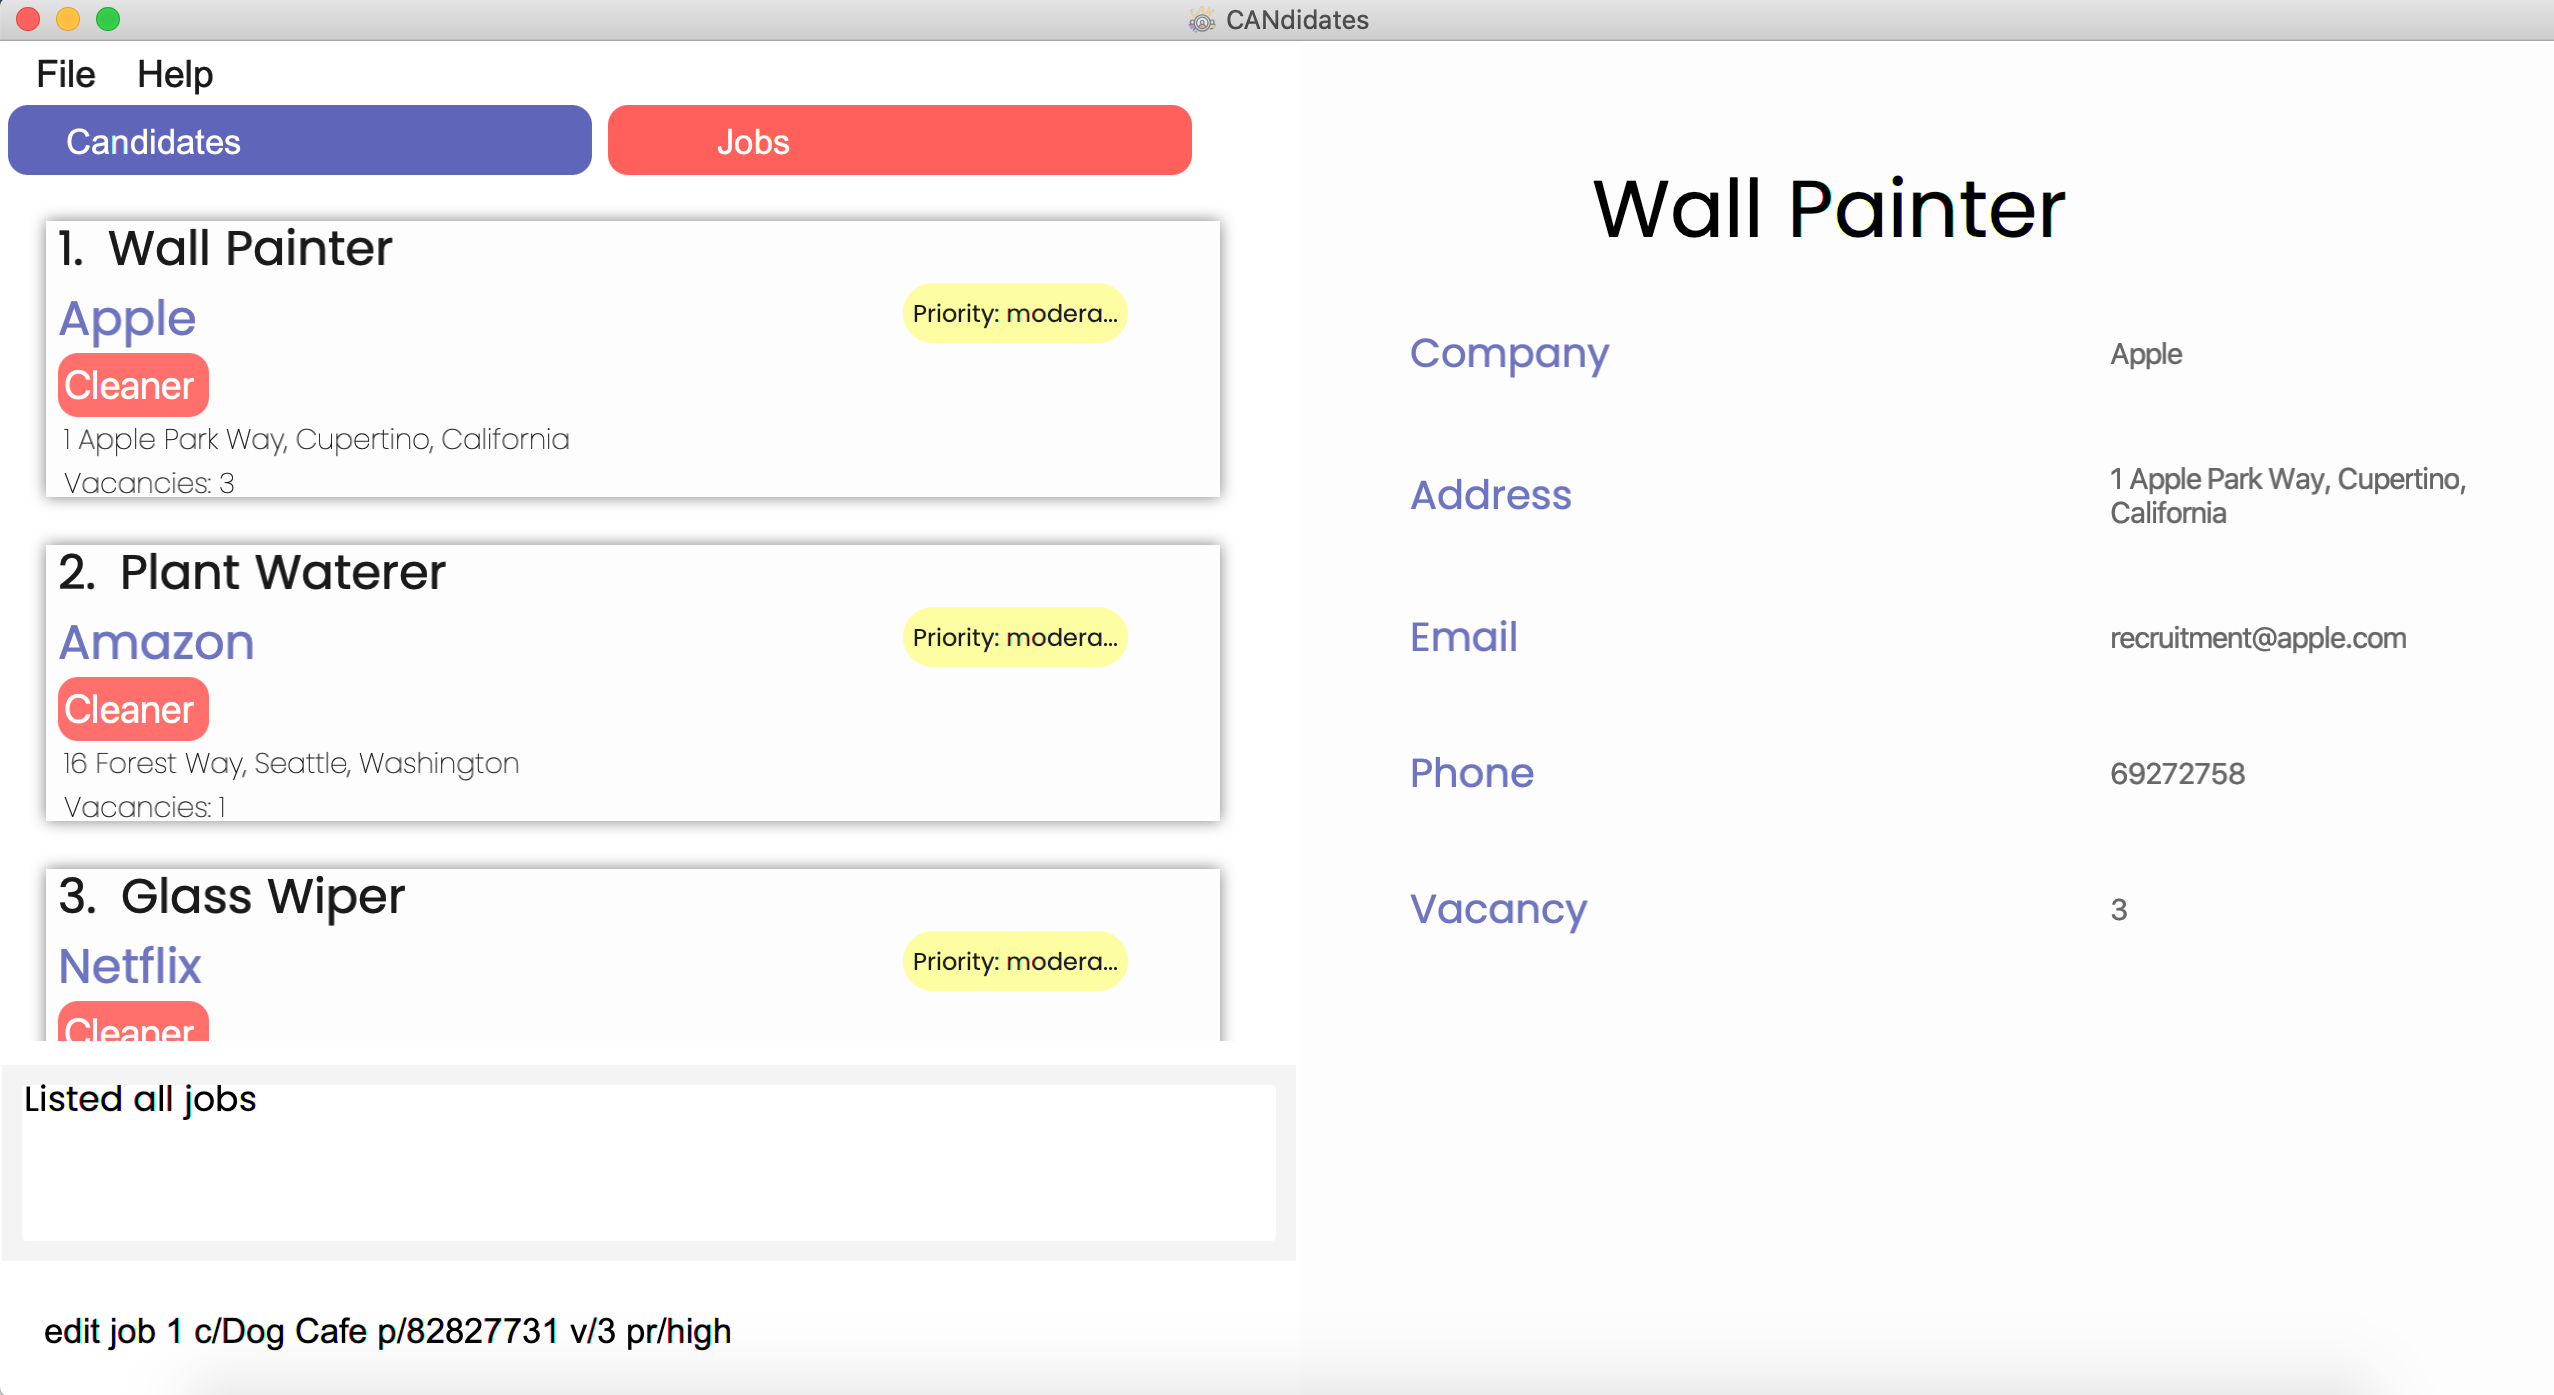
![]() To edit the 1st job’s company name, phone number, vacancy and priority to be Dog Cafe, 82827731, 3 and high respectively,
To edit the 1st job’s company name, phone number, vacancy and priority to be Dog Cafe, 82827731, 3 and high respectively,
edit job 1 c/Dog Cafe p/82827731 v/3 pr/high
![]() To edit the 3rd job and clear existing job descriptions,
To edit the 3rd job and clear existing job descriptions,
edit job 3 t/
Step by Step:
Step 1. Ensure there is at least 1 job in the jobs list.
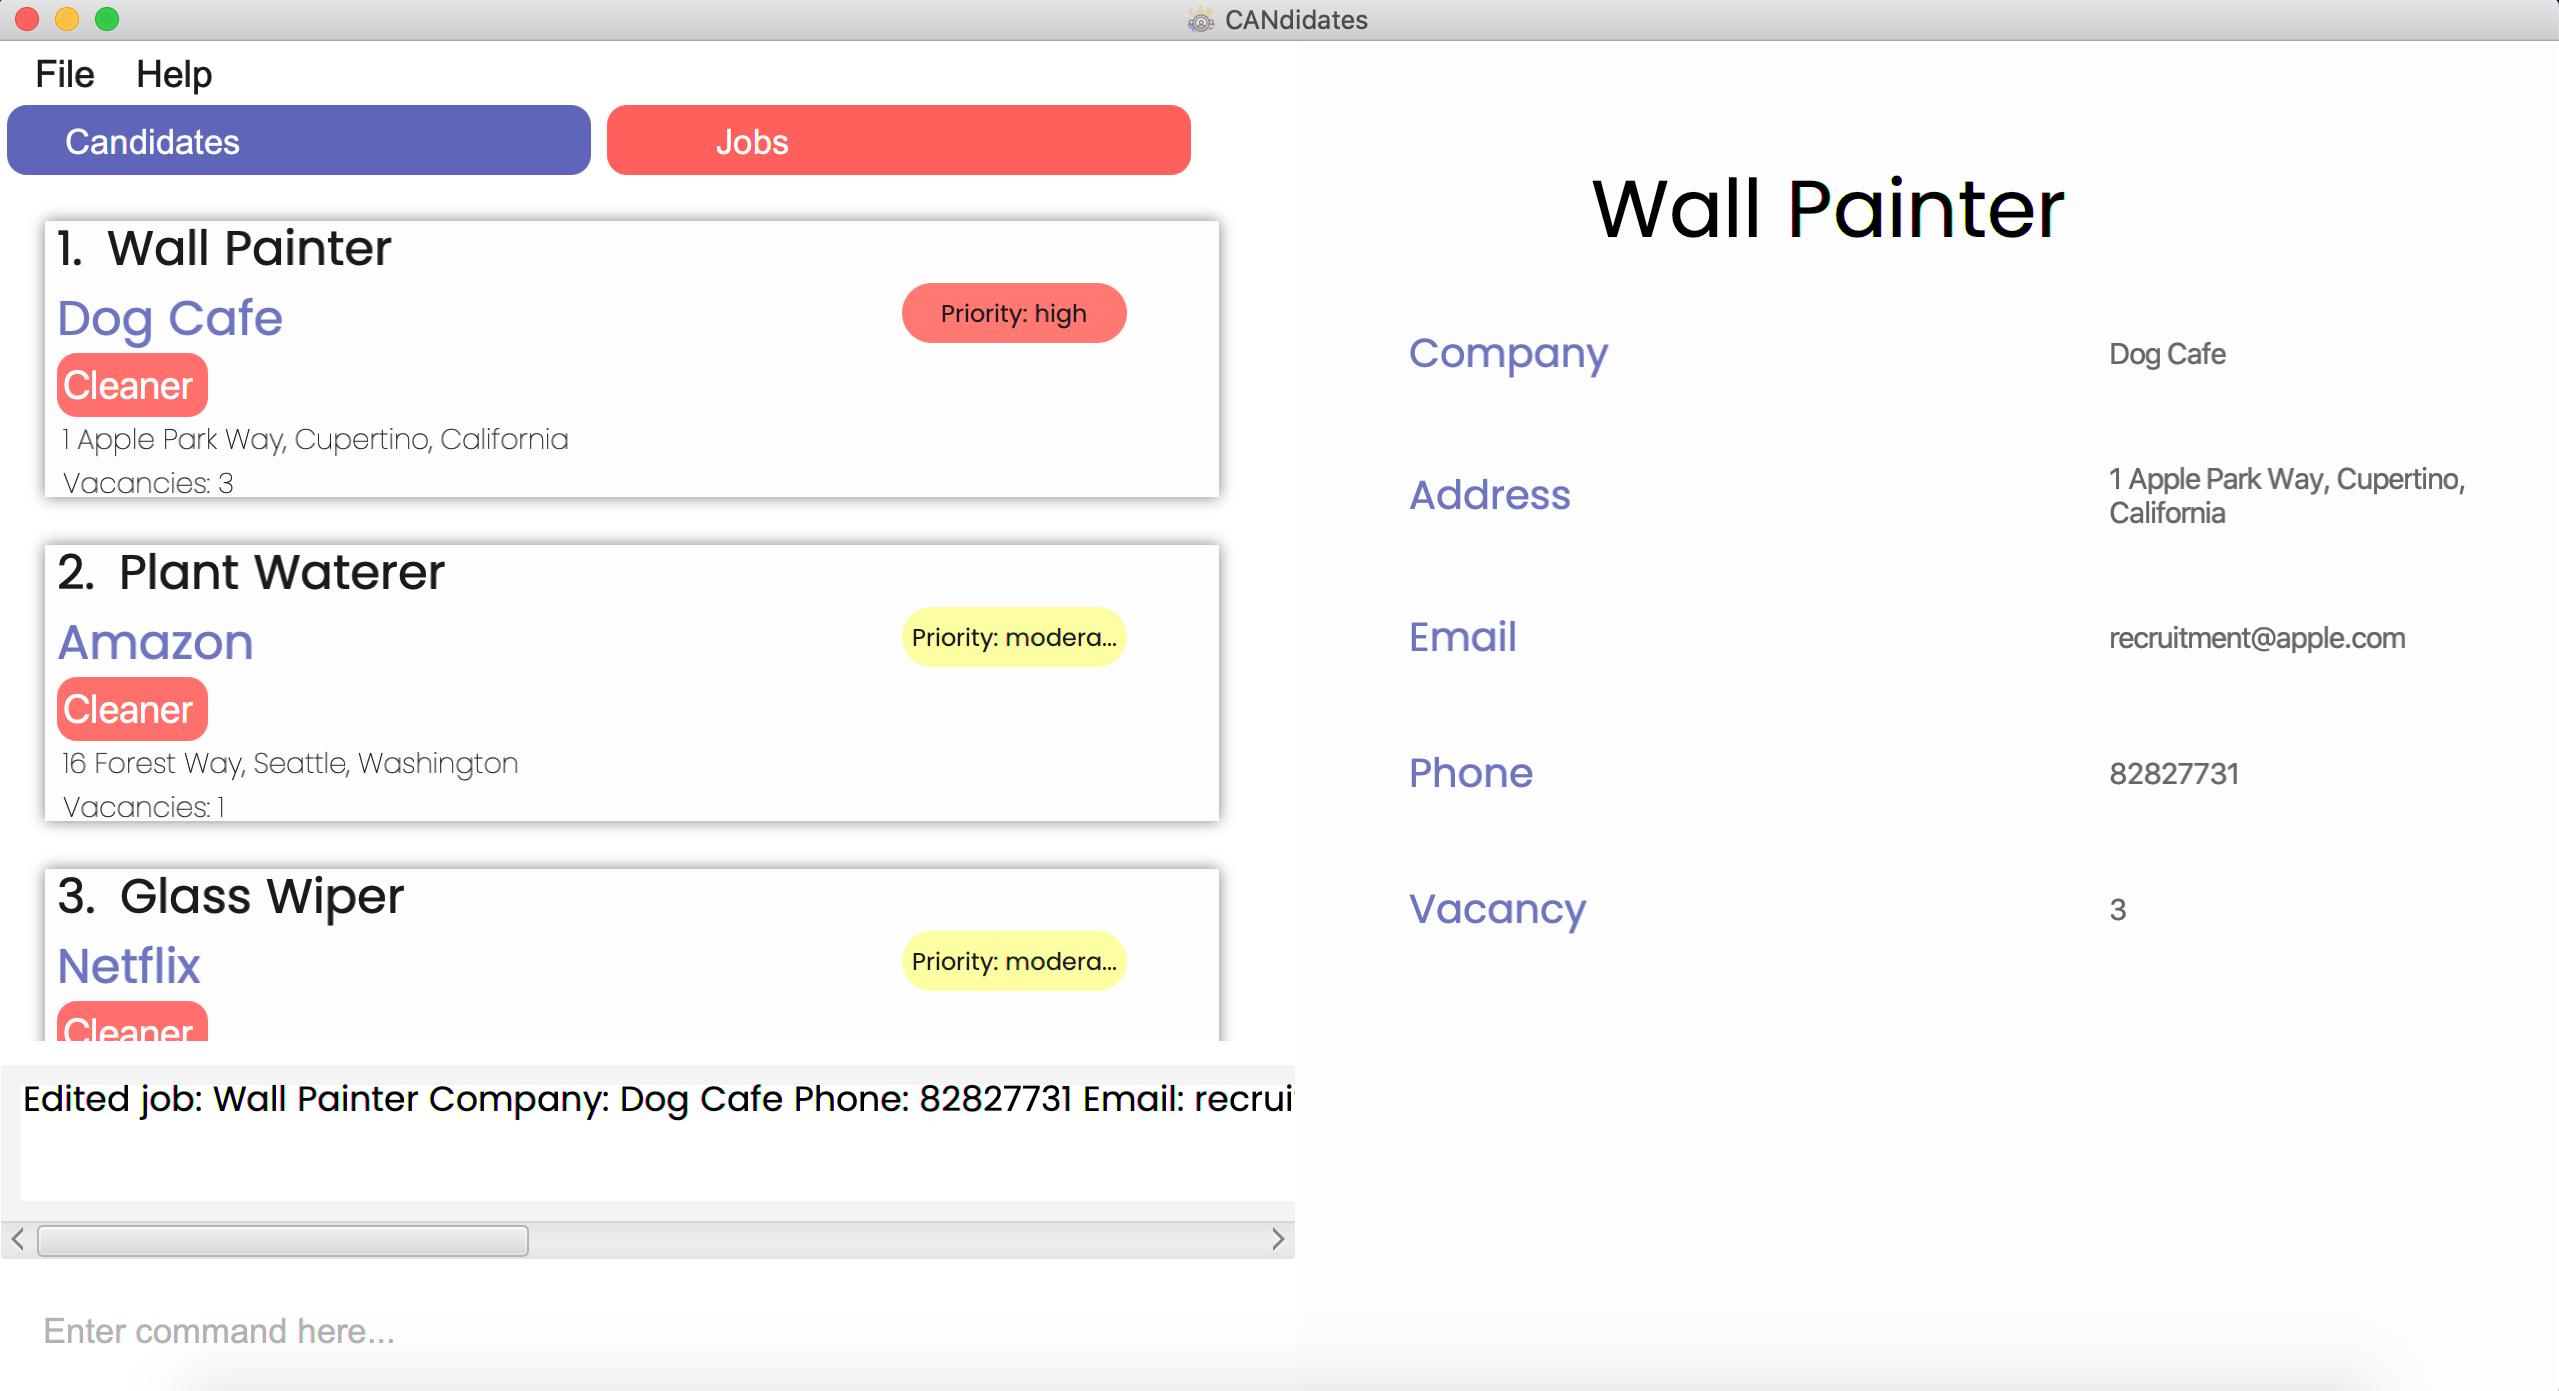
Type edit job 1 c/Dog Cafe p/82827731 v/3 pr/high in the command box and press Enter.
Step 2. The result of the command in the result display will depend on the specific job that is being edited, specifically its input fields that were not edited. The message that will be shown in the result display is
Edited job: {Original Job Title} Company: Dog Cafe Phone: 82827731 Email: {Original Email} Address: {Original Address} Priority: high Vacancy: 3 Tags: {Original Tags}
Step 3. The application will show the updated list of jobs with the edited job. Type view job 1 or click the edited job’s
card to view the job’s new information in detail.
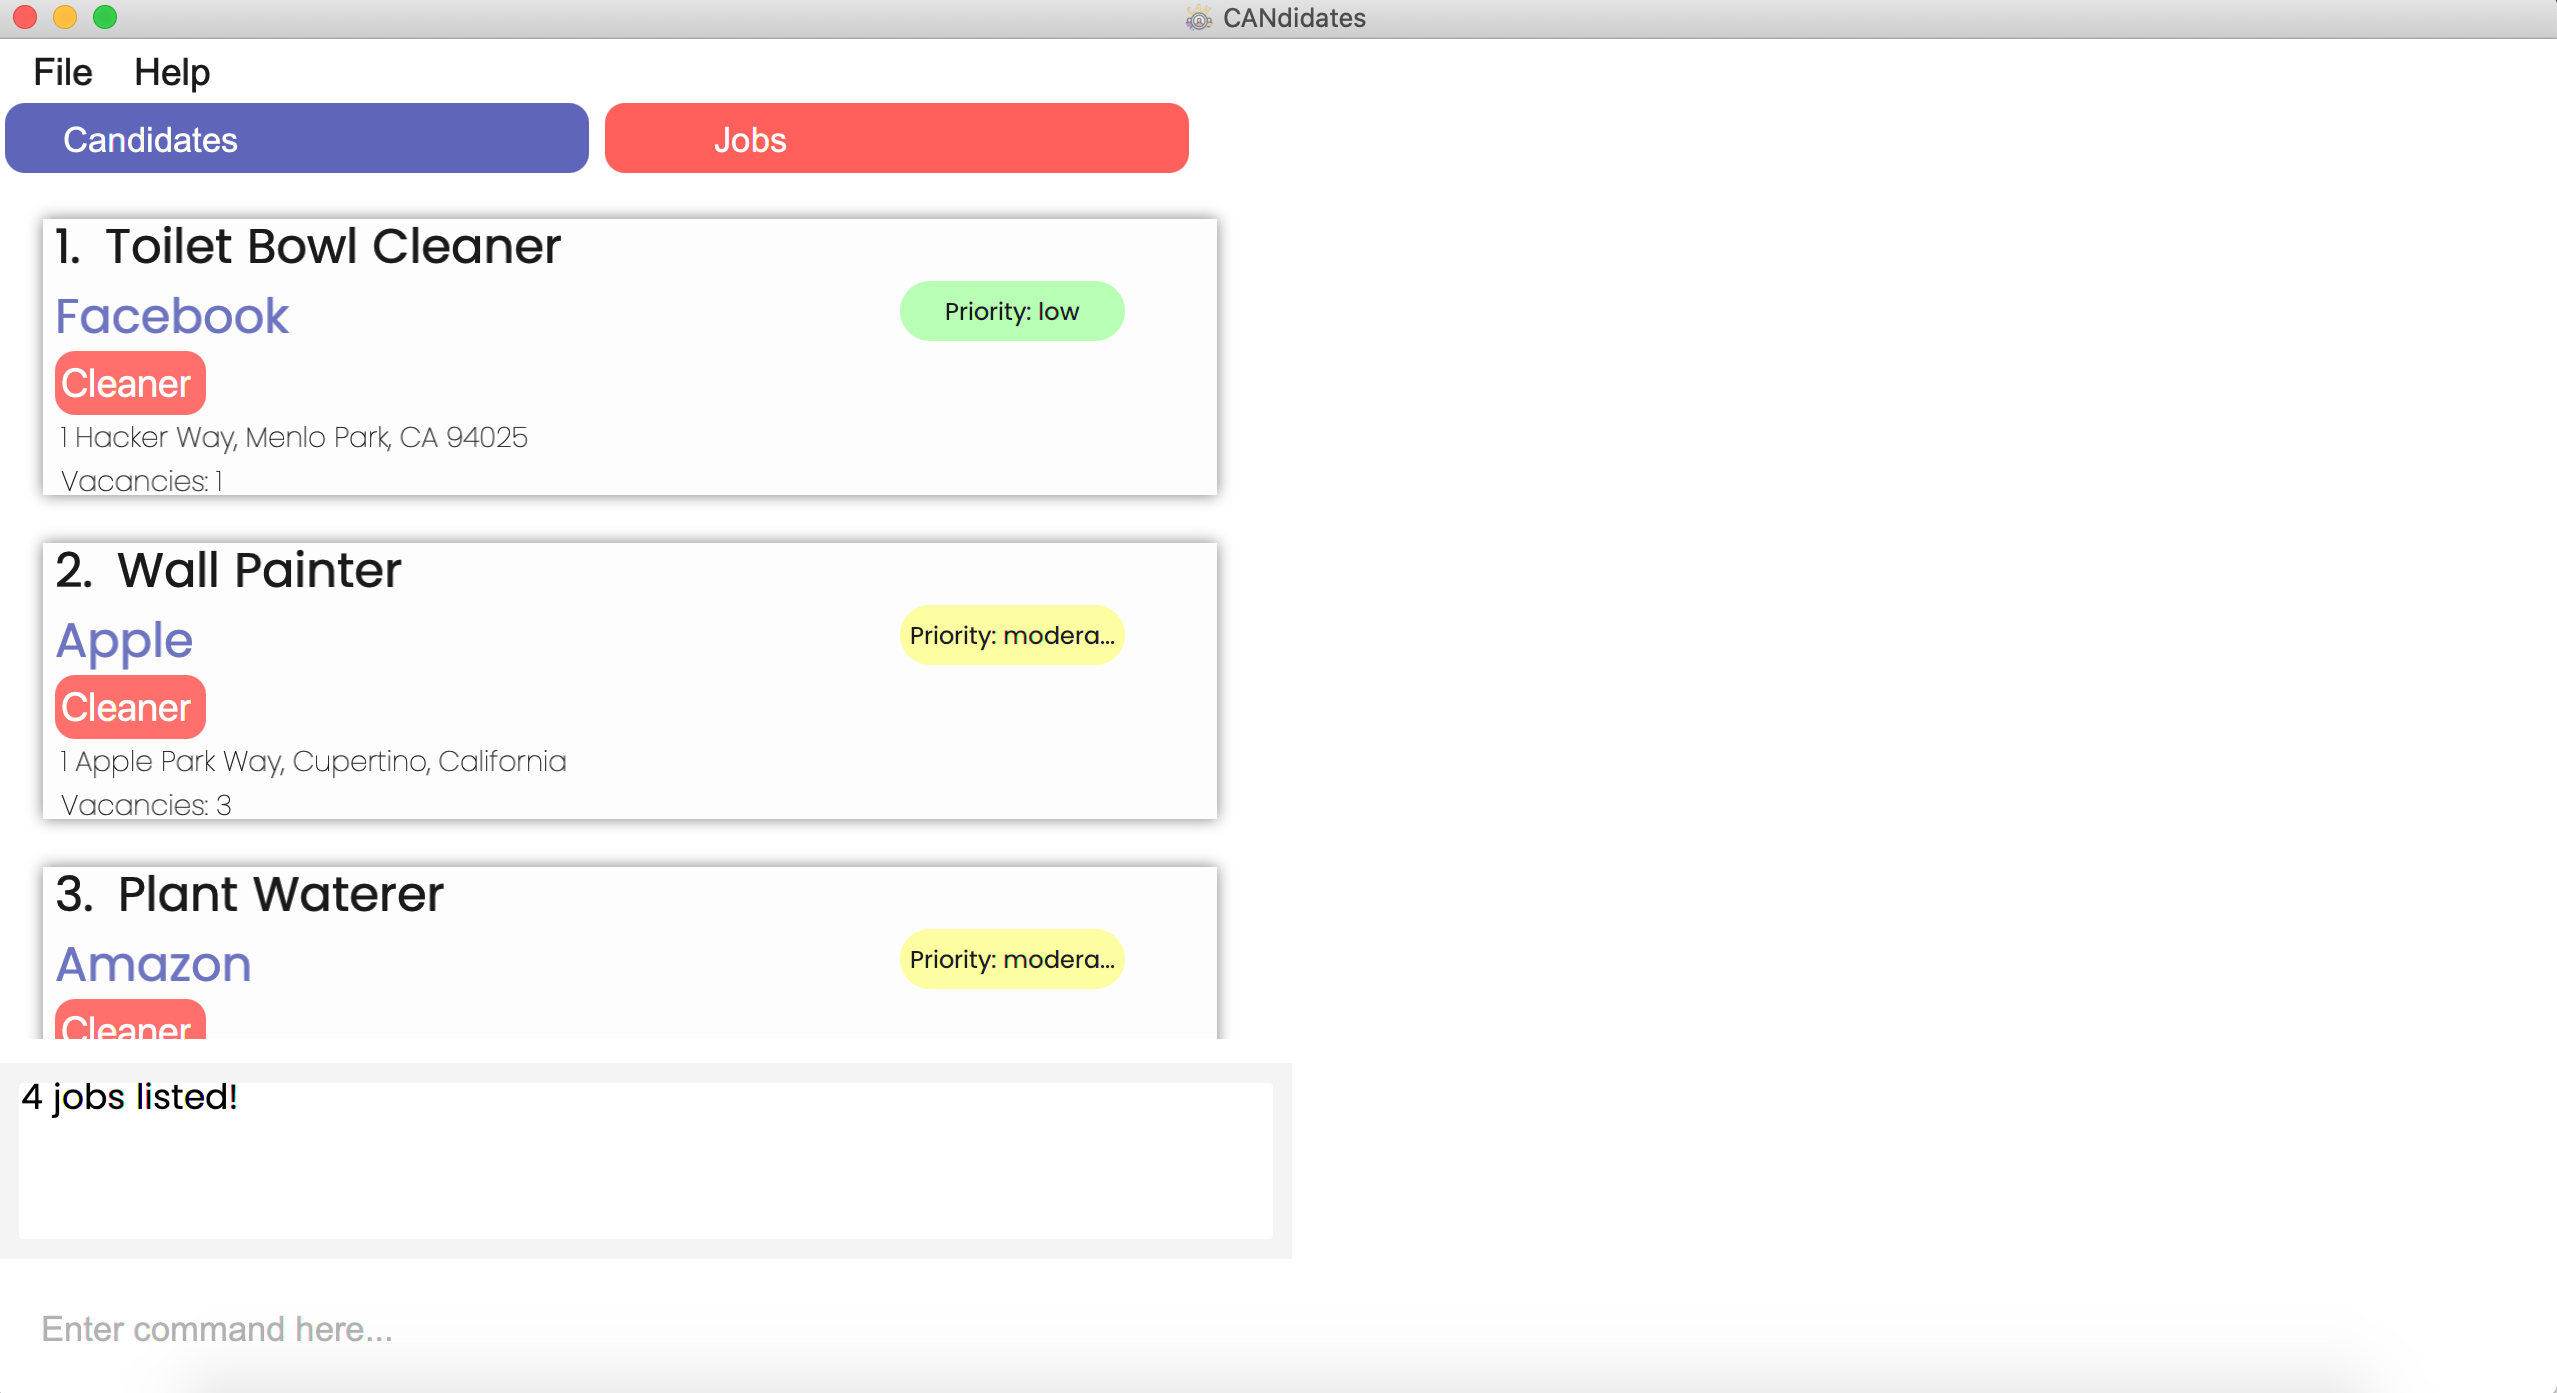
5.4 Finding a job: find job
Too many job listings with different information? You can find job listings that have certain criteria(s) or even a specific one from the long list simply by inserting keywords for the field(s) you are looking for!
Format: find job [n/JOB_TITLE] [c/COMPANY_NAME] [p/PHONE_NUMBER] [e/EMAIL] [a/ADDRESS] [v/VACANCY] [pr/PRIORITY] [t/JOB_DESCRIPTION]…
find job t/cleaner fulltime will show a list of jobs with the tags “cleaner” and “fulltime”
Examples:
![]() To find jobs with email containing “@gmail.com” and priority level high,
To find jobs with email containing “@gmail.com” and priority level high,
find job e/@gmail.com pr/high
![]() To find jobs with job titles containing the words “Software Engineer”,
To find jobs with job titles containing the words “Software Engineer”,
find job n/Software Engineer
Step by Step:
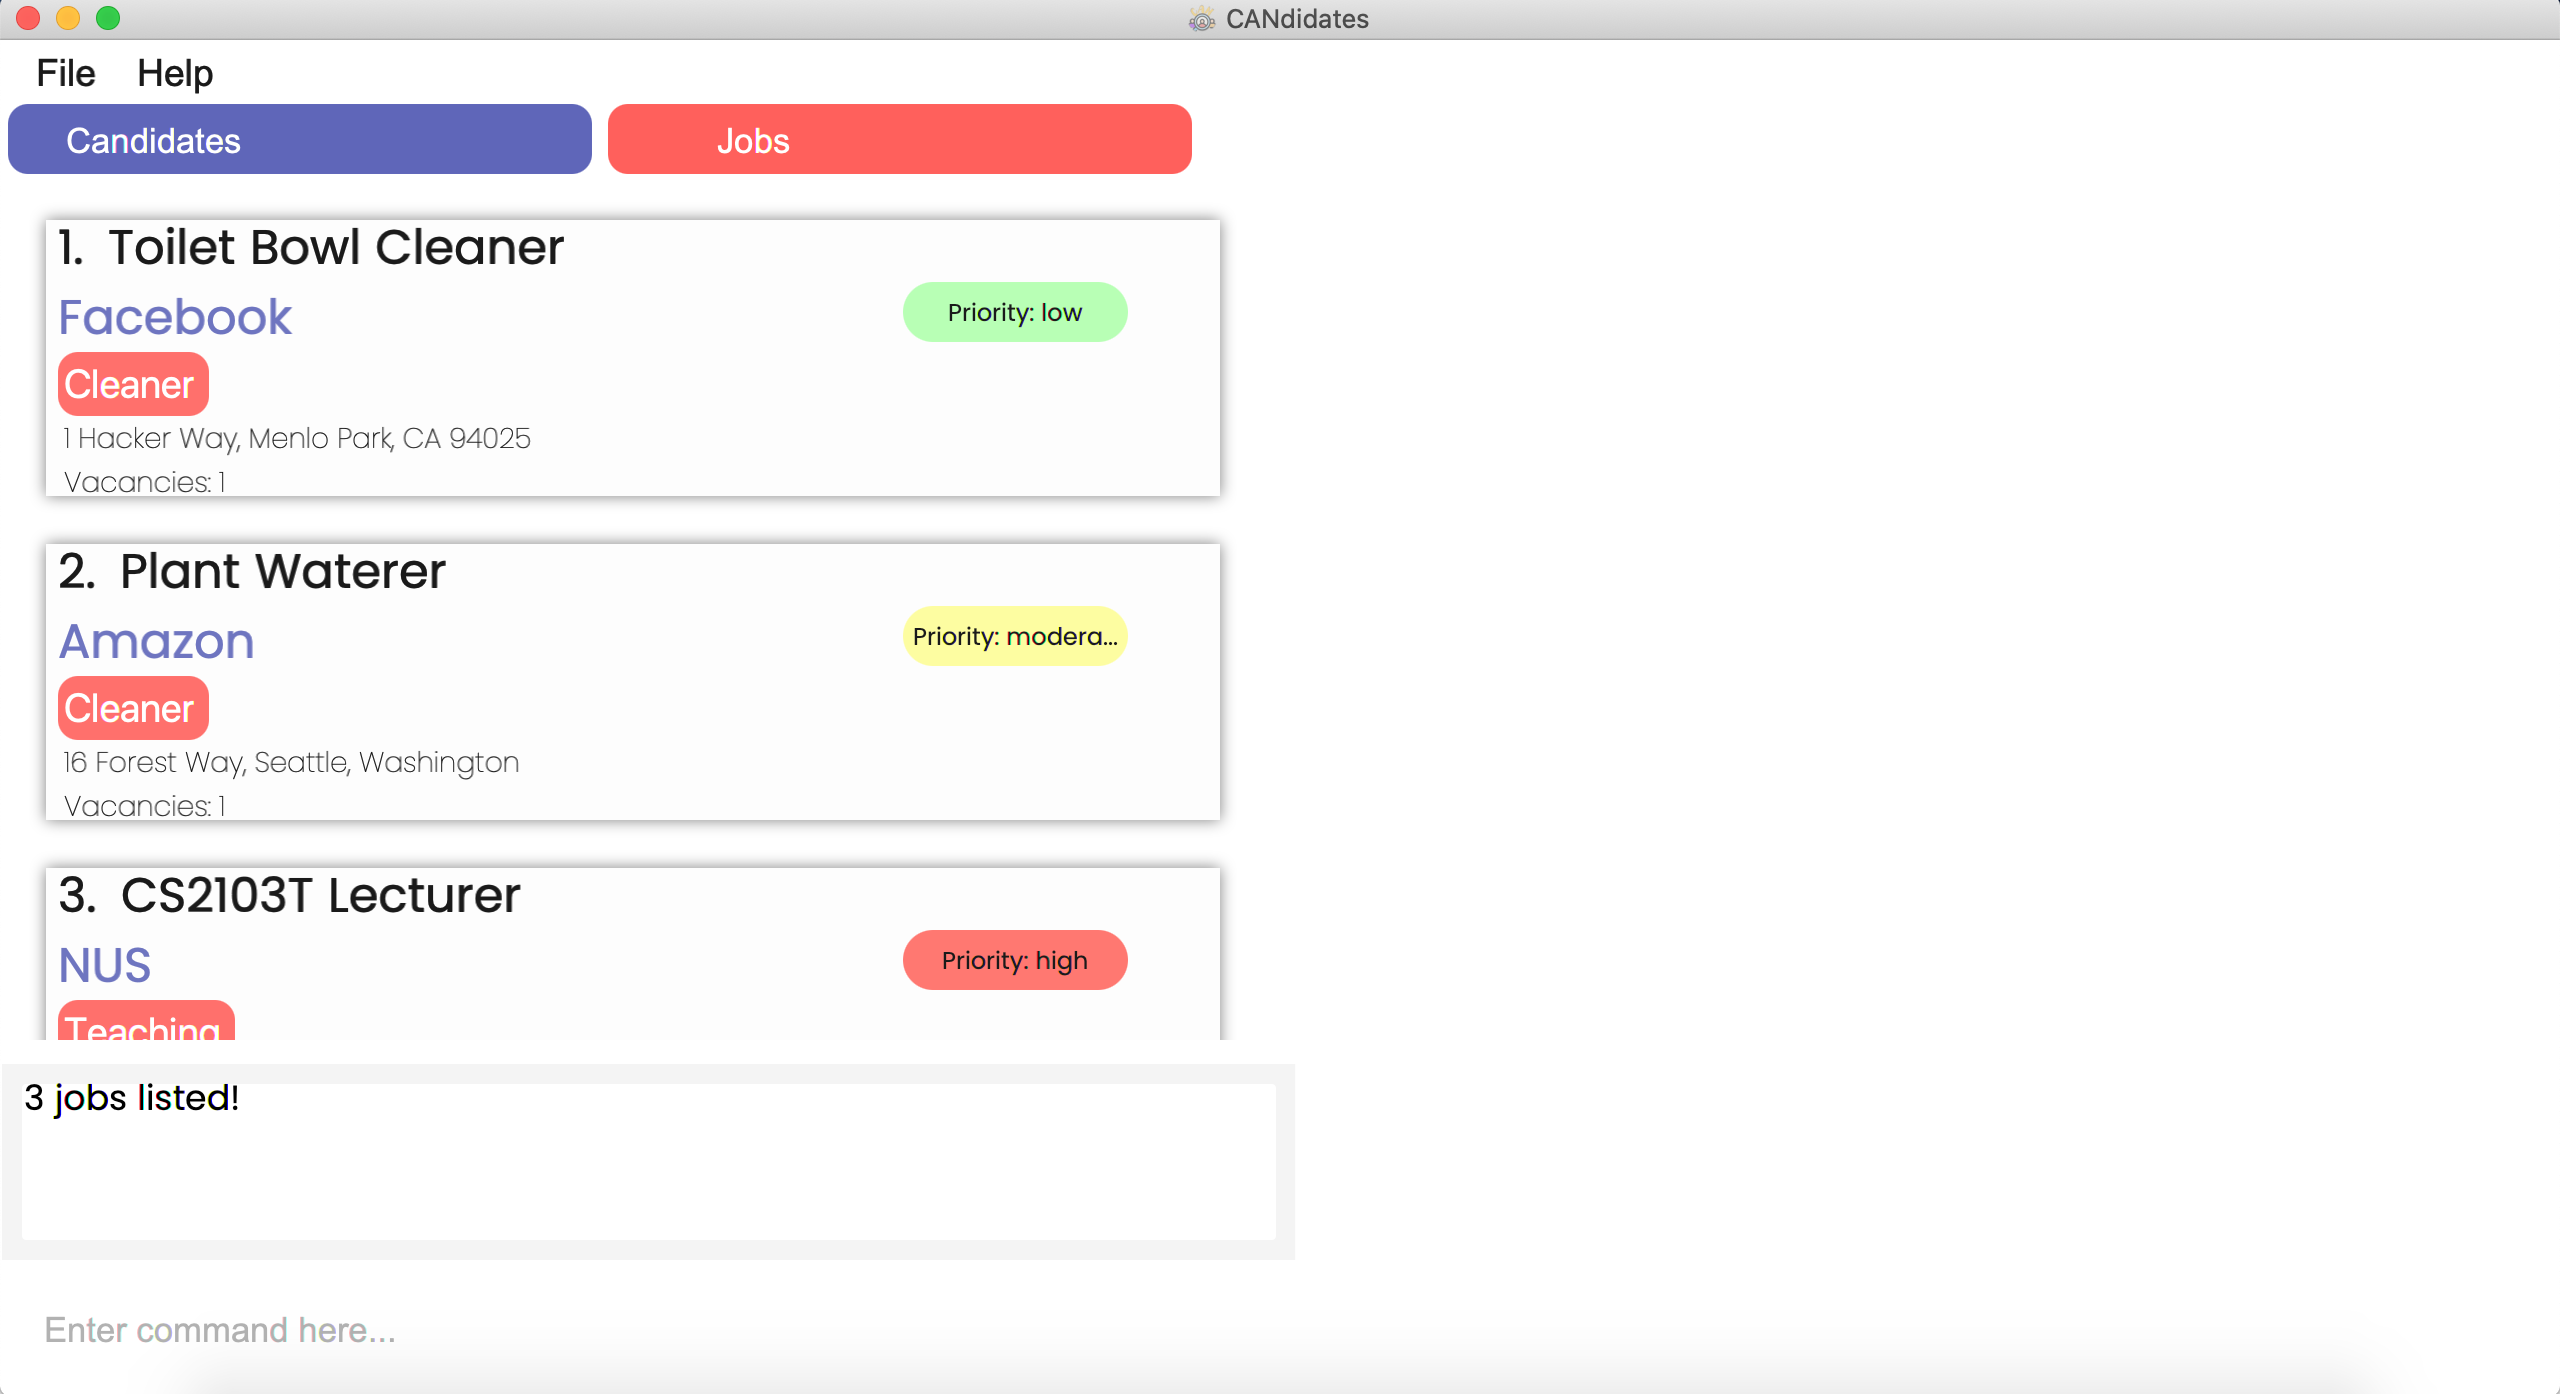
Step 1. Type find job v/1 in the command box and press Enter.
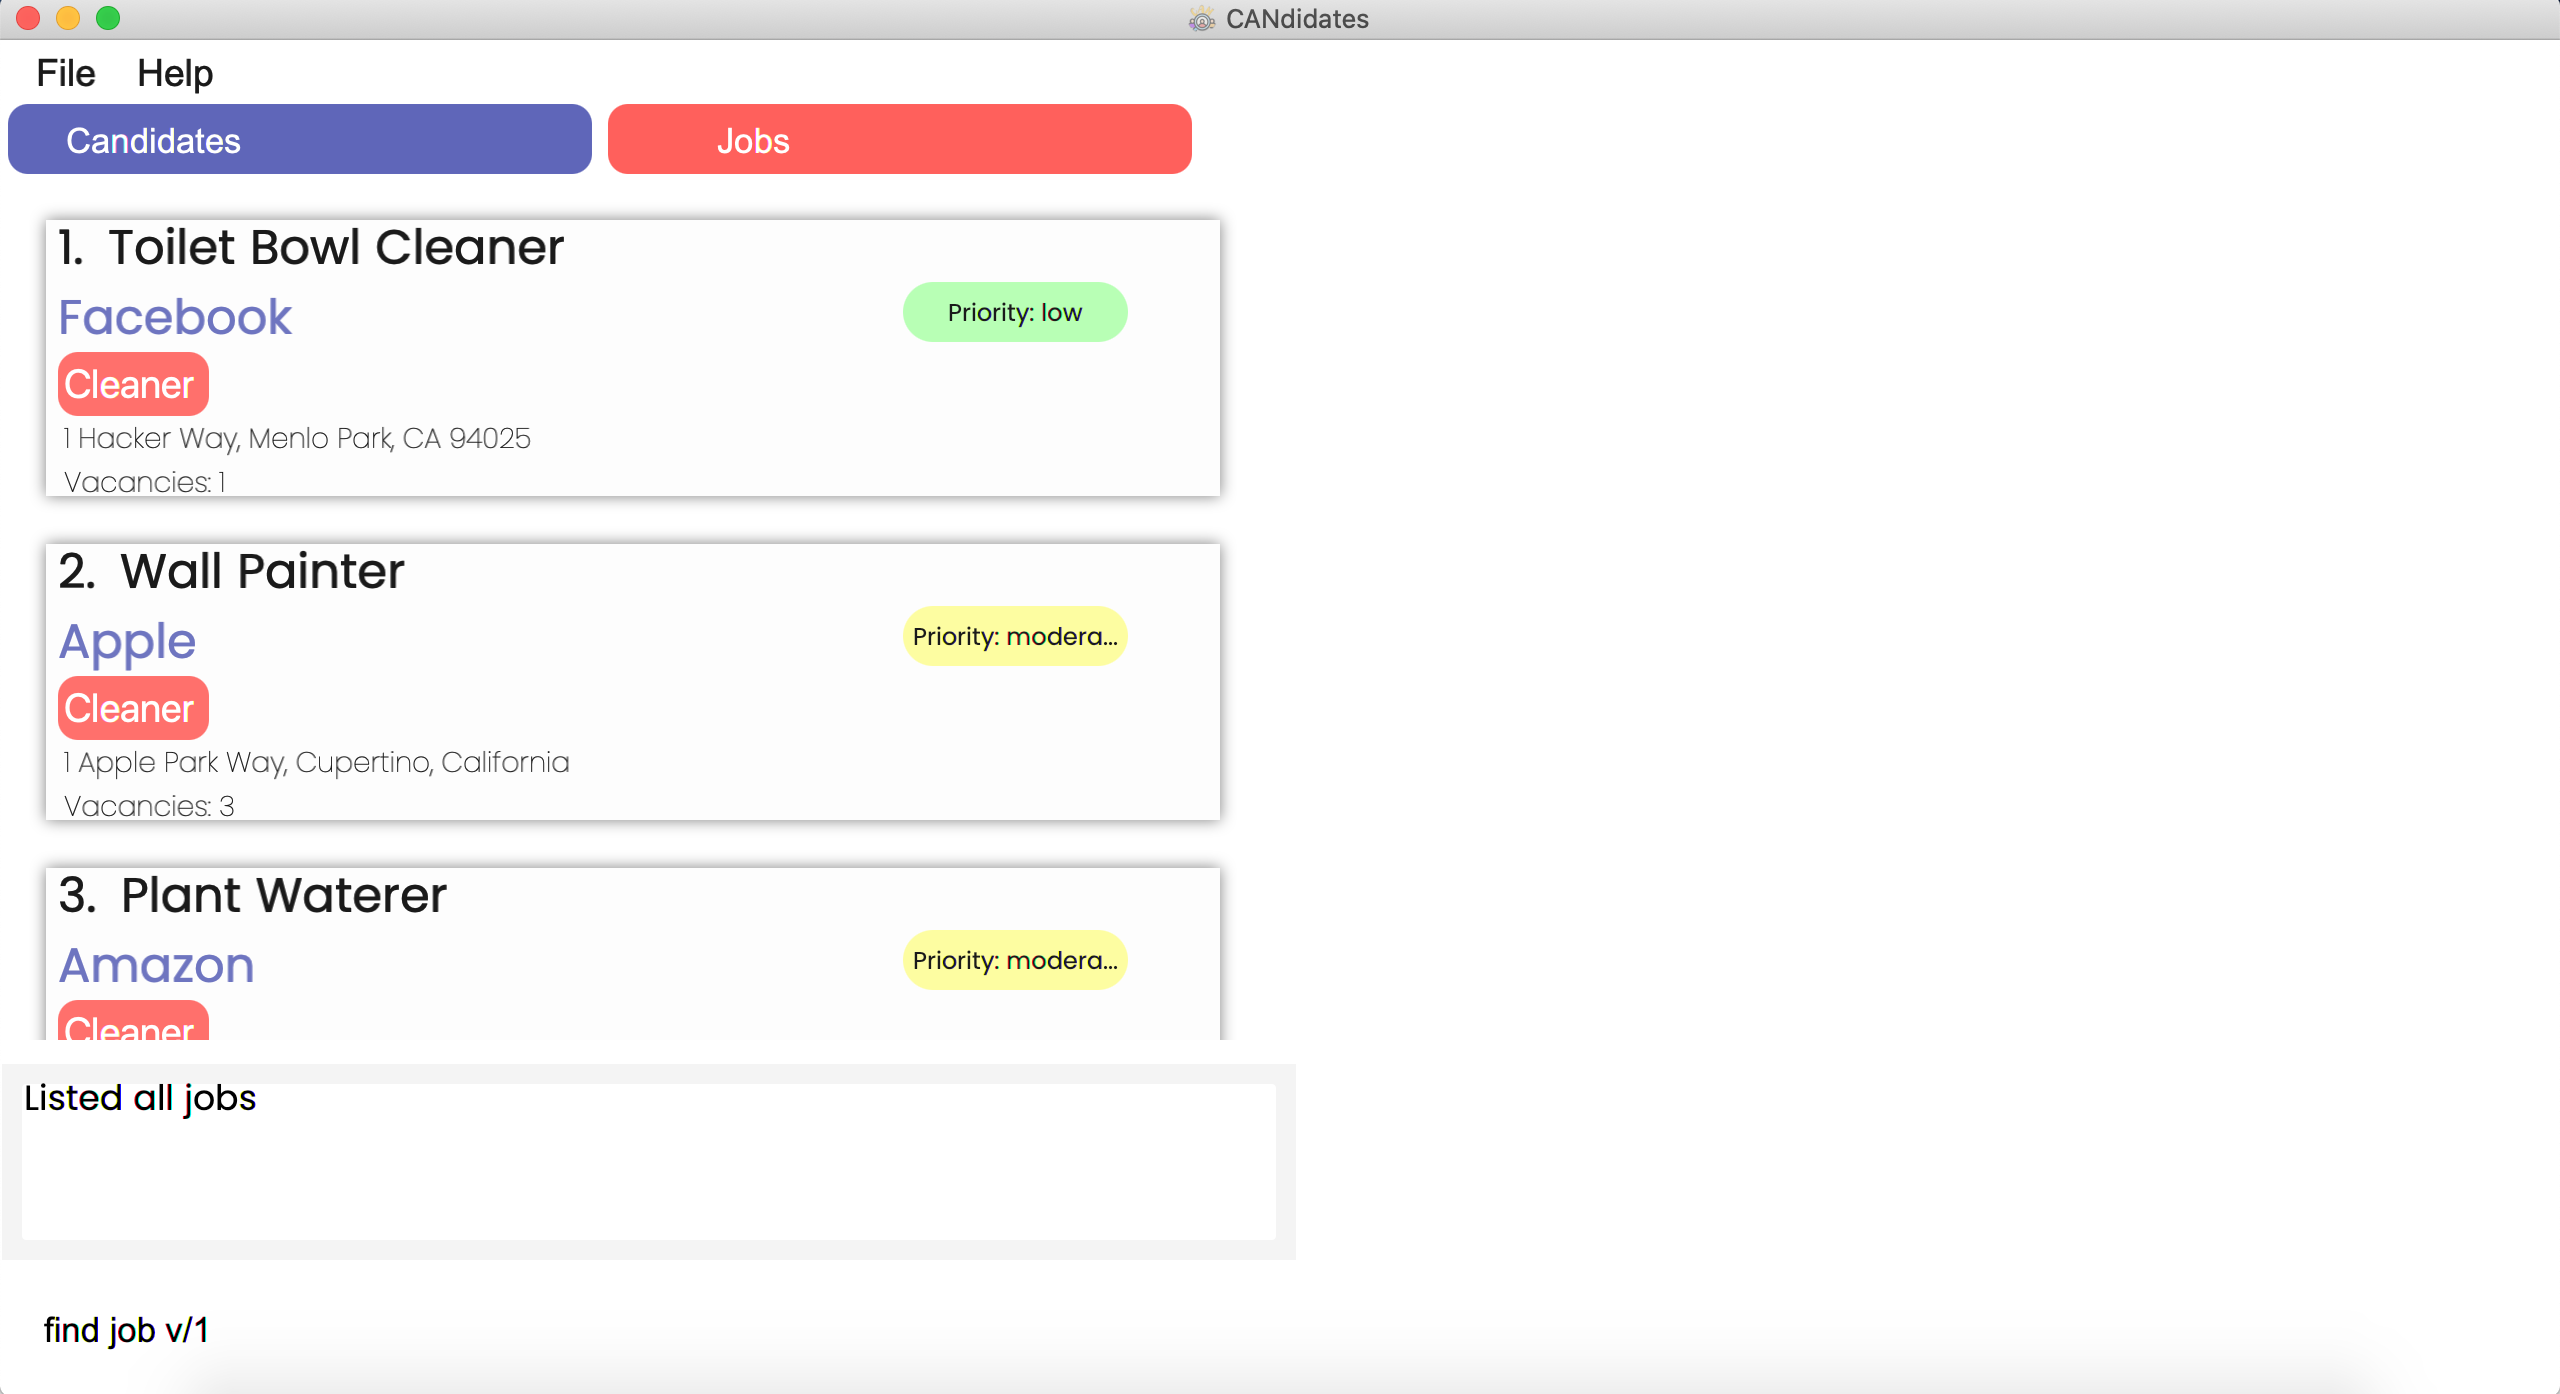
Step 2. The CANdidates application will show the following message in the result display
{Number of jobs found} jobs listed!
Step 3. The application will display jobs with all matching fields in the main list.
5.5 Sorting all jobs: sort job
Have too many job listings and need a way to organise them? You can get CANdidates to help you do that by sorting them according to these fields: job title, company name, priority or vacancies.
Format sort job type/FIELD_TO_SORT order/ORDER
sort job command after a find job command will only sort the list of job listings that were listed after the find job command.
FIELD_TO_SORT can be either n, c, pr or v depending on whether you wish to sort the job listings by the job title, company name, priority level or number of vacancies respectively.
ORDER can be either asc or desc depending on whether you wish the sorting to be done in an ascending or descending manner.
Examples:
![]() To sort the list of jobs starting from lowest priority,
To sort the list of jobs starting from lowest priority,
sort job type/pr order/asc
![]() To sort the list of jobs starting from the highest number of vacancies,
To sort the list of jobs starting from the highest number of vacancies,
sort job type/v order/desc
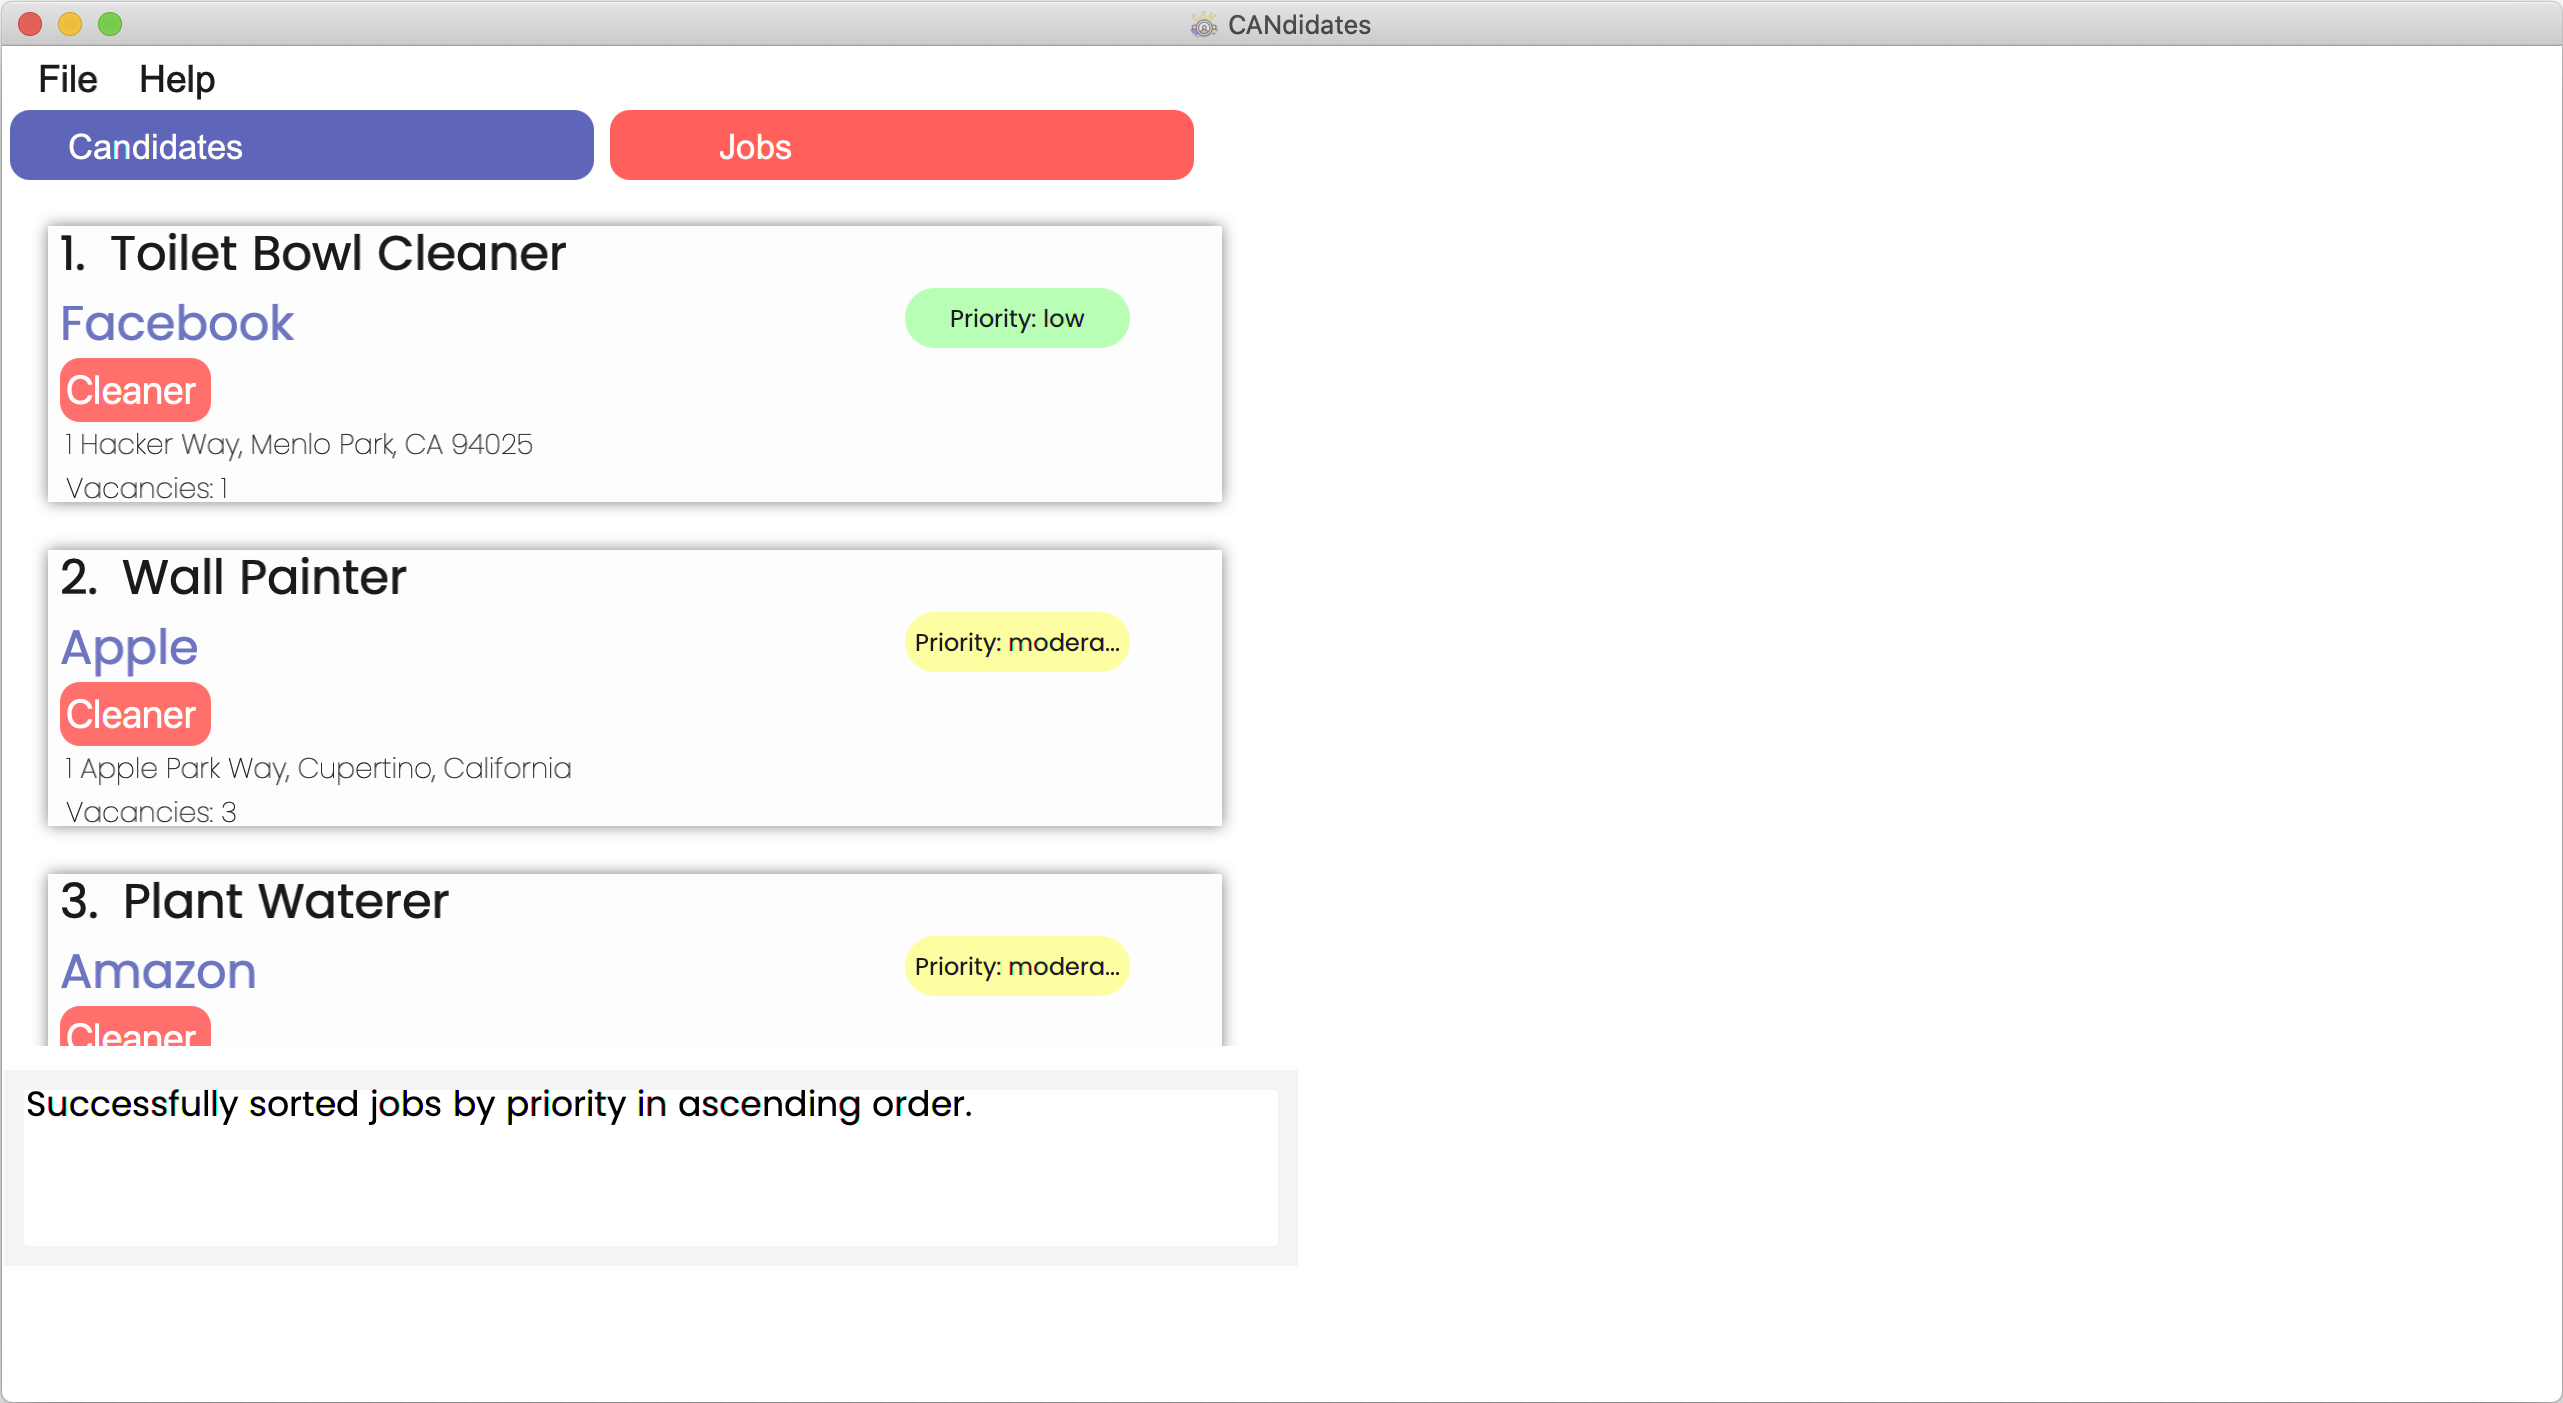
Step by Step:
Step 1. Type sort job type/pr order/asc in the command box and press Enter.
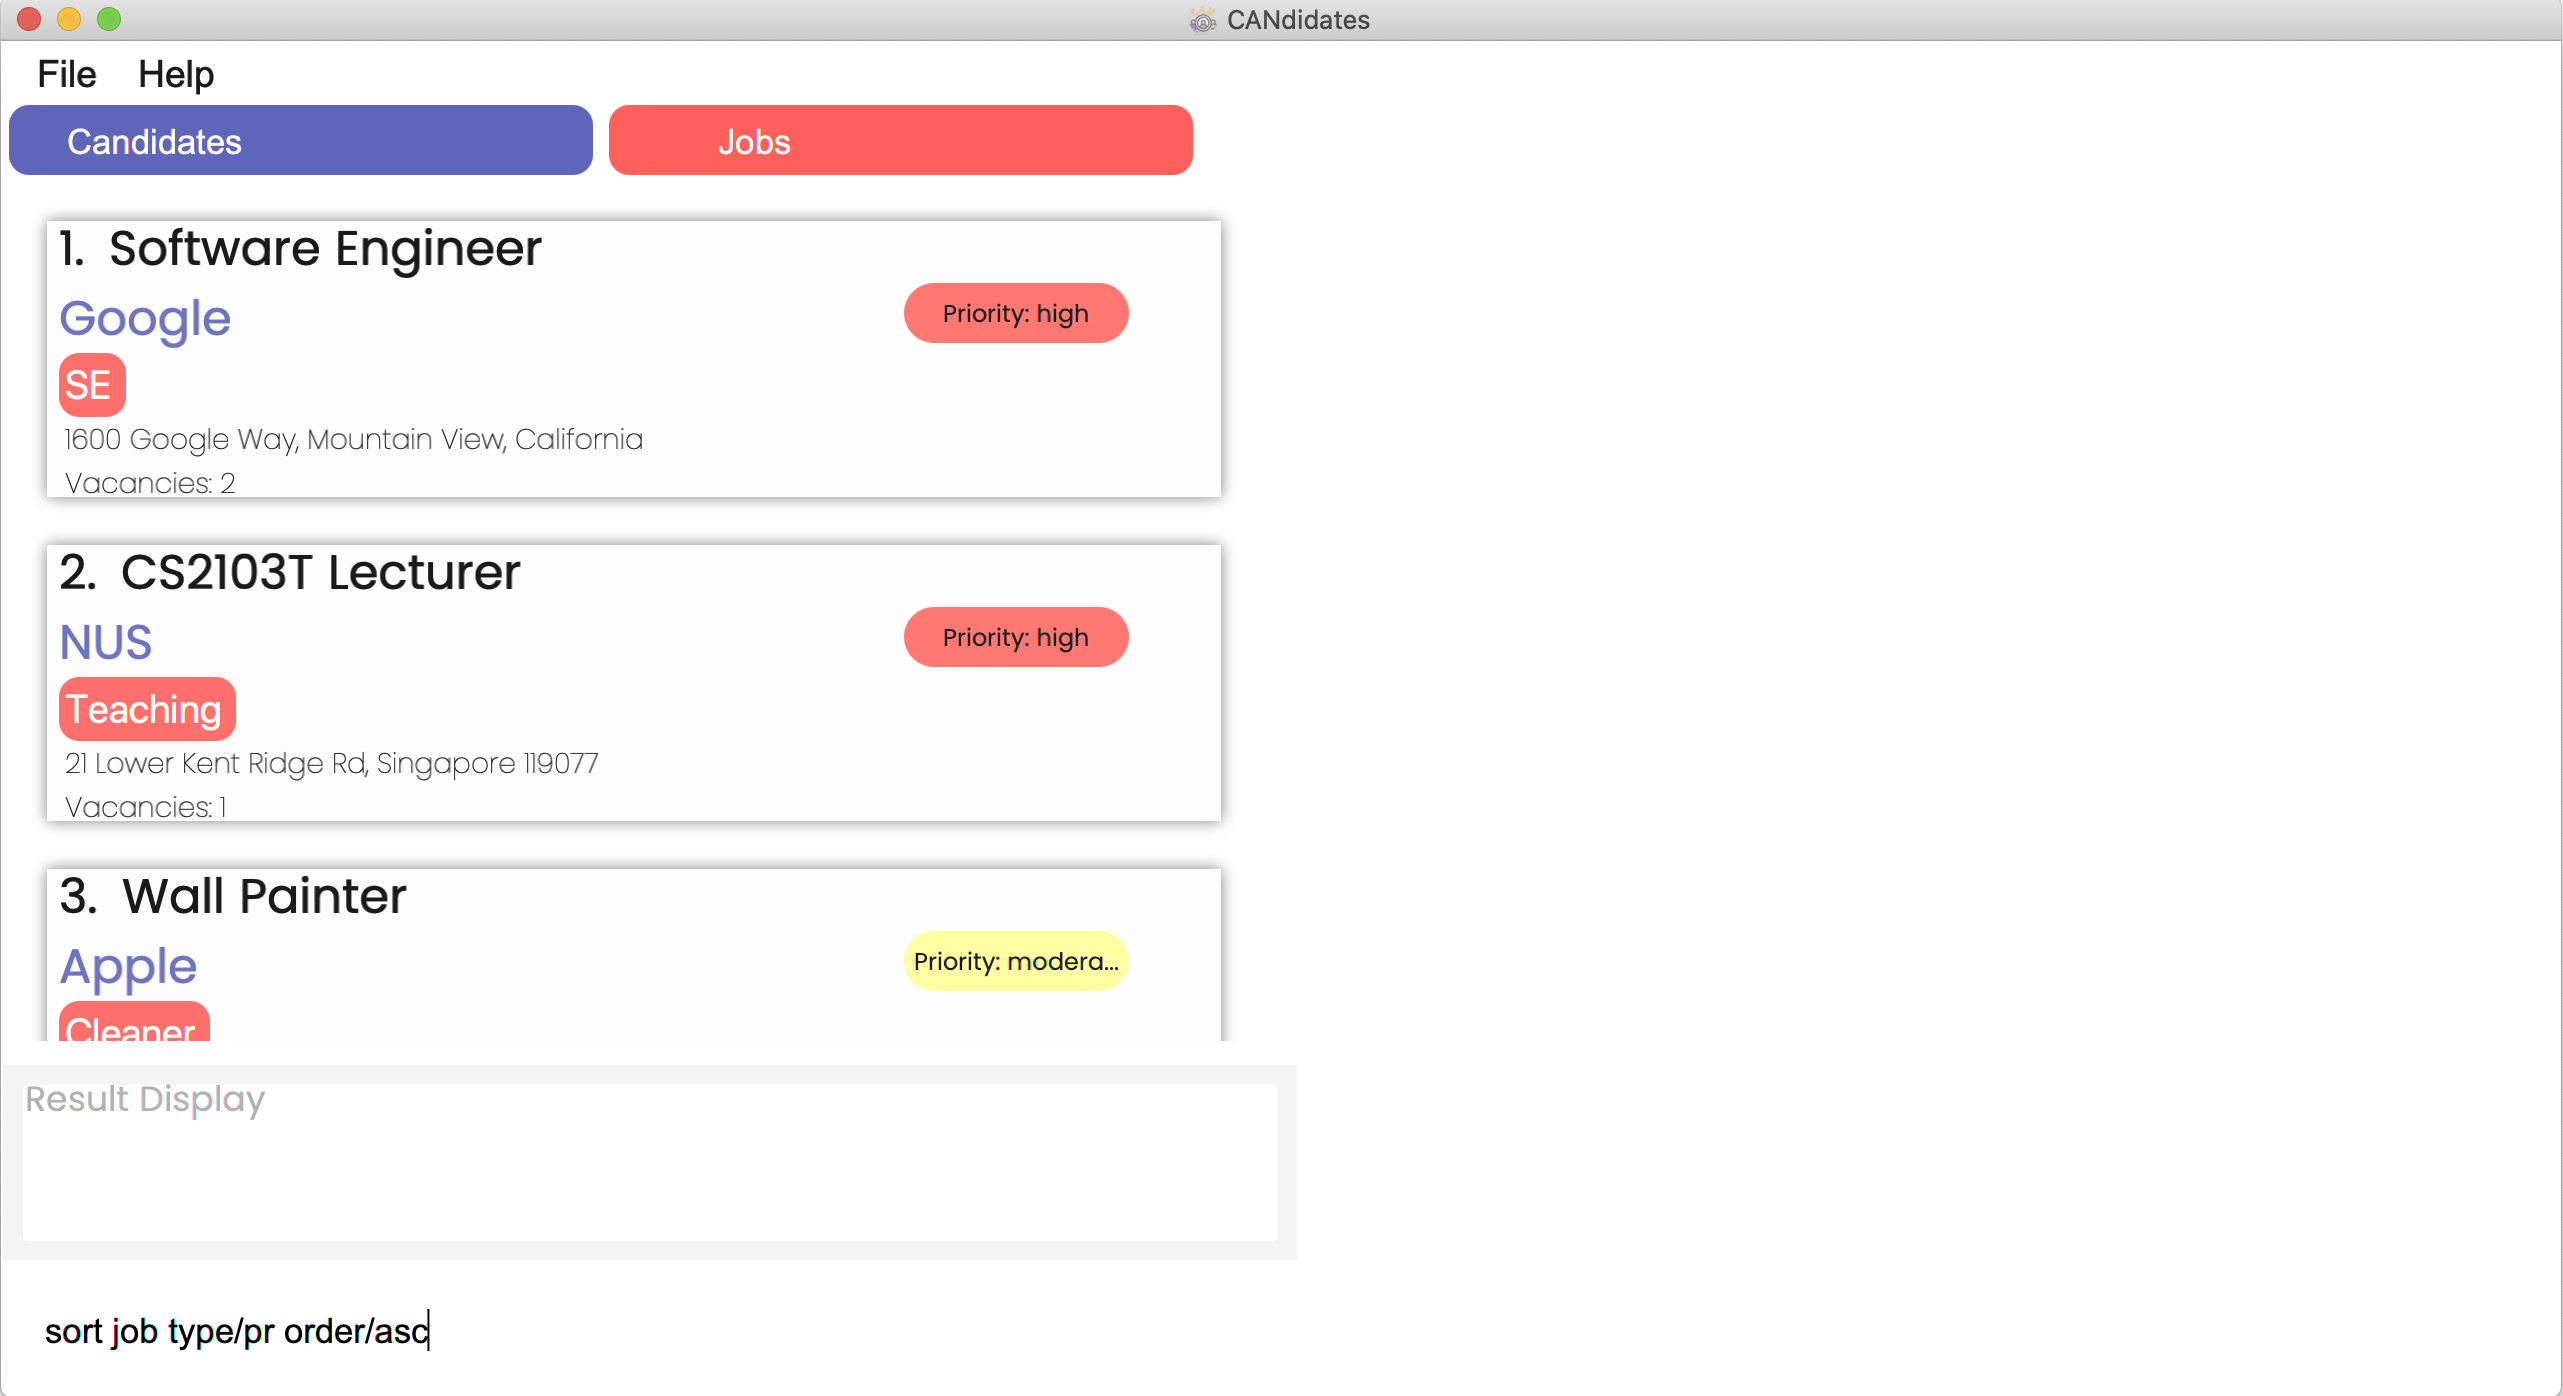
Step 2. The CANdidates application will show the following message in the result display
Successfully sorted jobs by priority in ascending order.
Step 3. The application will show the sorted job list based on the sort condition given.
5.6 Deleting a job: delete job
Have you successfully filled up the vacancies for a job listing and you no longer need to keep its details in CANdidates? To delete a particular job from the list, you can use the command below.
Format: delete job INDEX
Examples:
![]() To delete the job at index 1,
To delete the job at index 1,
delete job 1
![]() To delete the job at index 3,
To delete the job at index 3,
delete job 3
Step by Step:
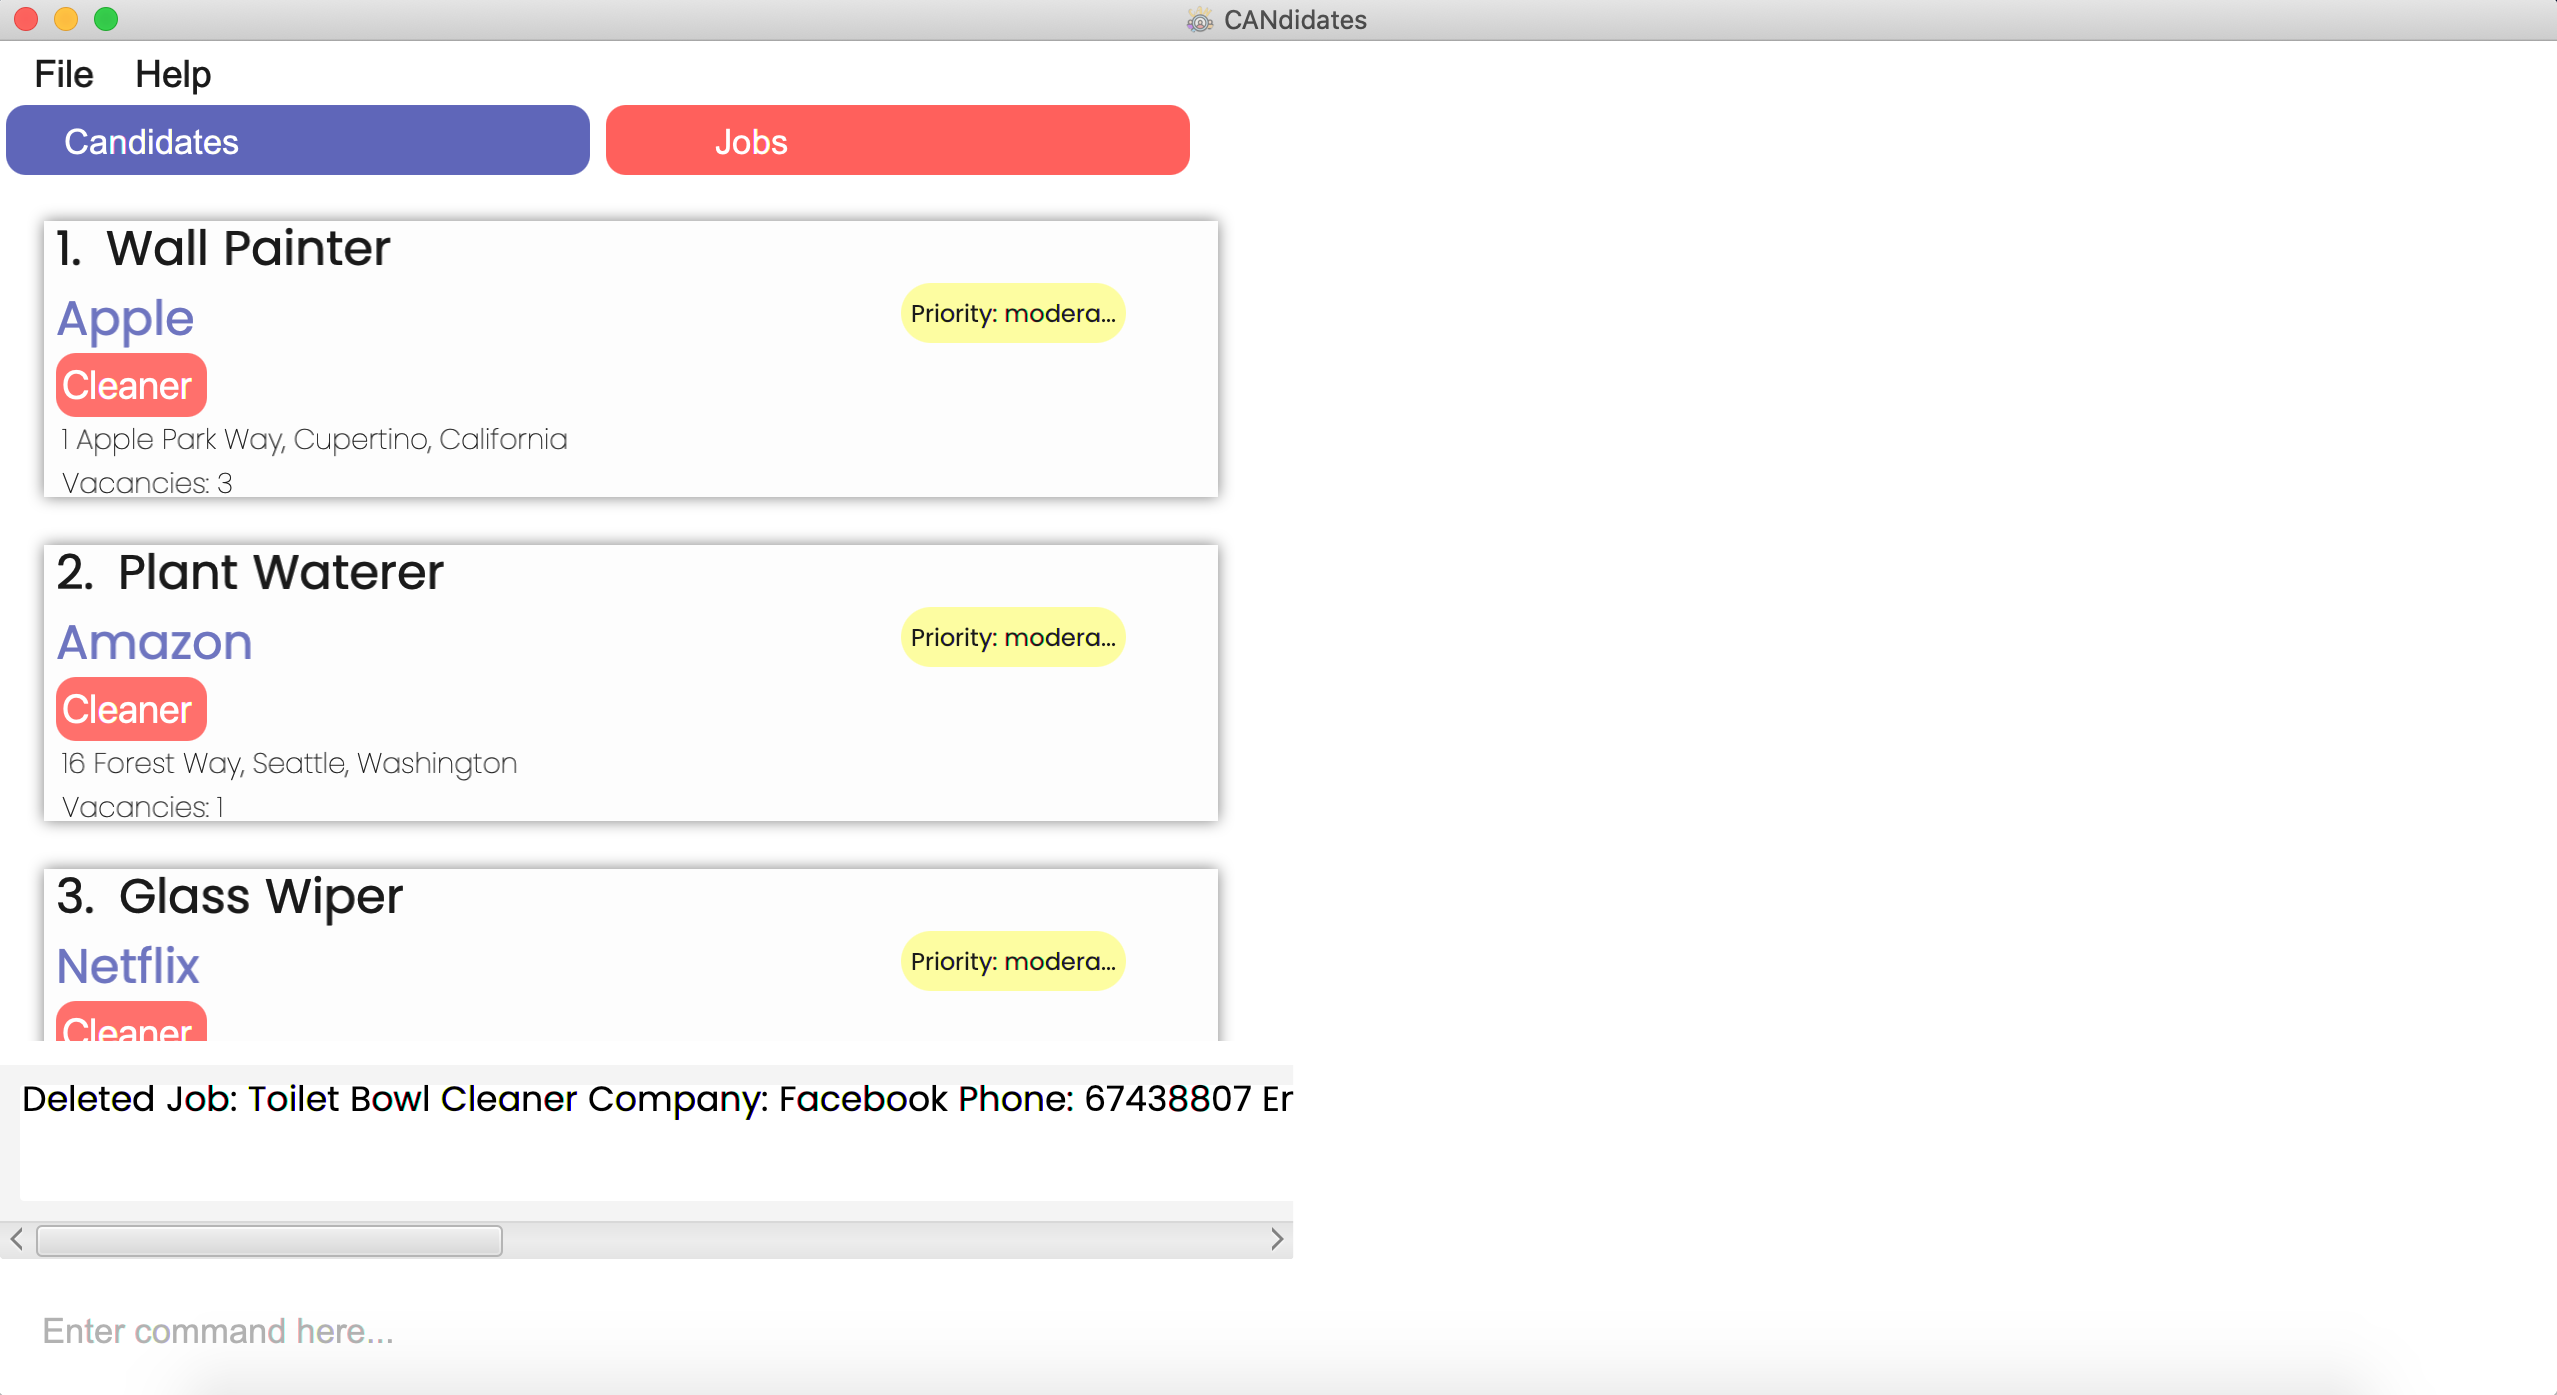
Step 1. Ensure there is at least 1 job in the jobs list.
Type delete job 1 in the command box and press Enter.

Step 2. The result of the command in the result display will depend on the specific job that is being deleted. The message that will be shown in the result display is
Deleted Job: {Job Title} Company: {Company Name} Phone: {Phone} Email: {Email} Address: {Address} Priority: {Priority} Vacancy: {Vacancy} Tags: {Tags}
Step 3. The application will show the updated job list without the deleted job.
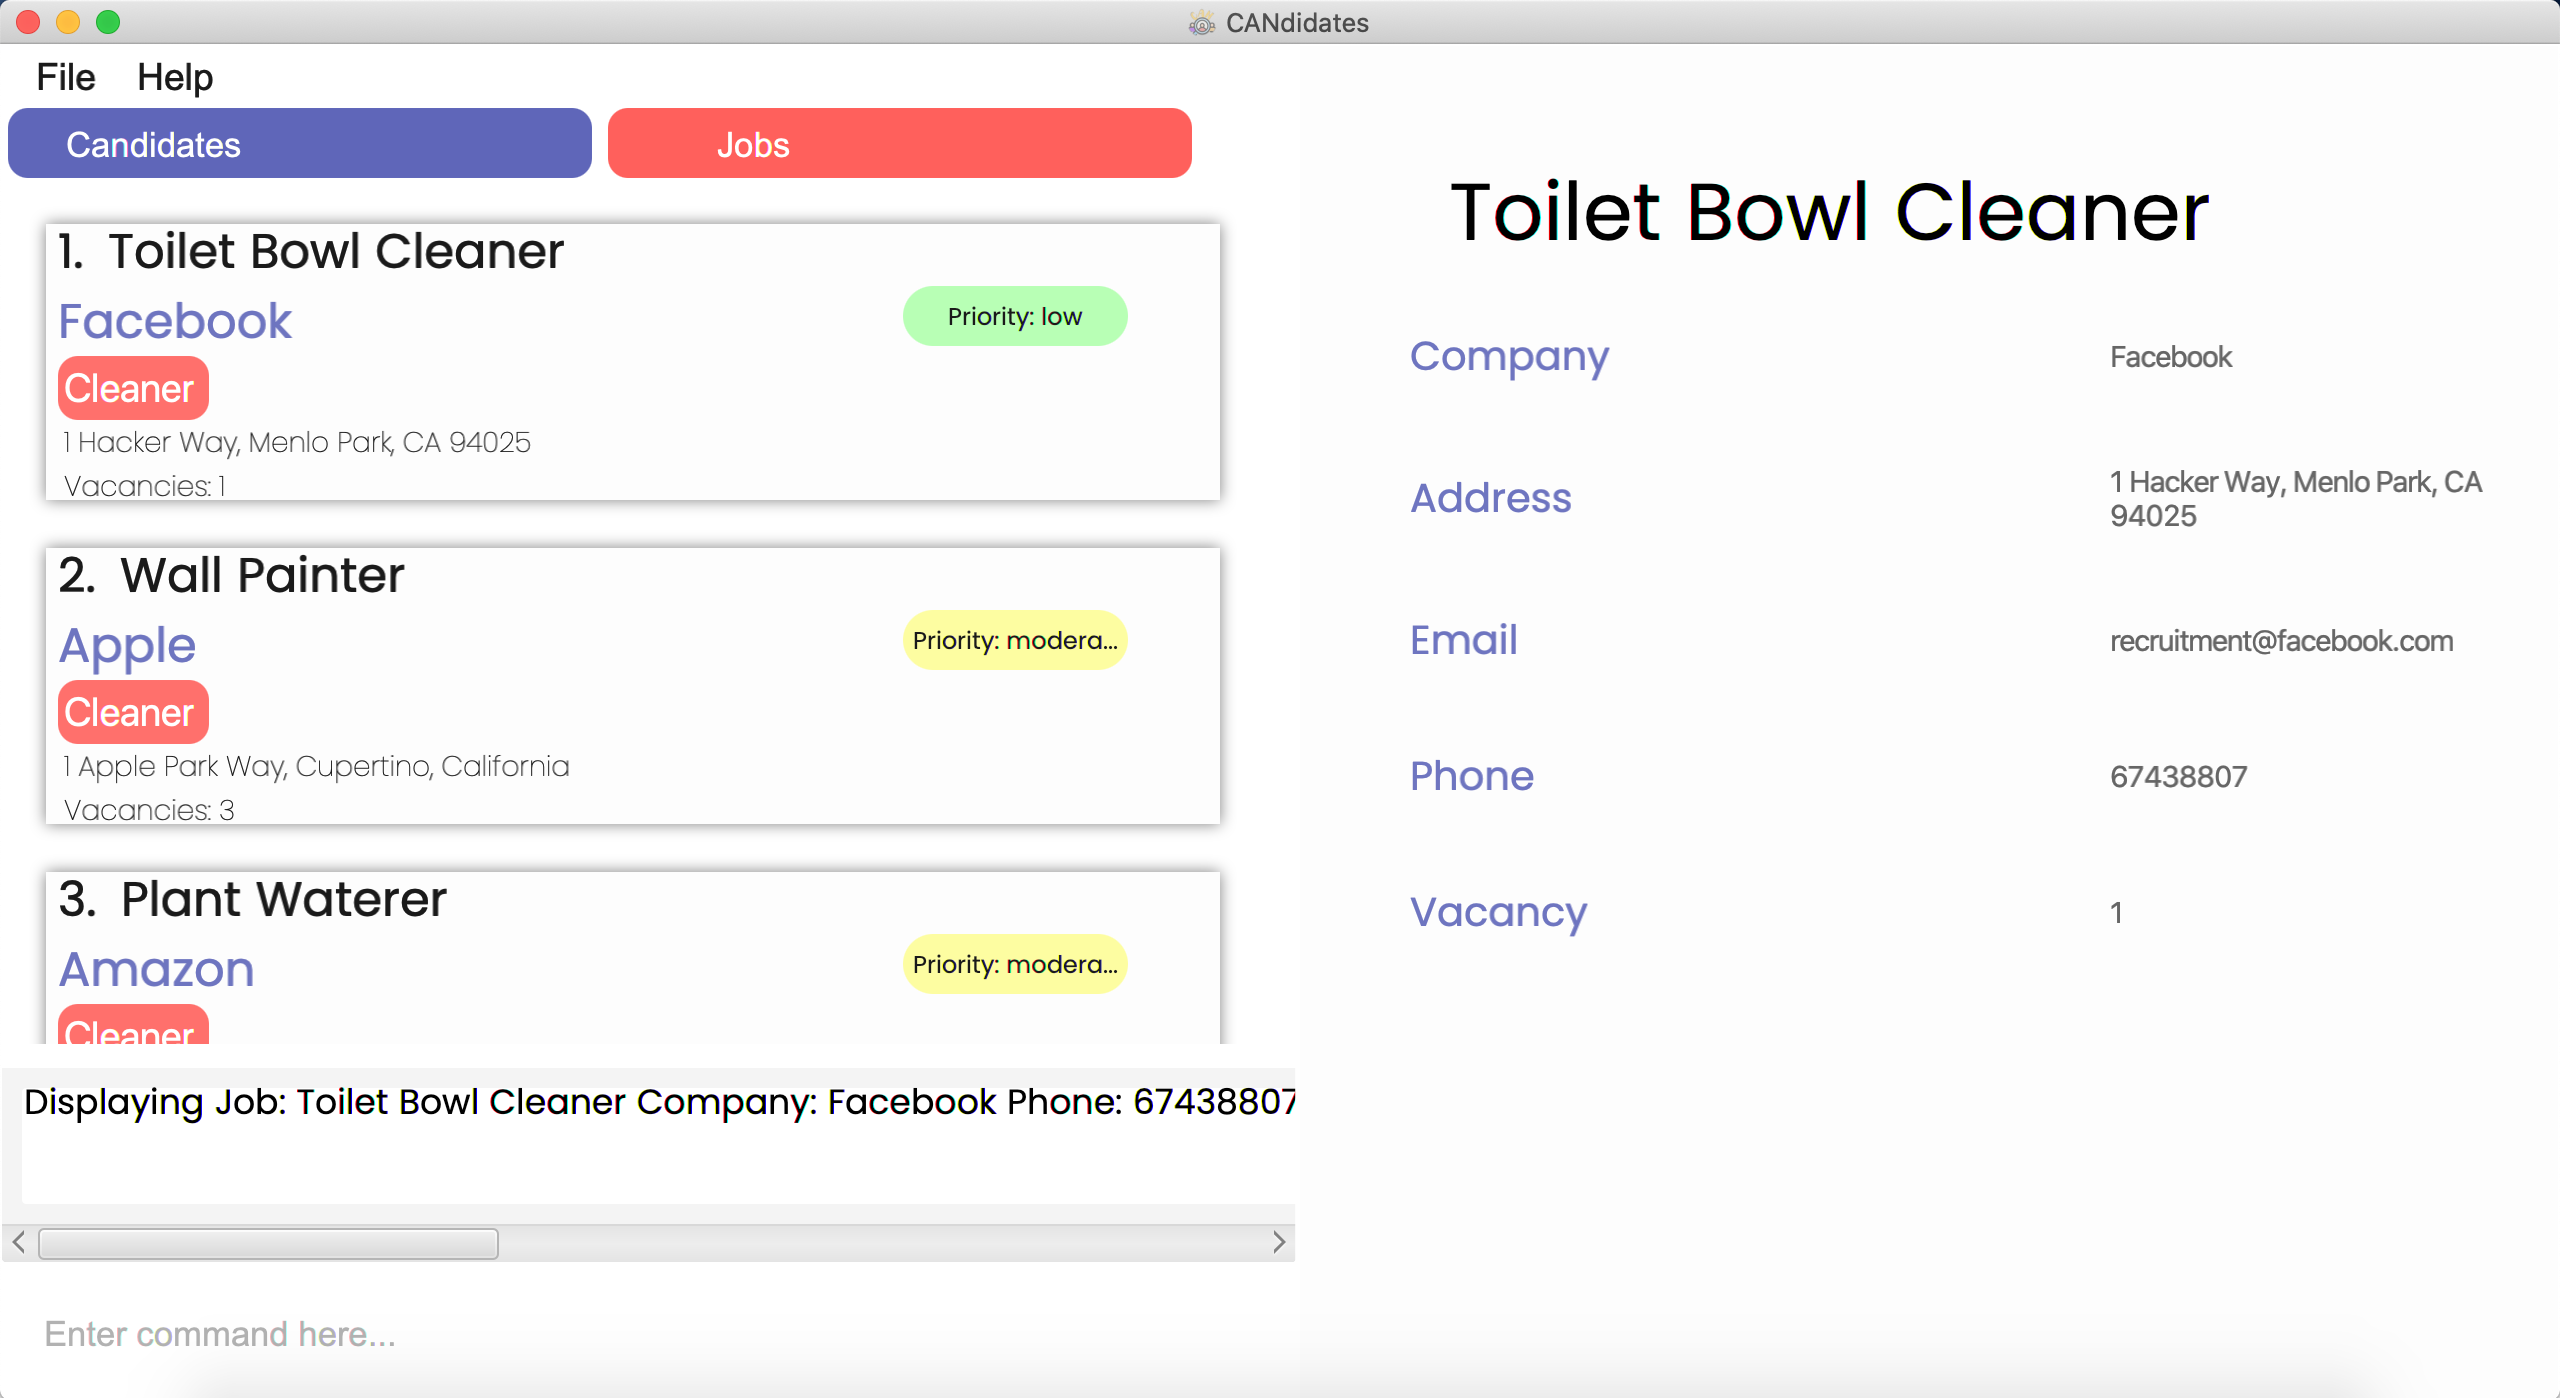
5.7 Viewing a job: view job
Want to view all the information of a particular job ? CANdidates provides an easy way for you to do it! Simply utilise the command below to display the all the information of a job on the display panel of the application!
Format view job INDEX
INDEX refers to the number beside the name of a job in the Main List. Thus INDEX cannot be a number lesser than the number beside the first job in the list or greater than the number beside the last job in the list.
Examples:
![]() To view the job at index 1,
To view the job at index 1,
view job 1
![]() To view the job at index 3,
To view the job at index 3,
view job 3
Step by Step:
Step 1. Type view job 1 in the command box and press Enter.
Step 2. The command result will depend on the job you have selected to display on the detailed panel. The CANdidates application will show the following message in the result display
Display Job: {Job Title} Company: {Company Name} Phone: {Phone} Email: {Email} Address: {Address} Priority: {Priority} Vacancy: {Vacancy} Tags: {Tags}
Step 3. All the information of the specified job would be displayed on the display panel.
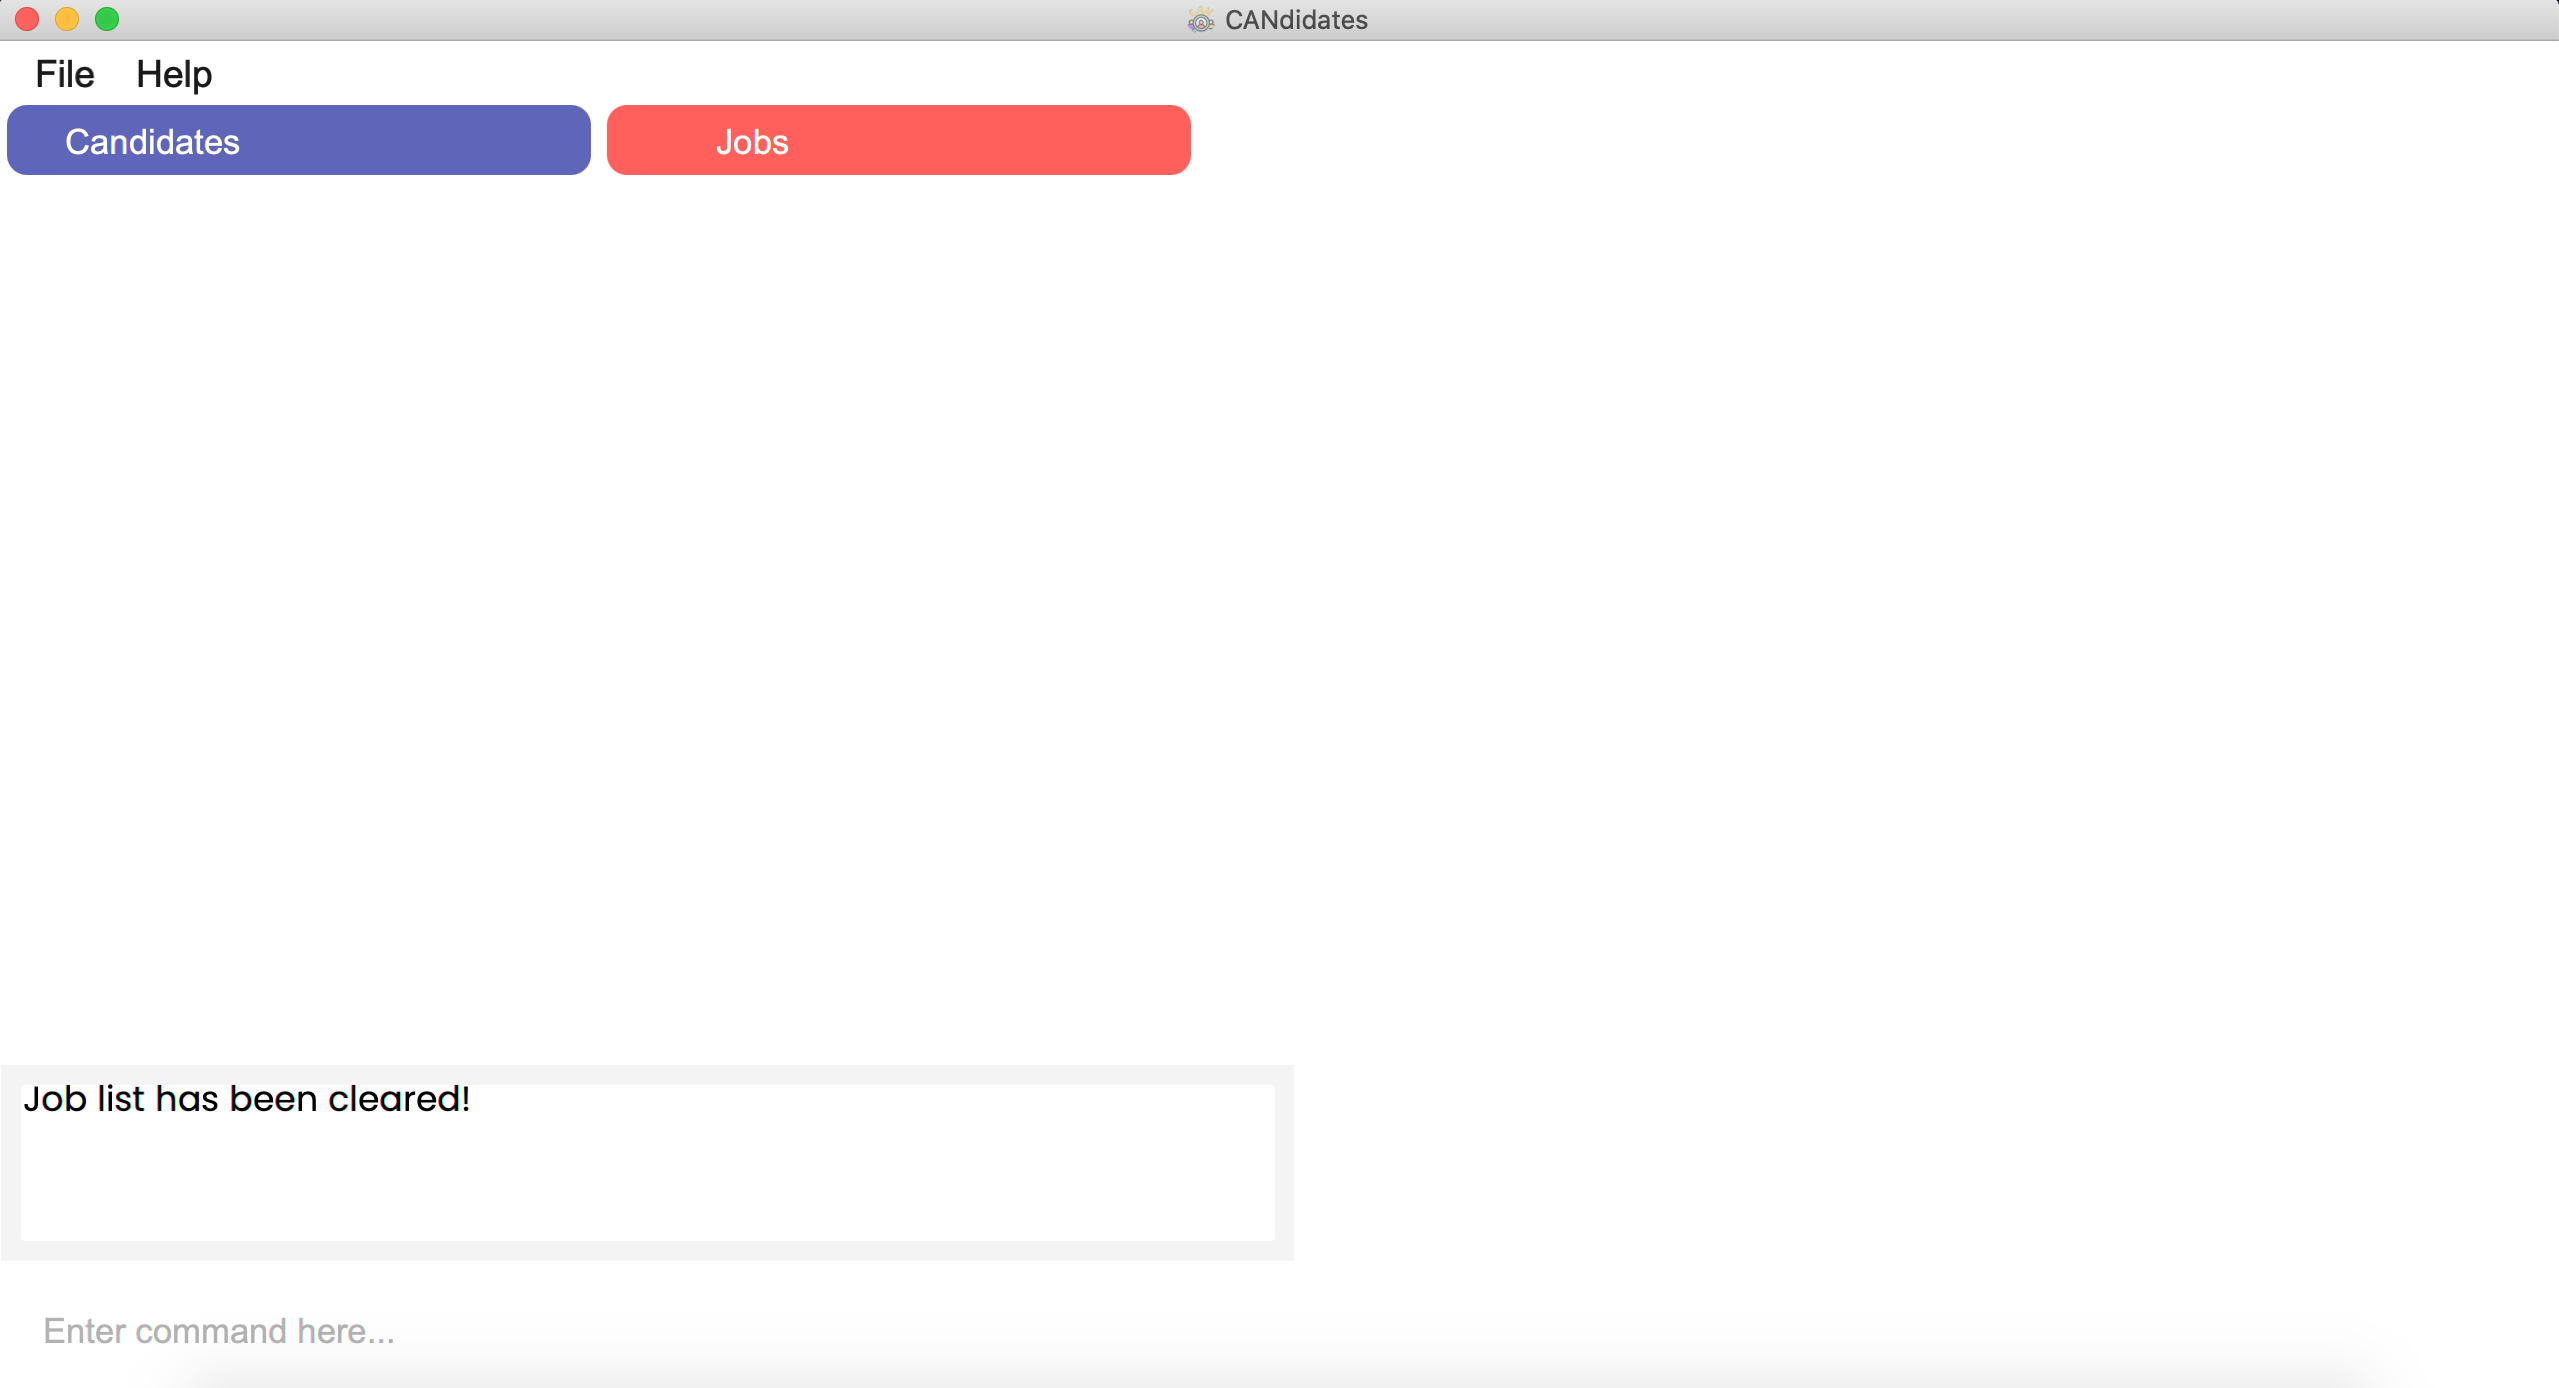
5.8 Clearing all job entries: clear job
Want to clear all the jobs in the list quickly without having to delete one by one? Simply use the command below!
Format: clear job
Step by Step:
Step 1. Type clear job in the command box and press Enter.

Step 2. The following message will be shown in the result display
Job list has been cleared!
Step 3. The application will show the updated job list which is empty.
6. Other Features
This section explores other general features that CANdidates has to offer!
Refer to Section 4. Features for Candidates for features specific to candidates or to Section 5. Features for Jobs for features specific to jobs.
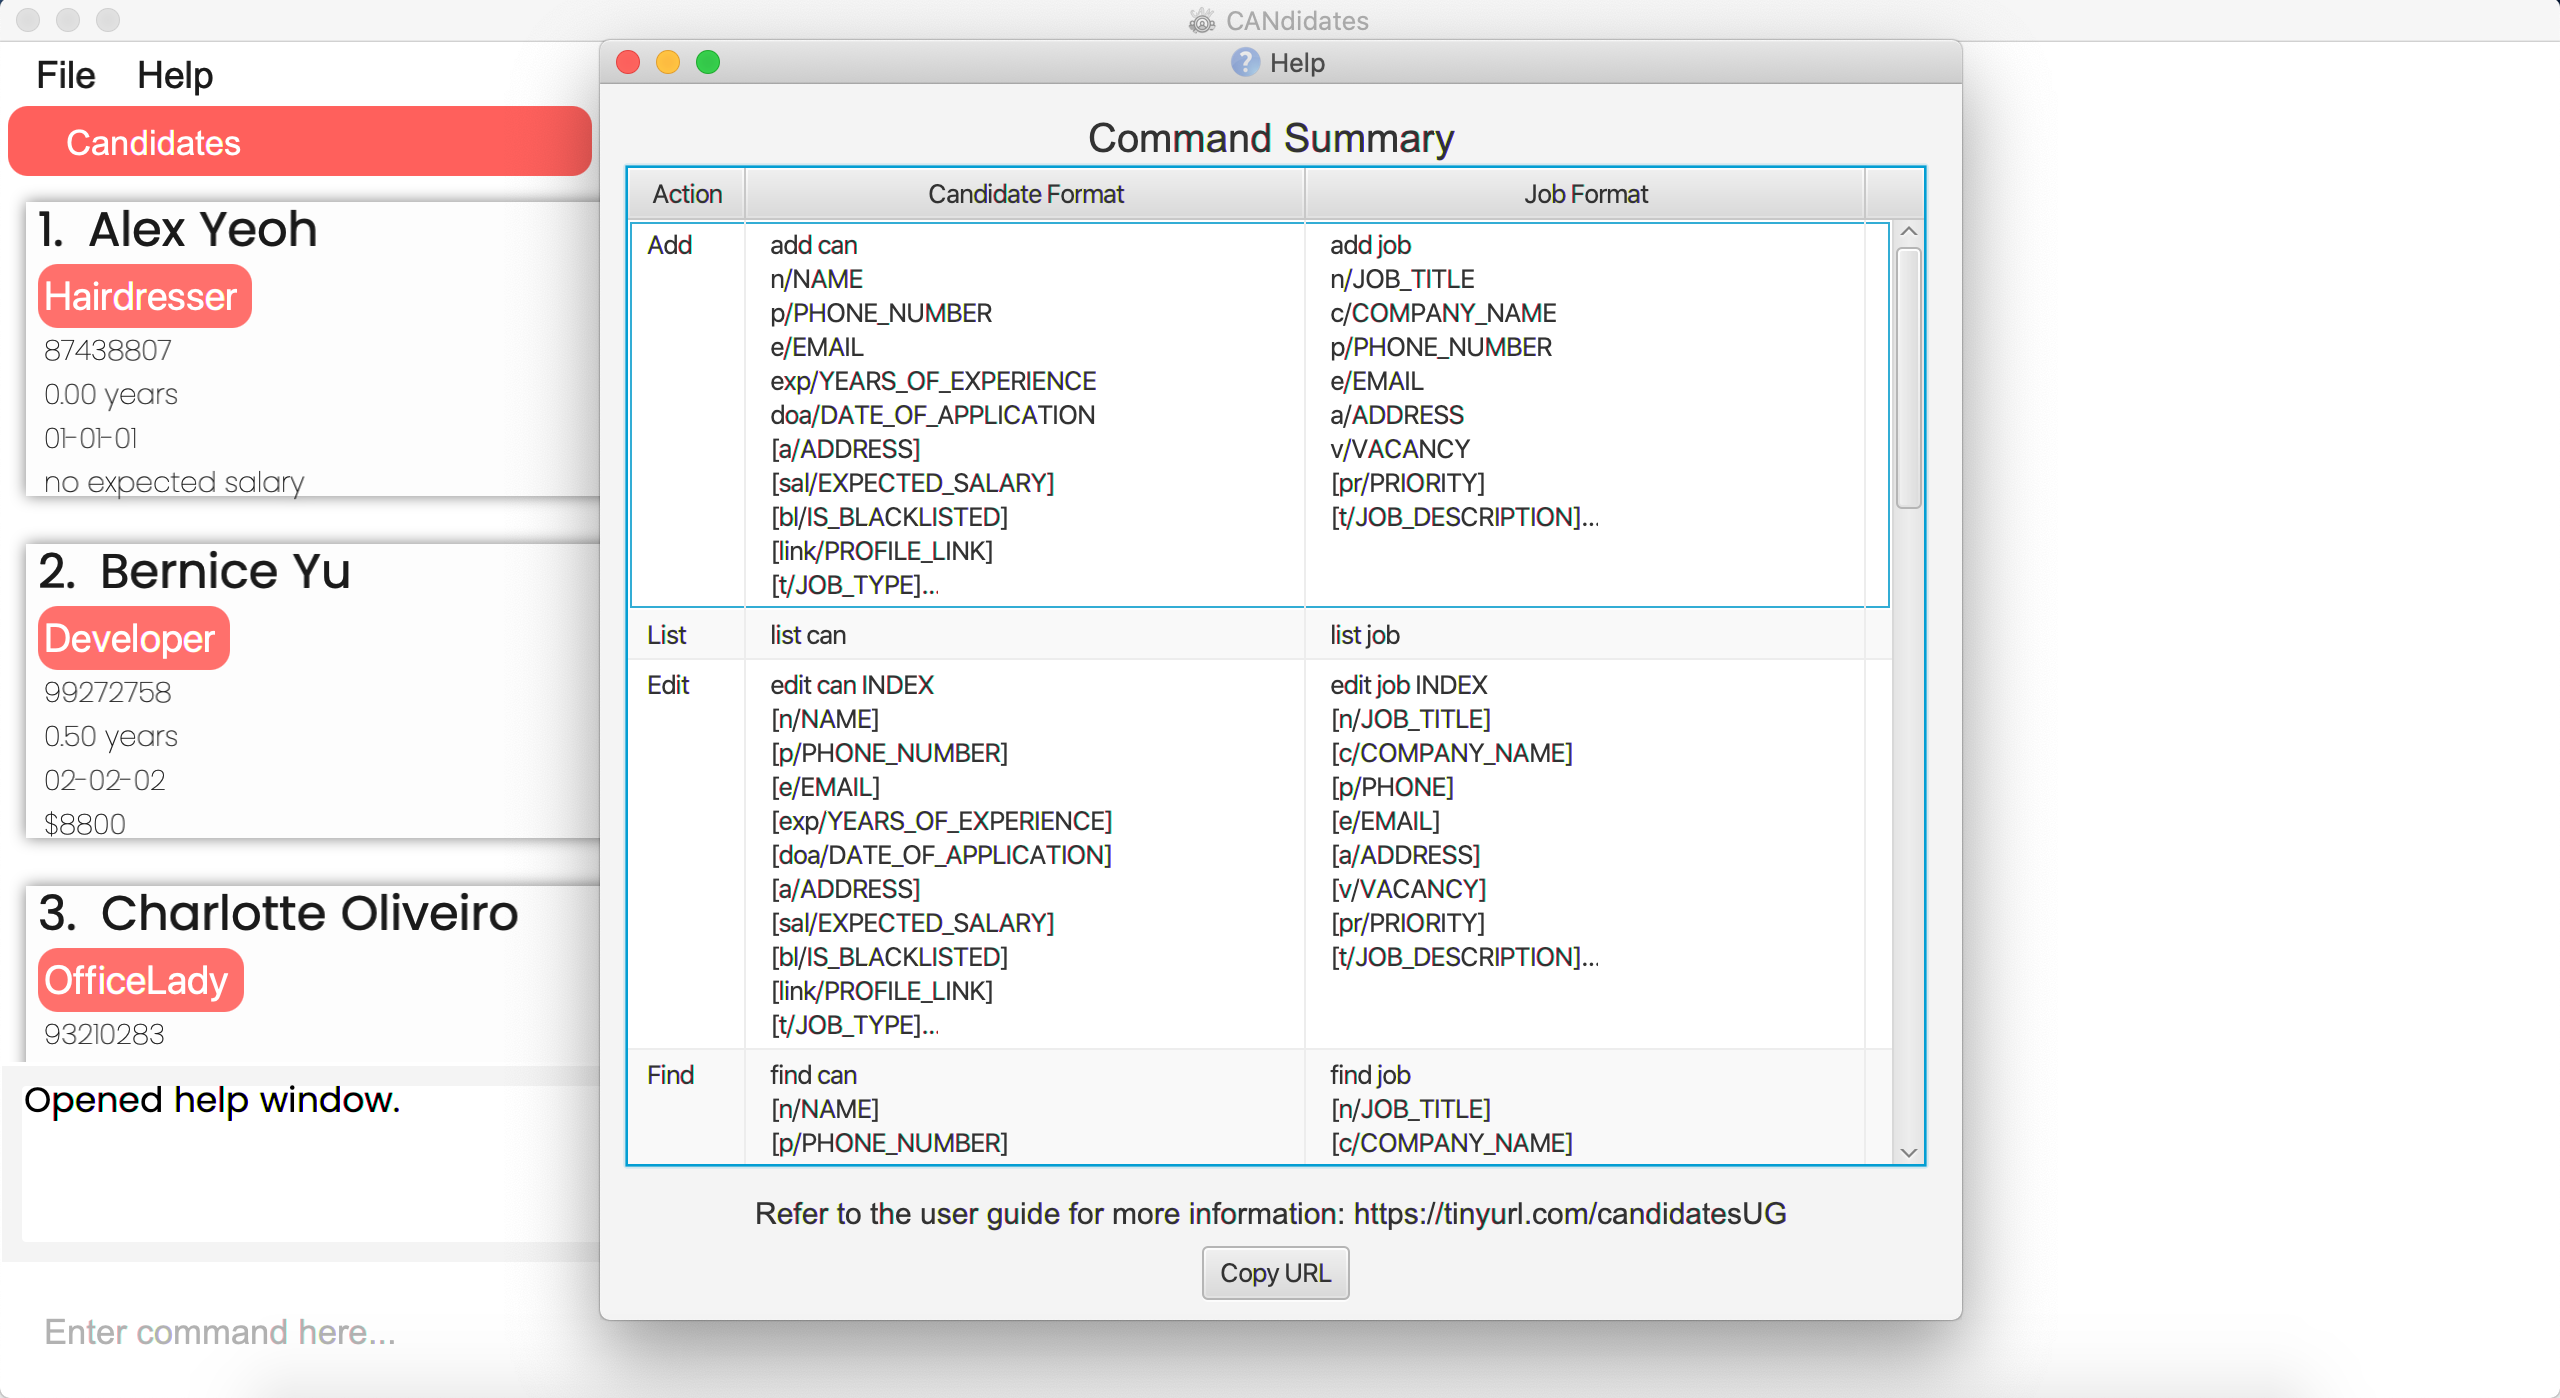
6.1 Viewing help: help
If you are unsure of how to use the application, we have a help function that will direct you to our user guide! You might also find it helpful to refer to the summary of all the available commands here.
Format: help
Step by Step:
Step 1. Type help in the command box and press Enter.

Step 2. The CANdidates application will show the following message in the result display.
Opened help window.
Step 3. The help window will appear as a pop-up and you may click on the “copy URL” button. This URL link will direct you to CANdidates’s User Guide, which is this document!
6.2 Exiting the program : exit
Done with updating your information with CANdidates? Use this command to exit the program!
Format: exit
6.3 Detecting duplicate entries
Worried that you might accidentally create duplicate entries of the same candidate or job? No need to worry, CANdidates has you covered! Duplicate entries are automatically detected and prevented from being created. No command is needed.
You will be notified by the following error message in the result display when this happens:
For duplicate candidates,
This candidate already exists in the address book.
For duplicate jobs,
This job already exists in the address book.
Examples:
![]() Creating of candidates with the same name and phone will be prevented
Creating of candidates with the same name and phone will be prevented
add can n/Rob p/12345 e/rob@mail.com exp/4 doa/08-08-22

add can n/Rob p/12345 e/robby@gmail.com exp/3.5 doa/09-08-22
![]() Creating of jobs with the same job title and company name will be prevented
Creating of jobs with the same job title and company name will be prevented
add job n/Actor c/Hollywood Pte Ltd  p/8888 e/h@mail.com a/Serangoon v/3

add job n/Actor c/Hollywood Pte Ltd p/1234 e/g@mail.com a/Nex v/3
6.4 Auto tab switch
CANdidates is designed for fast typers like you! Switching of tabs are done automatically, smartly detected based on the command that you enter so that you do not have to spend time clicking to switch tab to see the results of your entered command! With this feature, you can simply enter any command regardless of which tab you are on!
view can command when on the jobs tab does not result in auto tab switch to the candidates tab.
This allows you to do side by side comparison of a candidate to job listings.
view job command when on the candidates tab does not result in auto tab switch to the jobs tab.
This allows you to do side by side comparison of a job listing to candidates.
Step by Step:
Step 1. While on the candidates tab, type find job t/Cleaner in the command box and press Enter.
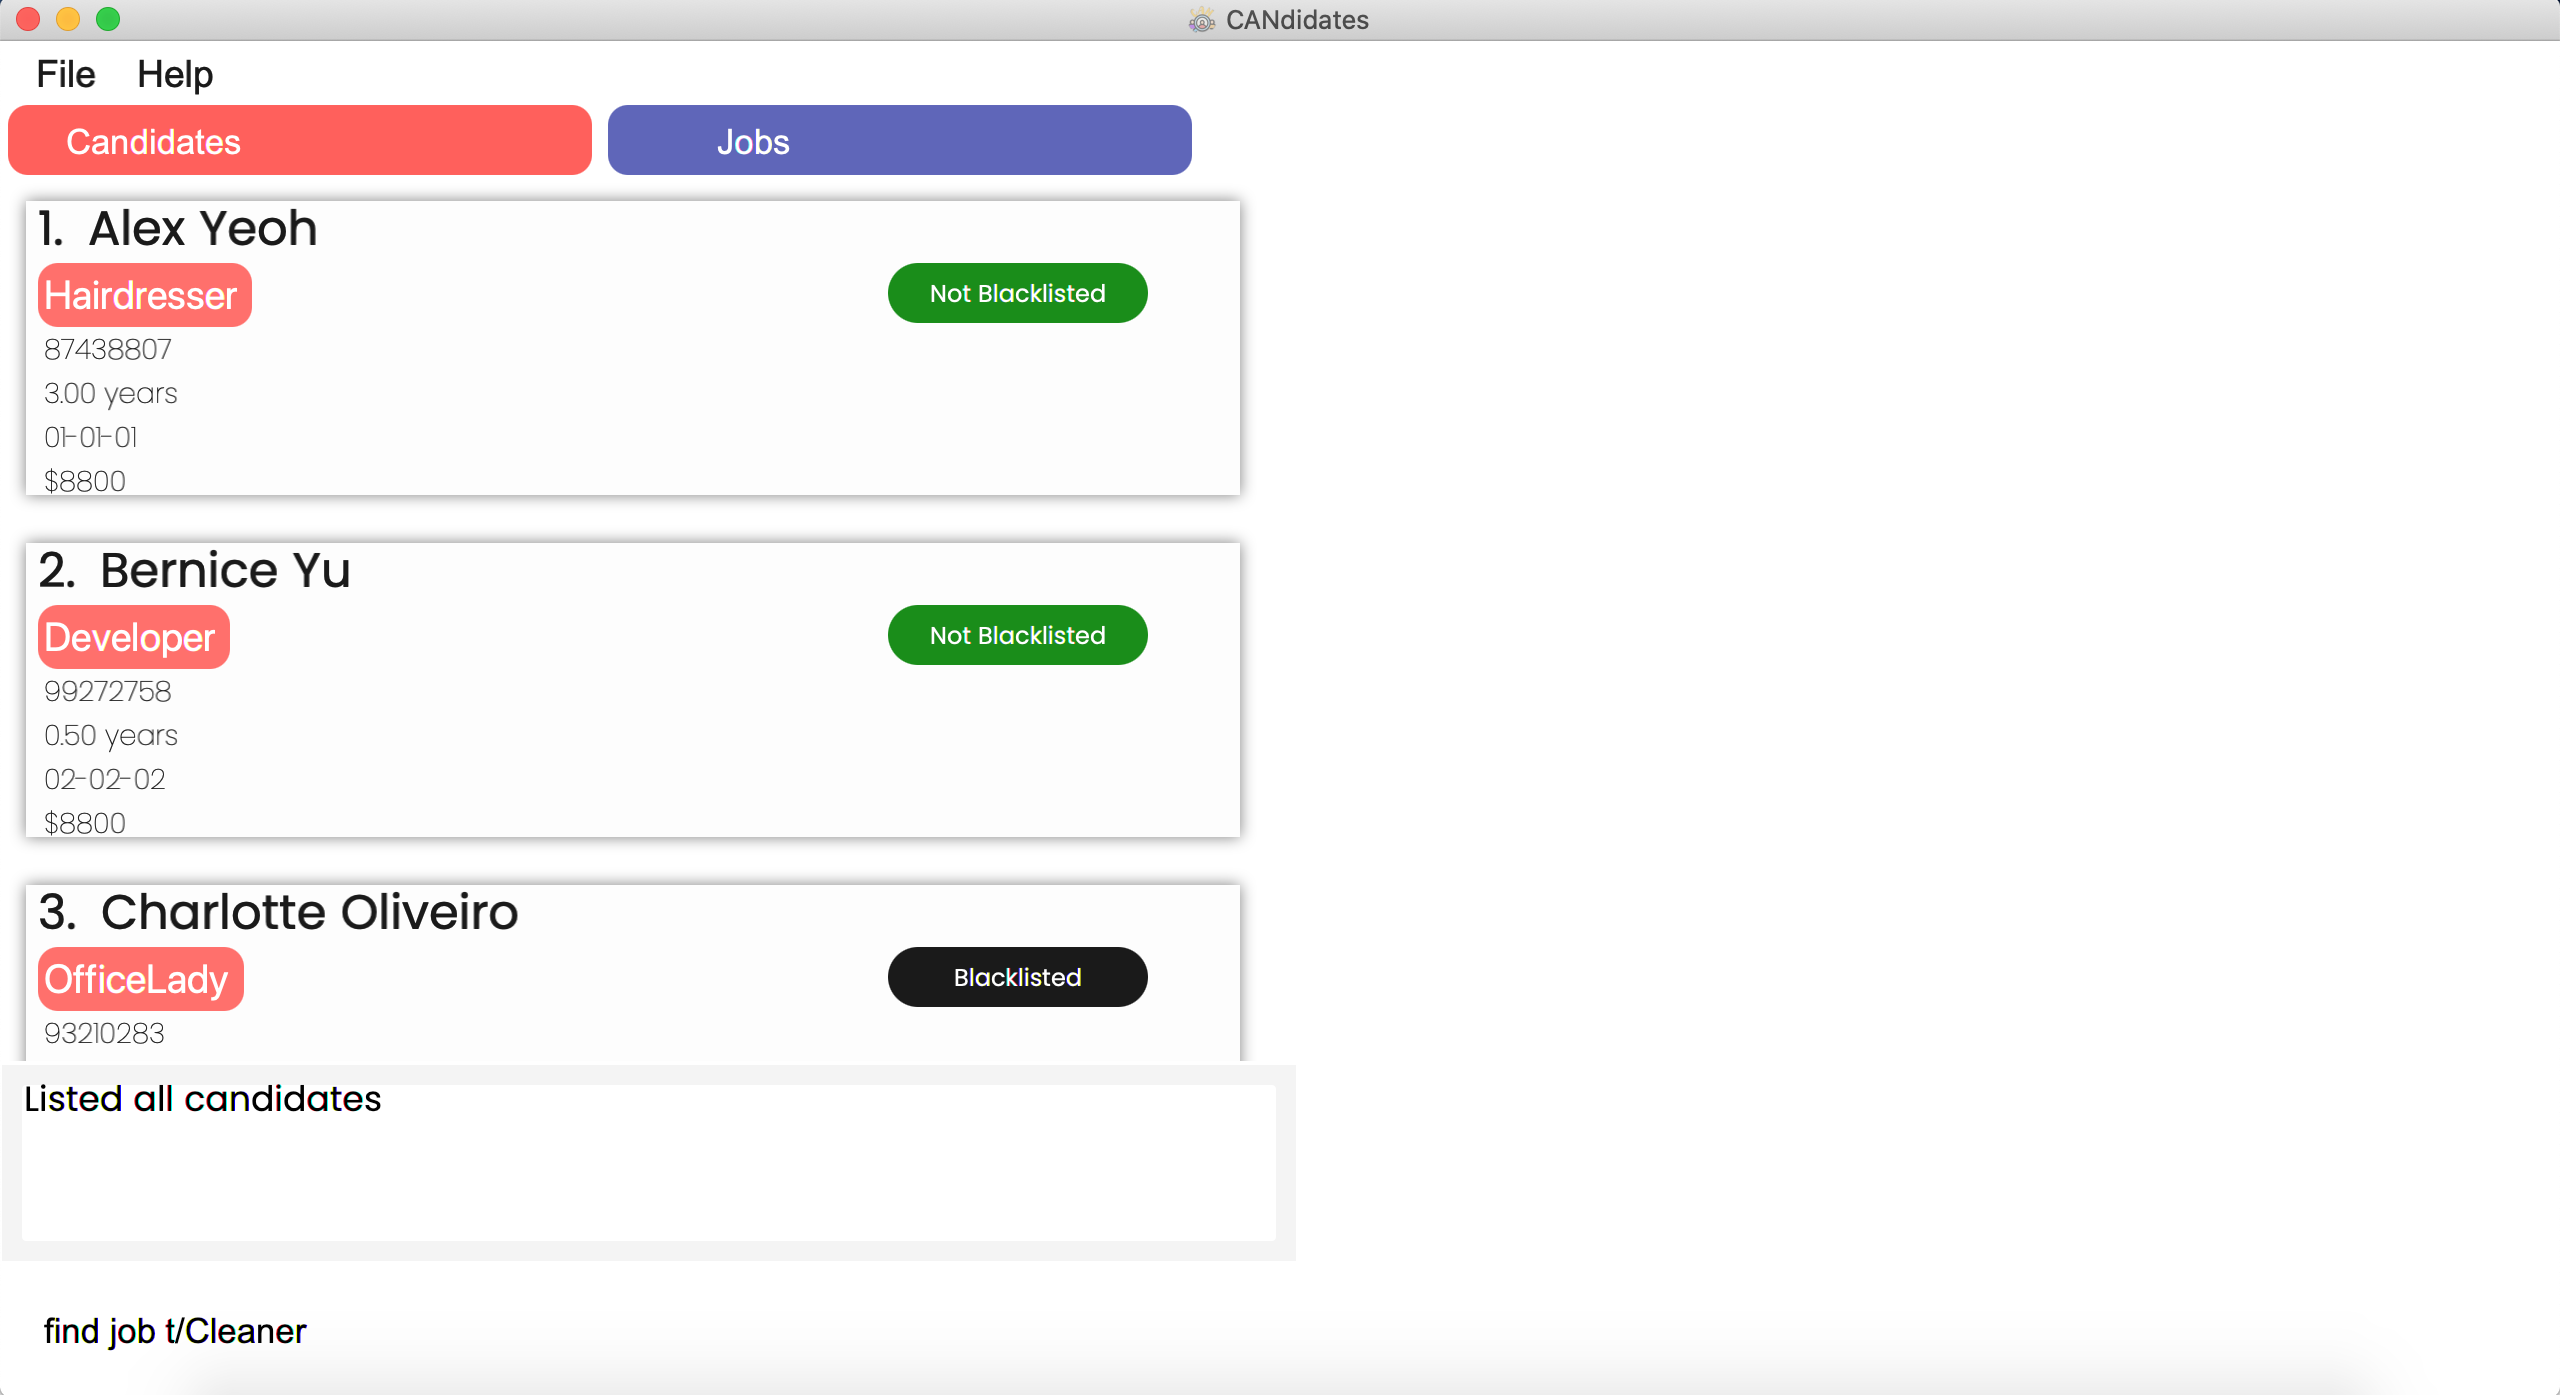
Step 2. The CANdidates application will show the following message in the result display
{Number of jobs found} jobs listed!
Step 3. The application will automatically direct you to the “Jobs” tab and display jobs with all matching fields in the main list.
6.5 Saving the data
All data is saved in the hard disk automatically after any command that changes the data. No need worry about having to save manually!
7. FAQ
Q: How do I transfer my data to another Computer?
A: Install the app in the other computer and overwrite the sample data file it creates with the file that contains the data from your previous CANdidates root folder.
Q: Where is the data stored and how can I access it?
A: The data is stored in the “data” folder in your CANdidates root folder. The candidate data is stored in the personaddressbook.jsonfile
while the job data is stored in the jobaddressbook.json file.
Q: Can I modify the data from the data files directly?
A: We recommend that you do not modify the data files unless you are an advanced user, and that you make any changes through the UI instead.
In the event that the data becomes corrupted, CANdidates will start up with sample data as a fallback. There is a risk of losing
all your original data should this happen. Should you still wish to modify the data files directly, we recommend that you first create a copy
of the original data files as a back-up in case the data becomes corrupt after modification.
Q: I modified my existing data file and it is now corrupted. My CANdidates application started up with the sample data. How can I get my data back?
A: Currently, our application is unfortunately not able to support recovering corrupted data files. We are sorry for any inconveniences caused.
Q: How do I report a bug I encountered?
A: Send an email to developers@CANdidates.com with a description and screenshot (if relevant) of the bug. We will make sure to get back to you promptly!
Q: How can I contribute to this project?
A: You may create a pull request to this repository. Here is our developer’s guide for your reference.
8. Command Summary
This handy command summary table provides you with all the possible commands for CANdidates at one glance.
| Action | Candidate Format | Job Format |
|---|---|---|
| Add | add can n/NAME p/PHONE_NUMBER e/EMAIL exp/YEARS_OF_EXPERIENCE doa/DATE_OF_APPLICATION [a/ADDRESS] [sal/EXPECTED_SALARY] [bl/IS_BLACKLISTED] [link/PROFILE_LINK] [t/JOB_TYPE]… |
add job n/JOB_TITLE c/COMPANY_NAME p/PHONE_NUMBER e/EMAIL a/ADDRESS v/VACANCY [pr/PRIORITY] [t/JOB_DESCRIPTION]… |
| List | list can |
list job |
| Edit | edit can INDEX [n/NAME] [p/PHONE_NUMBER] [e/EMAIL] [exp/YEARS_OF_EXPERIENCE] [doa/DATE_OF_APPLICATION] [a/ADDRESS] [sal/EXPECTED_SALARY] [bl/IS_BLACKLISTED] [link/PROFILE_LINK] [t/JOB_TYPE]… |
edit job INDEX [n/JOB_TITLE] [c/COMPANY_NAME] [p/PHONE_NUMBER] [e/EMAIL] [a/ADDRESS] [v/VACANCY] [pr/PRIORITY] [t/JOB_DESCRIPTION]… |
| Find | find can [n/NAME] [p/PHONE_NUMBER] [e/EMAIL] [exp/YEARS_OF_EXPERIENCE] [doa/DATE_OF_APPLICATION] [a/ADDRESS] [sal/EXPECTED_SALARY] [bl/IS_BLACKLISTED] [link/PROFILE_LINK] [t/JOB_TYPE]… |
find job [n/JOB_TITLE] [c/COMPANY_NAME] [p/PHONE_NUMBER] [e/EMAIL] [a/ADDRESS] [v/VACANCY] [pr/PRIORITY] [t/JOB_DESCRIPTION]… |
| Sort | sort can type/FIELD_TO_SORT order/ORDER |
sort job type/FIELD_TO_SORT order/ORDER |
| Delete | delete can INDEX |
delete job INDEX |
| View | view can INDEX |
view job INDEX |
| Clear | clear can |
clear job |
| Help | help |
help |
| Exit | exit |
exit |
9. Glossary
| Terms | Explanation |
|---|---|
| Java | Java is a widely-used programming language that developers use to create applications on computers. |
| GUI | A GUI (Graphical User Interface) is a system of interactive visual components for computer software. It is the visible component of the software. |
| Input field | Input to the command that the user specifies. |
| Cumulative | Increasing in quantity by successive additions. |
| Hard disk | Storage of information in a computer. |
| Root folder | The top-level folder of a file system. In this context, it is the folder you put the Candidates.jar file in. |
| Repository | Online container where your code can be stored, contributed to and managed over time. |
| Pull Request | Formal request to merge one’s code into a larger codebase. |
| Bug | A software bug is an error, flaw or fault in a computer program or system that causes it to produce an incorrect or unexpected result, or to behave in unintended ways. |
| Developer’s Guide | A guide that includes extensive guidance and reference materials to aid the developer in creating applications and extensions |